September 2019
We’re changing our name to LoyaltyLoop!
My goal is to deliver solutions that help you engage your customers to learn from their experiences, and help you turn that feedback into actions to grow and promote your business. While we do use online survey technology in our services, our product has and will continue to evolve beyond just a survey tool. As a result, I feel the time is right for me to evolve our company name as well.
Since the beginning of 2019 you may have noticed that I started marketing our company as “LoyaltyLoop by SurveyAdvantage”, and our website URL became loyaltyloop.com, with surveyadvantage.com redirecting to it.
As we enter 2020, you will see us fully rebrand the company to LoyaltyLoop. Our email addresses will change to @loyaltyloop.com, and we’ll be answering the phones as LoyaltyLoop. But rest assured the only thing changing is our name. We are the same company, run by the same people, with the same team, delivering the same great service and support we always have.
We hope you too embrace our name change to LoyaltyLoop.
Thank you,
John DiPippo
Owner
New Feature: Read-Only Users
Determining which level of access should be granted to your company’s LoyaltyLoop account requires careful consideration. Some users need access to billing information, and the ability to add or remove users, while others may not. Some users may need full access to all features like publishing testimonials and running follow-up campaigns, and some may not. To meet these needs, we’ve added a new “read-only” user type.
There are now 3 user types in LoyaltyLoop:
- Admin User: Full access to all features, and can manage (add/delete) users, manage billing, manage API keys
- Standard Users: Full access to all features
- Read-Only Users: Can only view results and data, but cannot take actions (e.g. publishing testimonials, engaging leads and referrals, and running follow-up campaigns…)
Read-only users can simply view information provided in LoyaltyLoop. They cannot take actions such as publishing testimonials, engaging leads and referrals, and run follow-up campaigns.
Any Admin User can modify an existing user to be “read-only”. Here’s how.
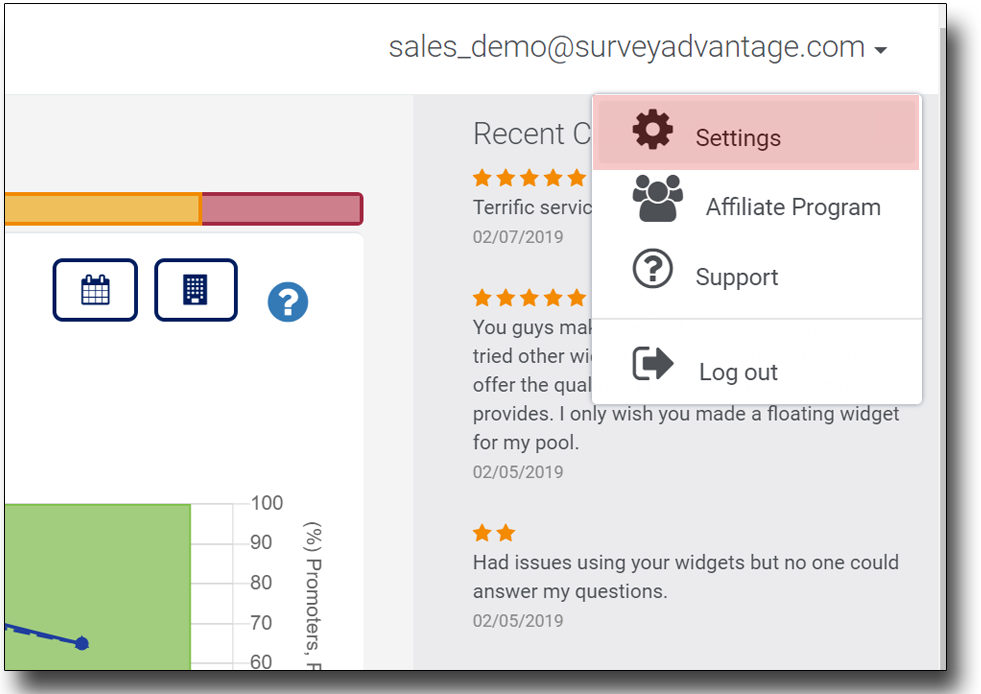
(1) Log in using your Admin account and click on your username in the top right-hand corner, then choose Settings.
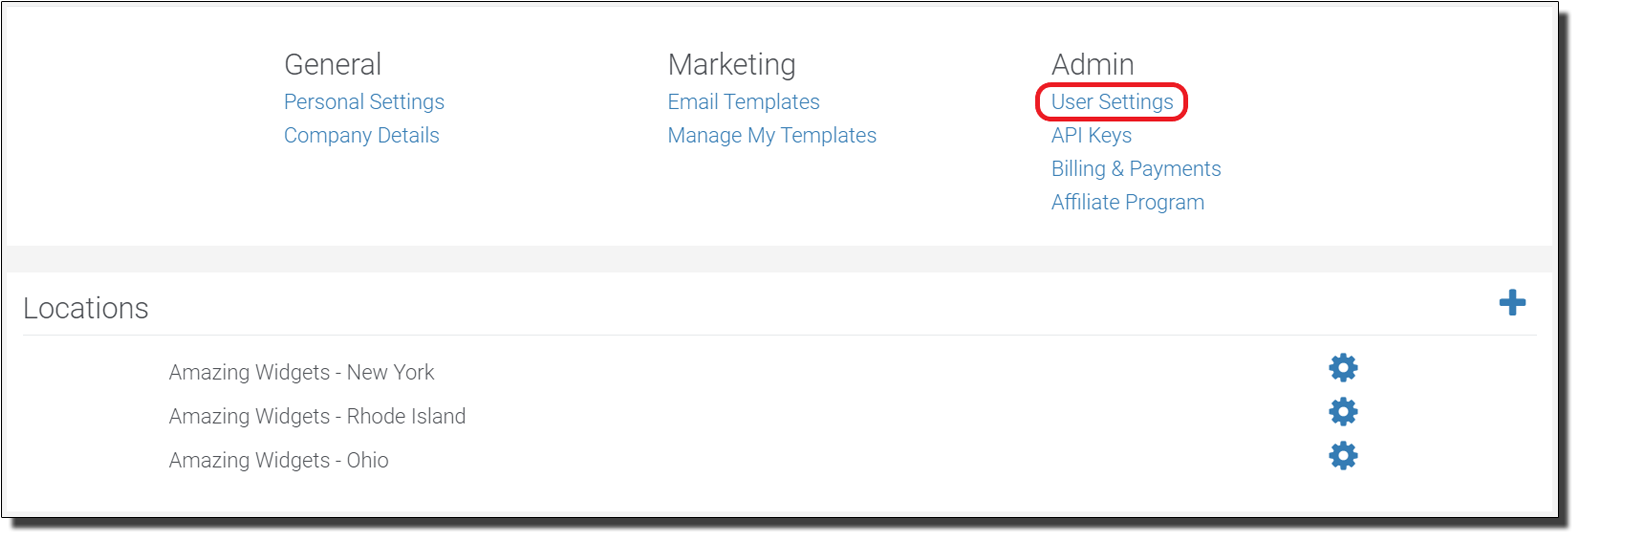
(2) Once you are viewing your Settings, click on User Settings below the Admin section.
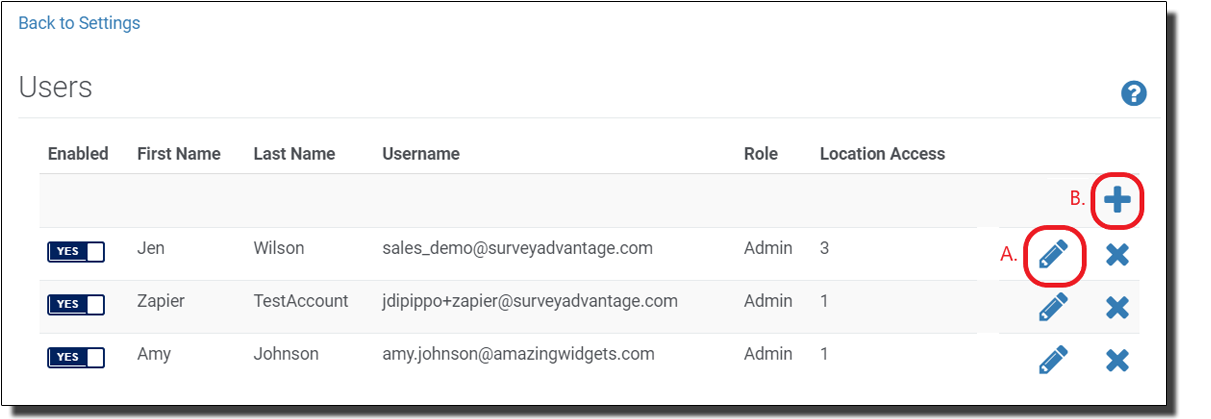
(3) User Settings
A. Choose the user whose rights you wish to modify, by selecting the Edit User icon.
B. If you are adding this user to your dashboard, click the plus (+) icon to Add a New User.
(4) Choose the desired role for the user and click Save Changes.

Amplify your SEO with backlinks to your testimonial page
A backlink is commonly referred to as an “inbound link”, which connects one website to another. In the case of SEO, backlinks can be extremely valuable for boosting a website or webpage’s search visibility. In short, a backlink adds credibility, almost as a “vote of confidence” that this directed webpage has content worth linking to, enhancing its search engine ranking. Therefore, the more backlinks pointing to your website, the more SEO value you derive.
When sharing a testimonial on Facebook and your other social media sites, whenever possible we recommend including a backlink to your website’s LoyaltyLoop testimonial page. Including this link will also direct prospective customers browsing your social media pages, back to your website for more content and information. If you’re manually copying and pasting your testimonials onto your social media sites, simply remember to include the backlink to the page on your website that displays all your testimonials.
If you’re using the Share feature from inside LoyaltyLoop, follow these simple steps to add your backlink.
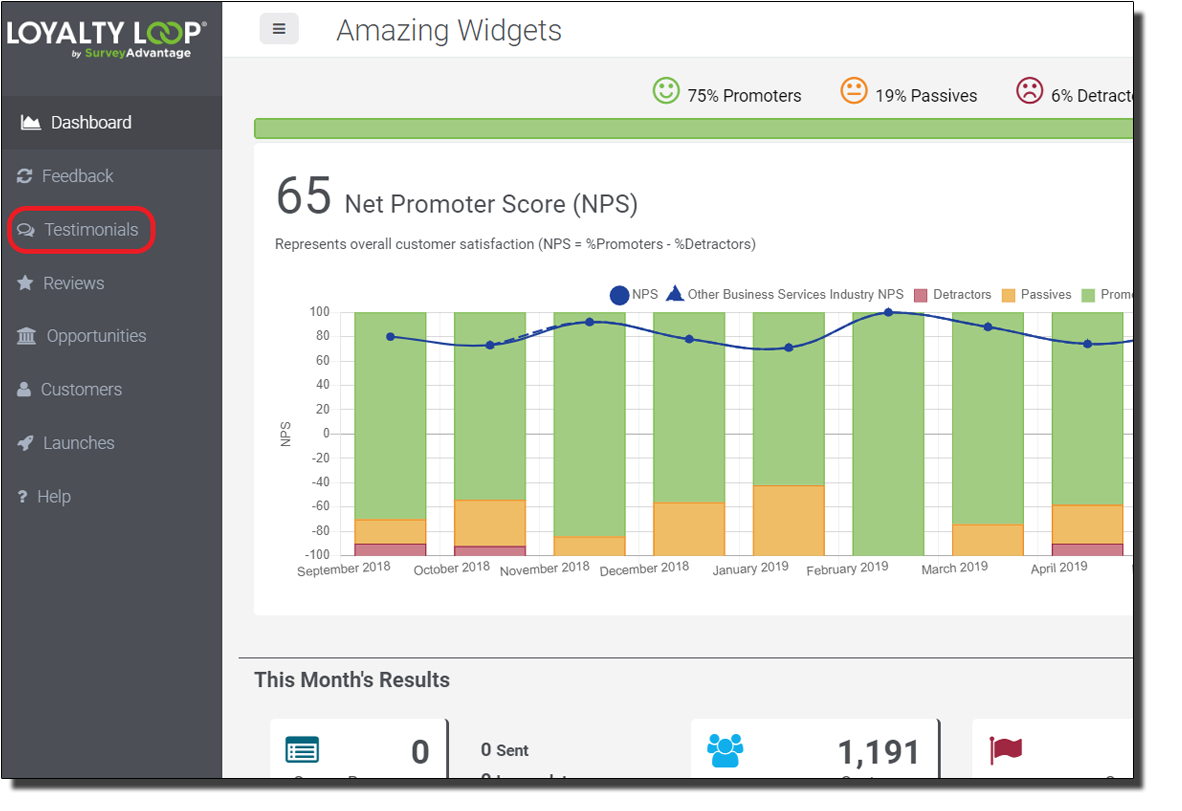
(1) To include this link, first log into your dashboard and click on your Testimonials page.
(2) Only published testimonials can be shared, so first toggle your testimonial filter to display these.
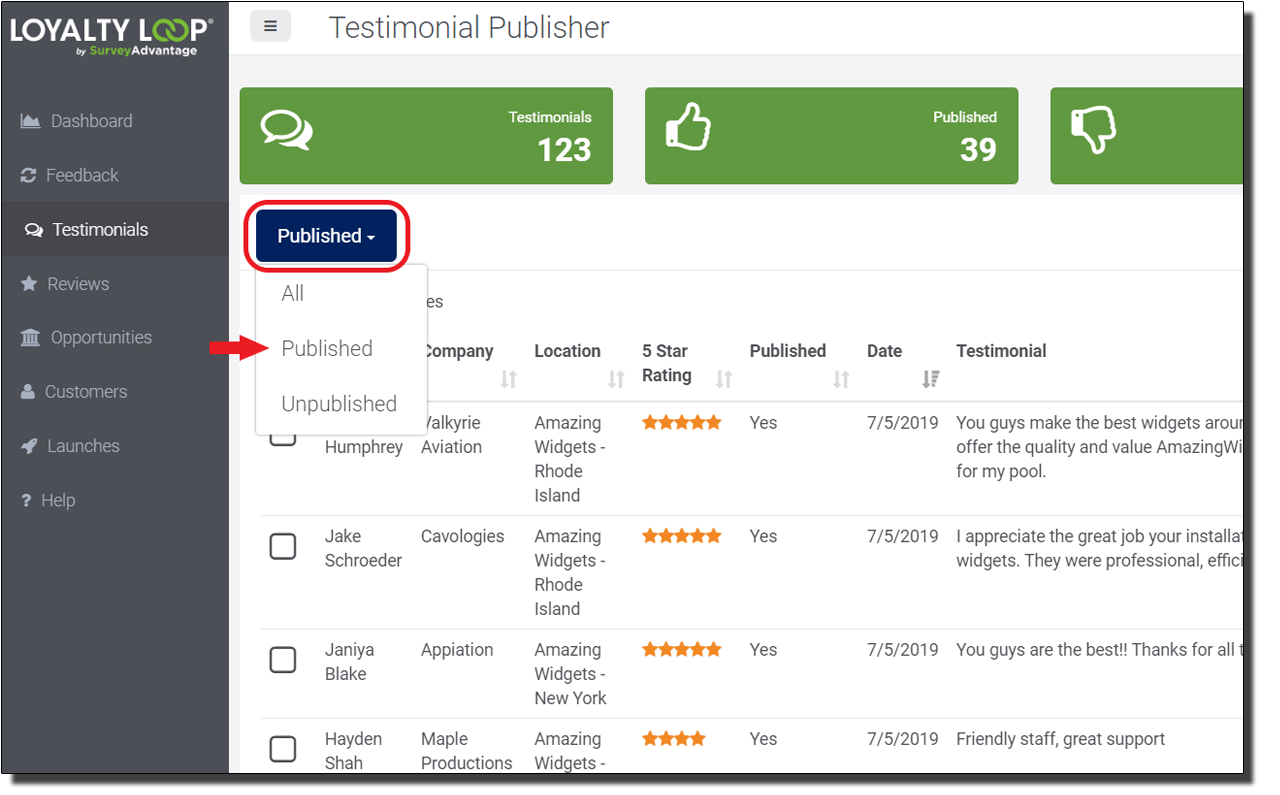
(3) Find the desired testimonial and click the share icon.

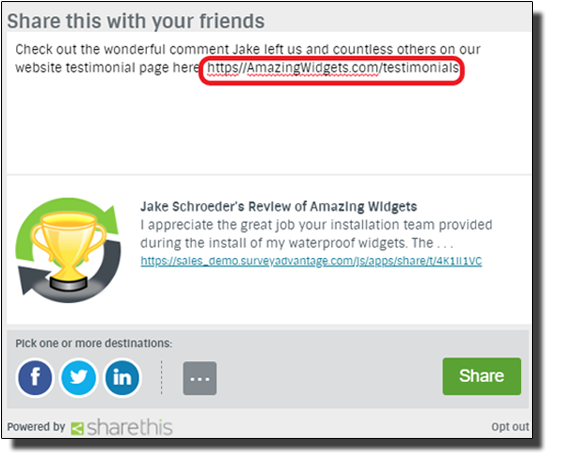
(4) Add captions to personalize the comment, choose the social media platform, include the backlink to your website testimonial page, and hit share.
Google Policy change
On September 16, 2019, Google announced changes in this Google Webmaster article relating to how they’re handling what they call “self-serving” Rich Snippets in their search results.
What’s a Rich Snippet?
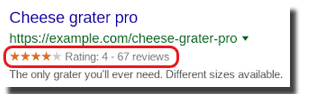
Rich Snippets are search results that provide additional helpful details embedded inside the search result. In the context of this change, the Rich Snippets relate to coding of reviews about your business that may appear in an extra line in a search result, where the search result may display the star rating and counts of reviews for your business.
To ensure the authenticity of these review results, Google is enhancing their search algorithms to remove any results they deem “self-serving” content not in the best interest of users.
What Does “Self-Serving” Mean?
Google calls reviews “self-serving” when a review about entity A (your business) is placed on the website of entity A (your website) – either directly in your web page’s markup or via an embedded 3rd party widget. Google’s change will prevent review content from being displayed in rich search results with star ratings, in cases where the entity being reviewed controls its own reviews. Previously, entities such as businesses or other organizations added this review markup on their websites as an added search boost, causing these Rich Snippets and star counts to display in search results.
How could this affect my business?
If your website contains reviews that are coded as Rich Snippets, Google has stopped displaying the little golden stars and review counts in your search results.
Can LoyaltyLoop help me address this problem?
Yes, in the coming weeks we will be releasing a new feature to address this issue. Third-party web sites like ours, that display reviews about your business, are not affected by this change and not considered “self-serving”.
Know when your surveys are sent using the QC Email
By default, the email address of our main contact for your company, and/or the email address of the survey sender for your company, is automatically included in your survey launch as a quality control (QC) check. We refer to this as the QC Email. This QC Email allows you to a) know when your survey was sent to your customers, and b) experience your email invite and survey just the way your customers would. The QC Email includes the direct link to your existing survey, should you need to reference this for any updates or future changes. It is a good habit to review your invite, survey and thank you page every so often to spot changes that might need to be made. If you want to add someone else to your QC Email, simply email us the details atsupport@loyaltyloop.com.
Execute follow-up campaigns to request online reviews
As a Promoter Plan subscriber, you have the ability to generate follow-up email campaigns right from the Feedback section of LoyaltyLoop. The campaign feature can be used to follow-up opportunities, send personalized ‘thank you’ messages to respondents, reply to customer questions, and more.
You can also use this feature to manually request online reviews from your customers, to complement LoyaltyLoop’s automatic review requests capability. There are 3 basic steps for running a campaign:
- Select the customers you wish to engage
- Select the email template you wish to use
- Schedule your campaign to send
Before you start, make sure you have the correct email template set up for your review campaign. Email templates make the sending of campaigns easy, fast and effective. LoyaltyLoop already has an email template to “Request Google Review” that you can use as a starting point. Here’s a short video explaining how to set up email templates (also available in the Help section of LoyaltyLoop), and here are the specific steps for modifying the existing review template:
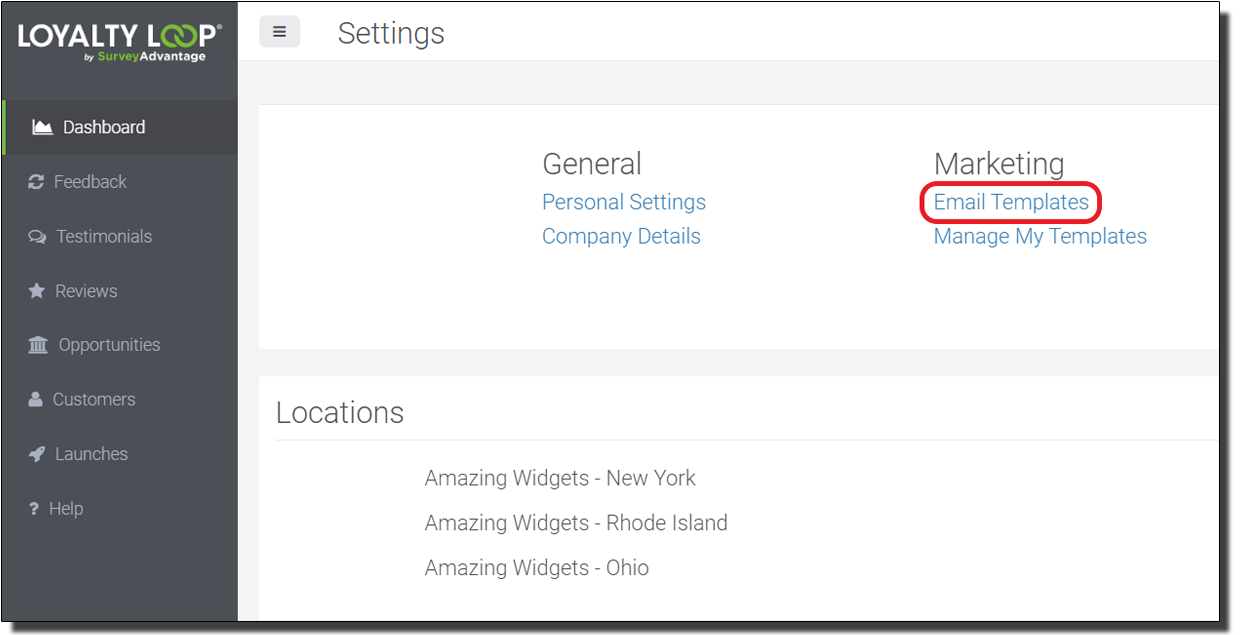
(1) First access your Settings by clicking your username in the top right-hand corner of the screen.
(2) Choose Email Templates below the Marketing section of your settings.
(3) Find the email template “Request Google Review”, preview it by clicking the plus (+) icon, and “Add To My Templates” to begin editing.

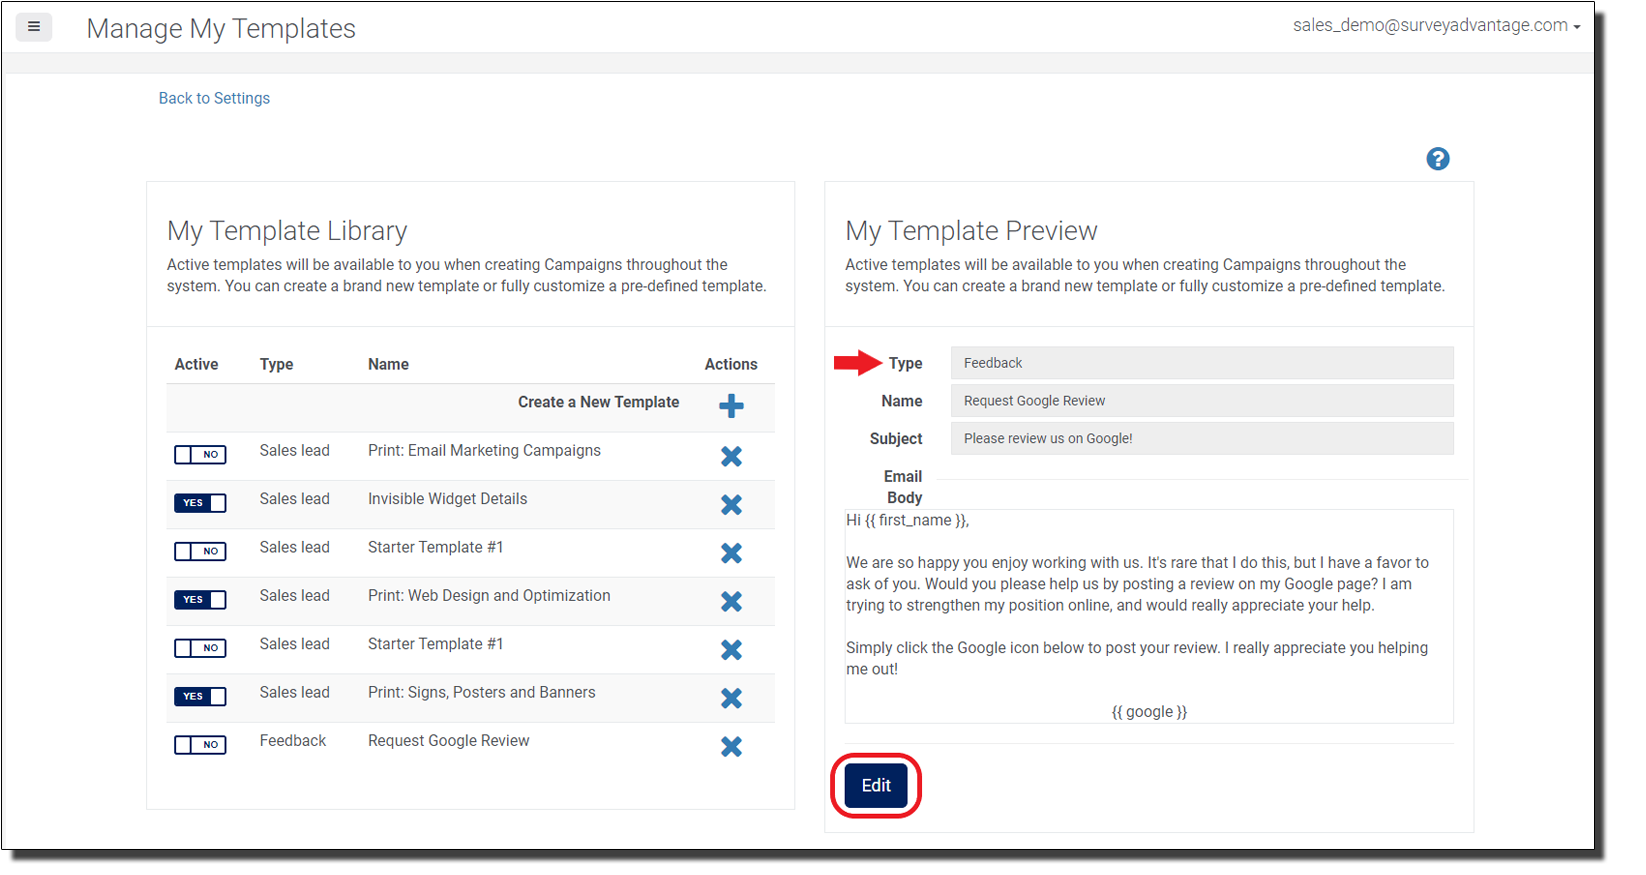
(4) Click Manage My Templates from your Settings page to access your Template Library to further personalize and click Edit.
(5) Set the correct template type so it is available to you in the corresponding section of LoyaltyLoop. In this case, the template type should be selected as Feedback.
(6) Modify the email so it reflects how you speak to your customers and insert the correct review site template tag which will insert the icon and link to your specific review page in your finished email. Then, click Save To My Templates.
Now that you have your template set up, to send your campaign follow the steps below. You can also watch this video that explains how to launch follow-up campaigns (also available in the Help section of LoyaltyLoop).
- Click Feedback from the left menu
- On the Feedback by Customers page, select the customers you would like to send the campaign
- Click the “Start Campaign” button
- Enter the required details making sure to pick the review template, and the launch date
- Click the Preview Campaign button to ensure your email appears as you intend, then hit Send Campaign
To view the results of your campaign, click Launches from the left main menu, then click Campaign History from the top menu.