
“Using loyalty loop has been a great asset to us for staying in contact with our clients. We highly recommend them!”
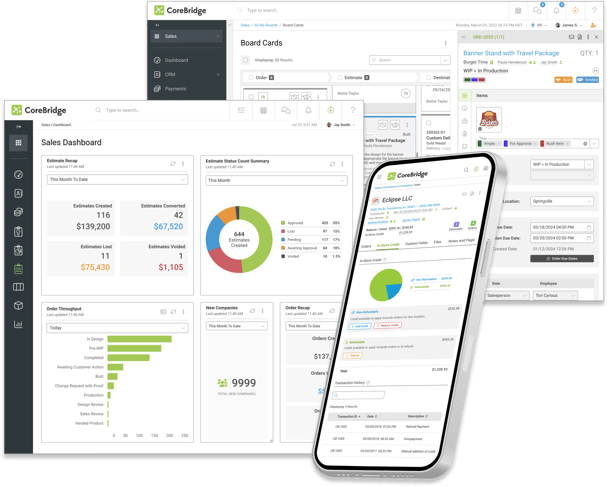
CoreBridge
Integration Add-On
LOYALTYLOOP INTEGRATION
Automated Feedback and Reviews!
When running CoreBridge, not only do you benefit from Intelligent Business Management Software, but it has never been easier to automate your feedback and review process. As a proud CoreBridge partner, you'll find the LoyaltyLoop Integration right in their Marketplace. It takes seconds to connect, and your customer contact info (i.e., customers to be surveyed) from recent transactions will flow automatically to your LoyaltyLoop account on a daily basis, giving you the option to engage customers for feedback and reviews as soon as the next day.
- Connect via CoreBridge Marketplace
- Set it, and forget it!
- Engage customer via LoyaltyLoop soon after their transaction
- Send requests as often as daily
- No manual reports to run to send surveys
The integration is quick and simple to set up, and enables you to send your requests for feedback and reviews closer to when the customer worked with you. Instead of batching and sending all feedback requests once a month, the integration gives you the option to send requests for feedback as frequently as daily or weekly. Moving the feedback request closer to when the customer experienced your business can increase both the quality and quantity of responses.
How much does it cost?
CoreBridge EVO (v 3.0 and higher) integration adds only $40/mo to your LoyaltyLoop subscription. There is no setup fee.
How do I enable my CoreBridge Integration?
Click here if you're running CoreBridge versions prior to 3.0. Otherwise, continue following this guide.
The process is very simple, and will take you only a couple of minutes. It involves installing the integration and generating API tokens in CoreBridge, then copying the tokens into LoyaltyLoop.
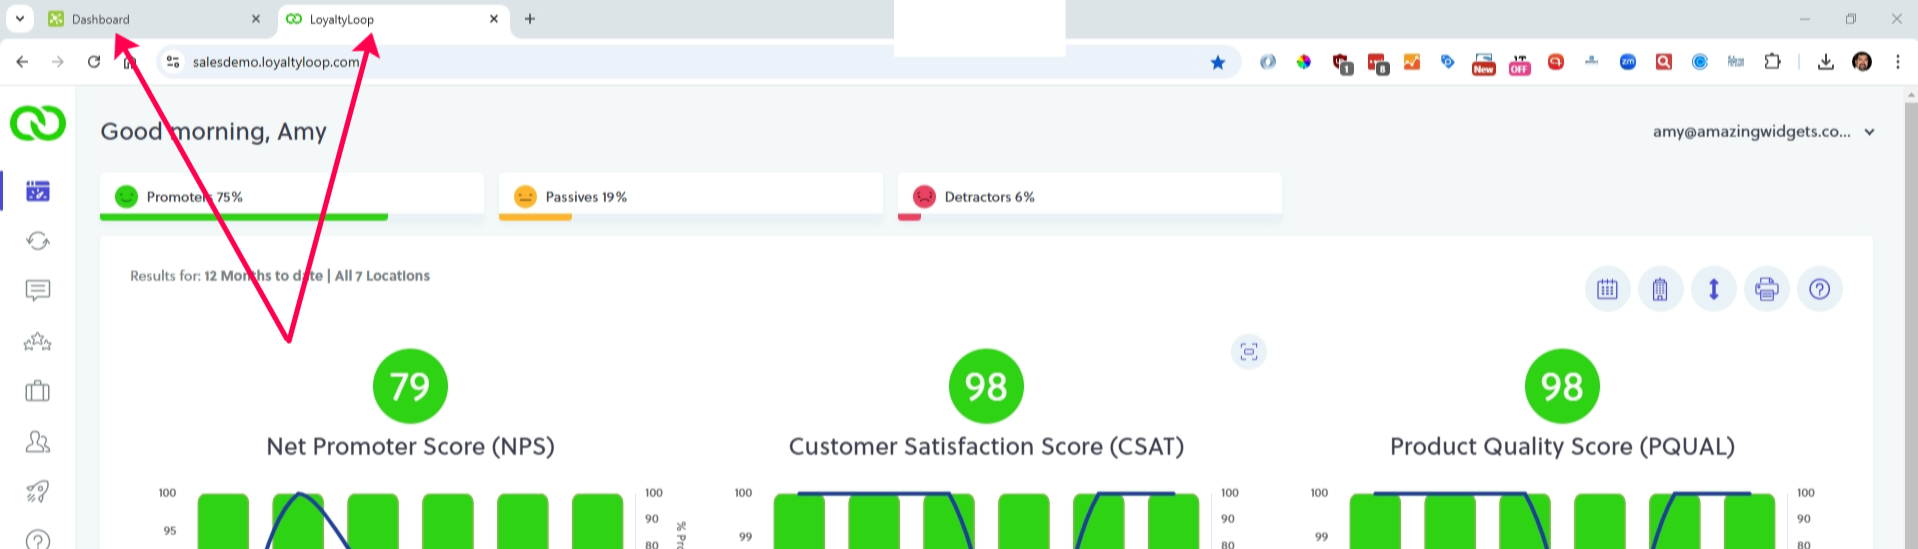
- Sign in to CoreBridge in one browser tab, and LoyaltyLoop (as an Admin User) in another
- In LoyaltyLoop, click your username, Settings, the Location you wish to integrate (if you have more than one), then click Integrations. Click the Integration drop-down menu, and select CoreBridge. You'll land on the integration form in LoyaltyLoop. Leave this LoyaltyLoop tab open, and go to the CoreBridge tab now.
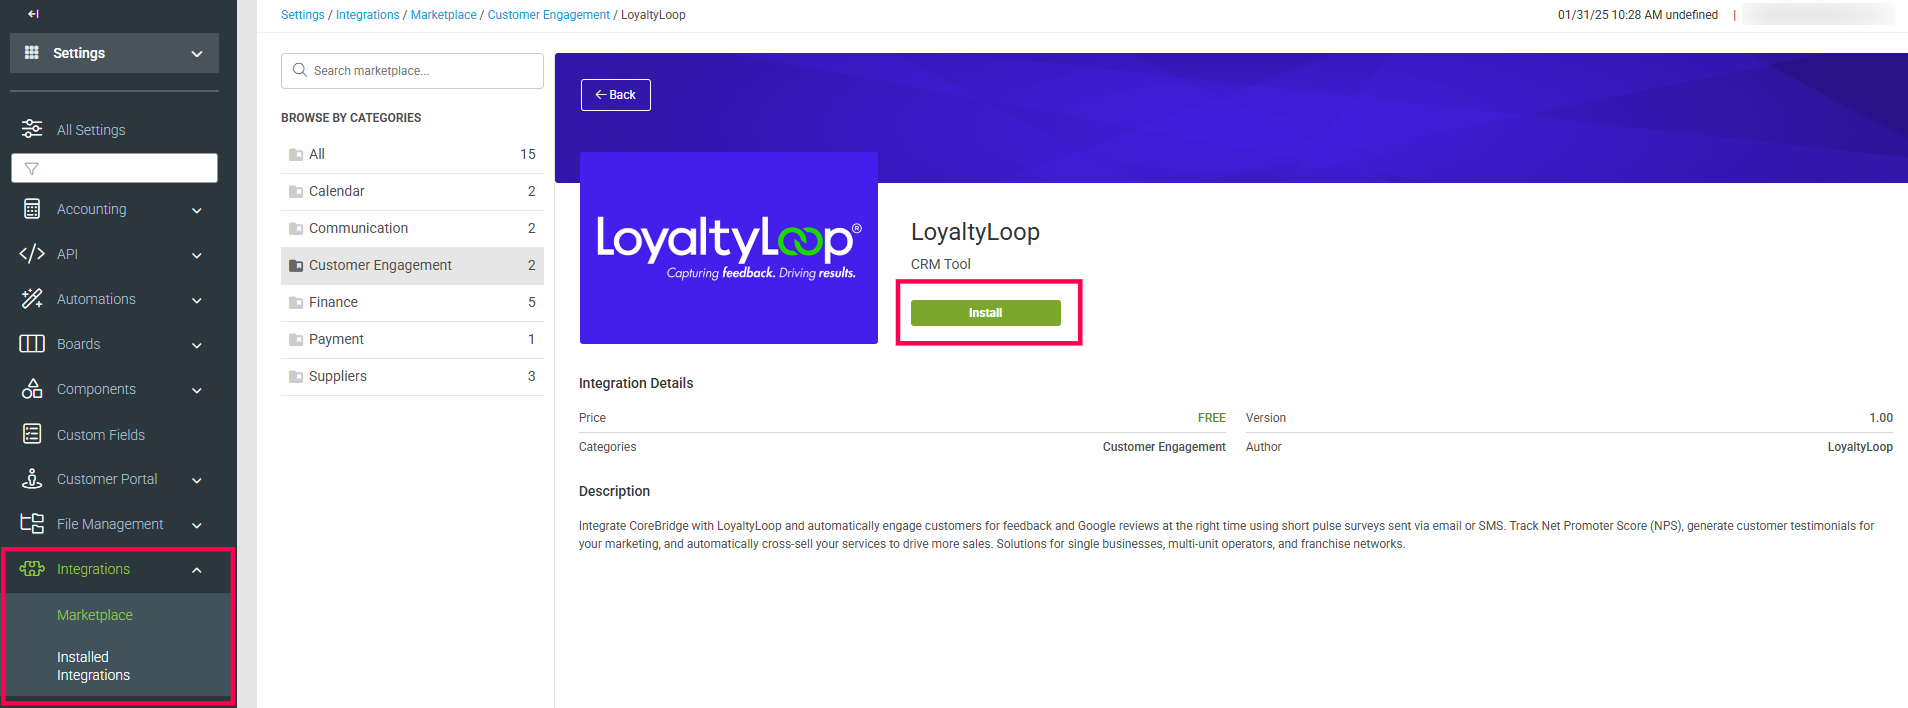
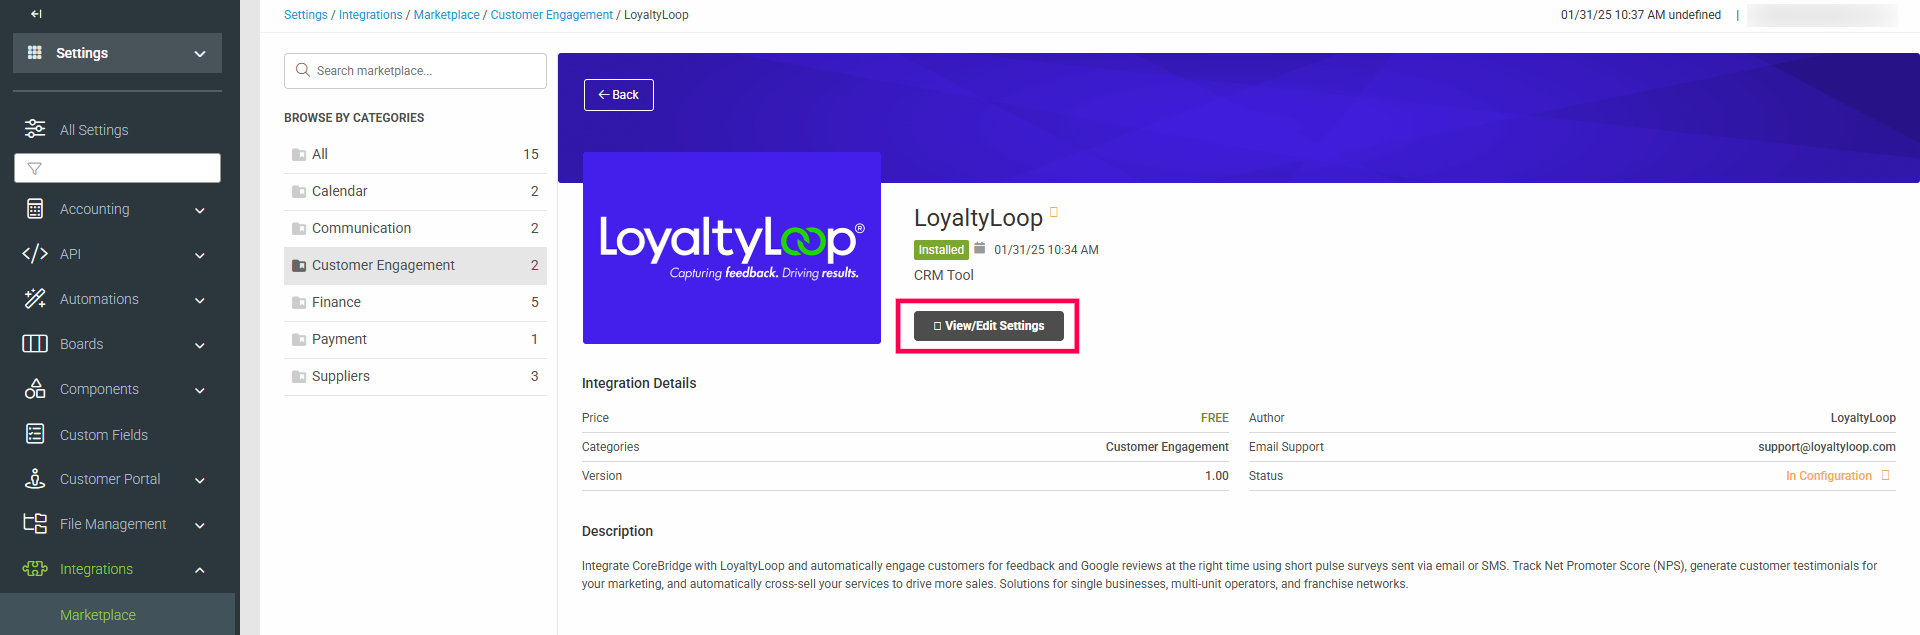
- In CoreBridge, and head over their Marketplace. You find this under Integrations off the left main menu. Search for LoyaltyLoop, or find us under Customer Engagement.
- Once on our listing page, click "Install".
- Once installed, click View/Edit Settings.
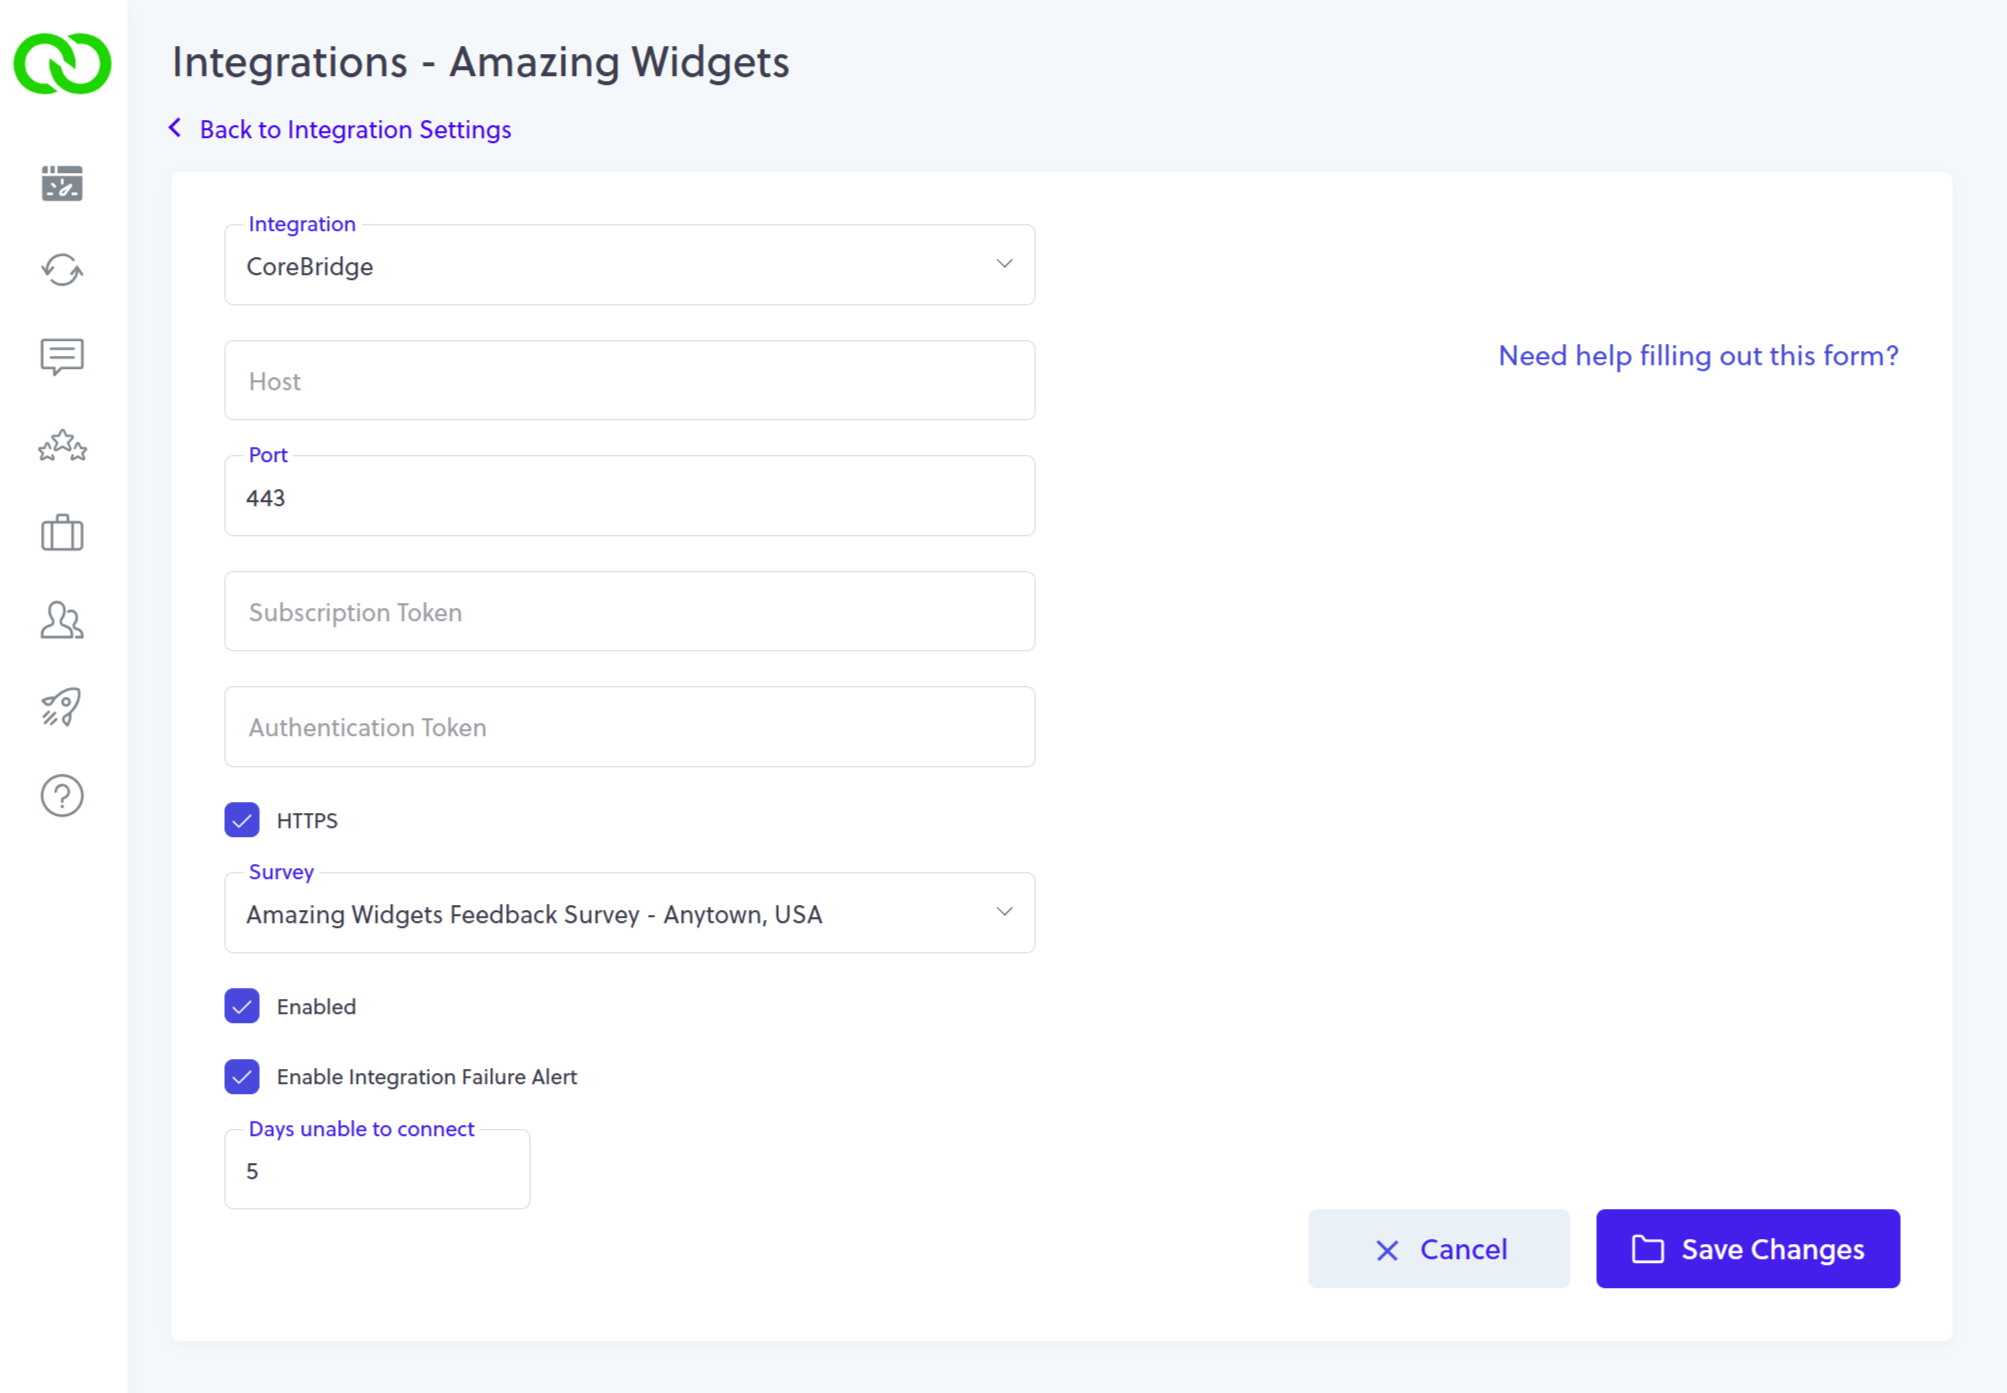
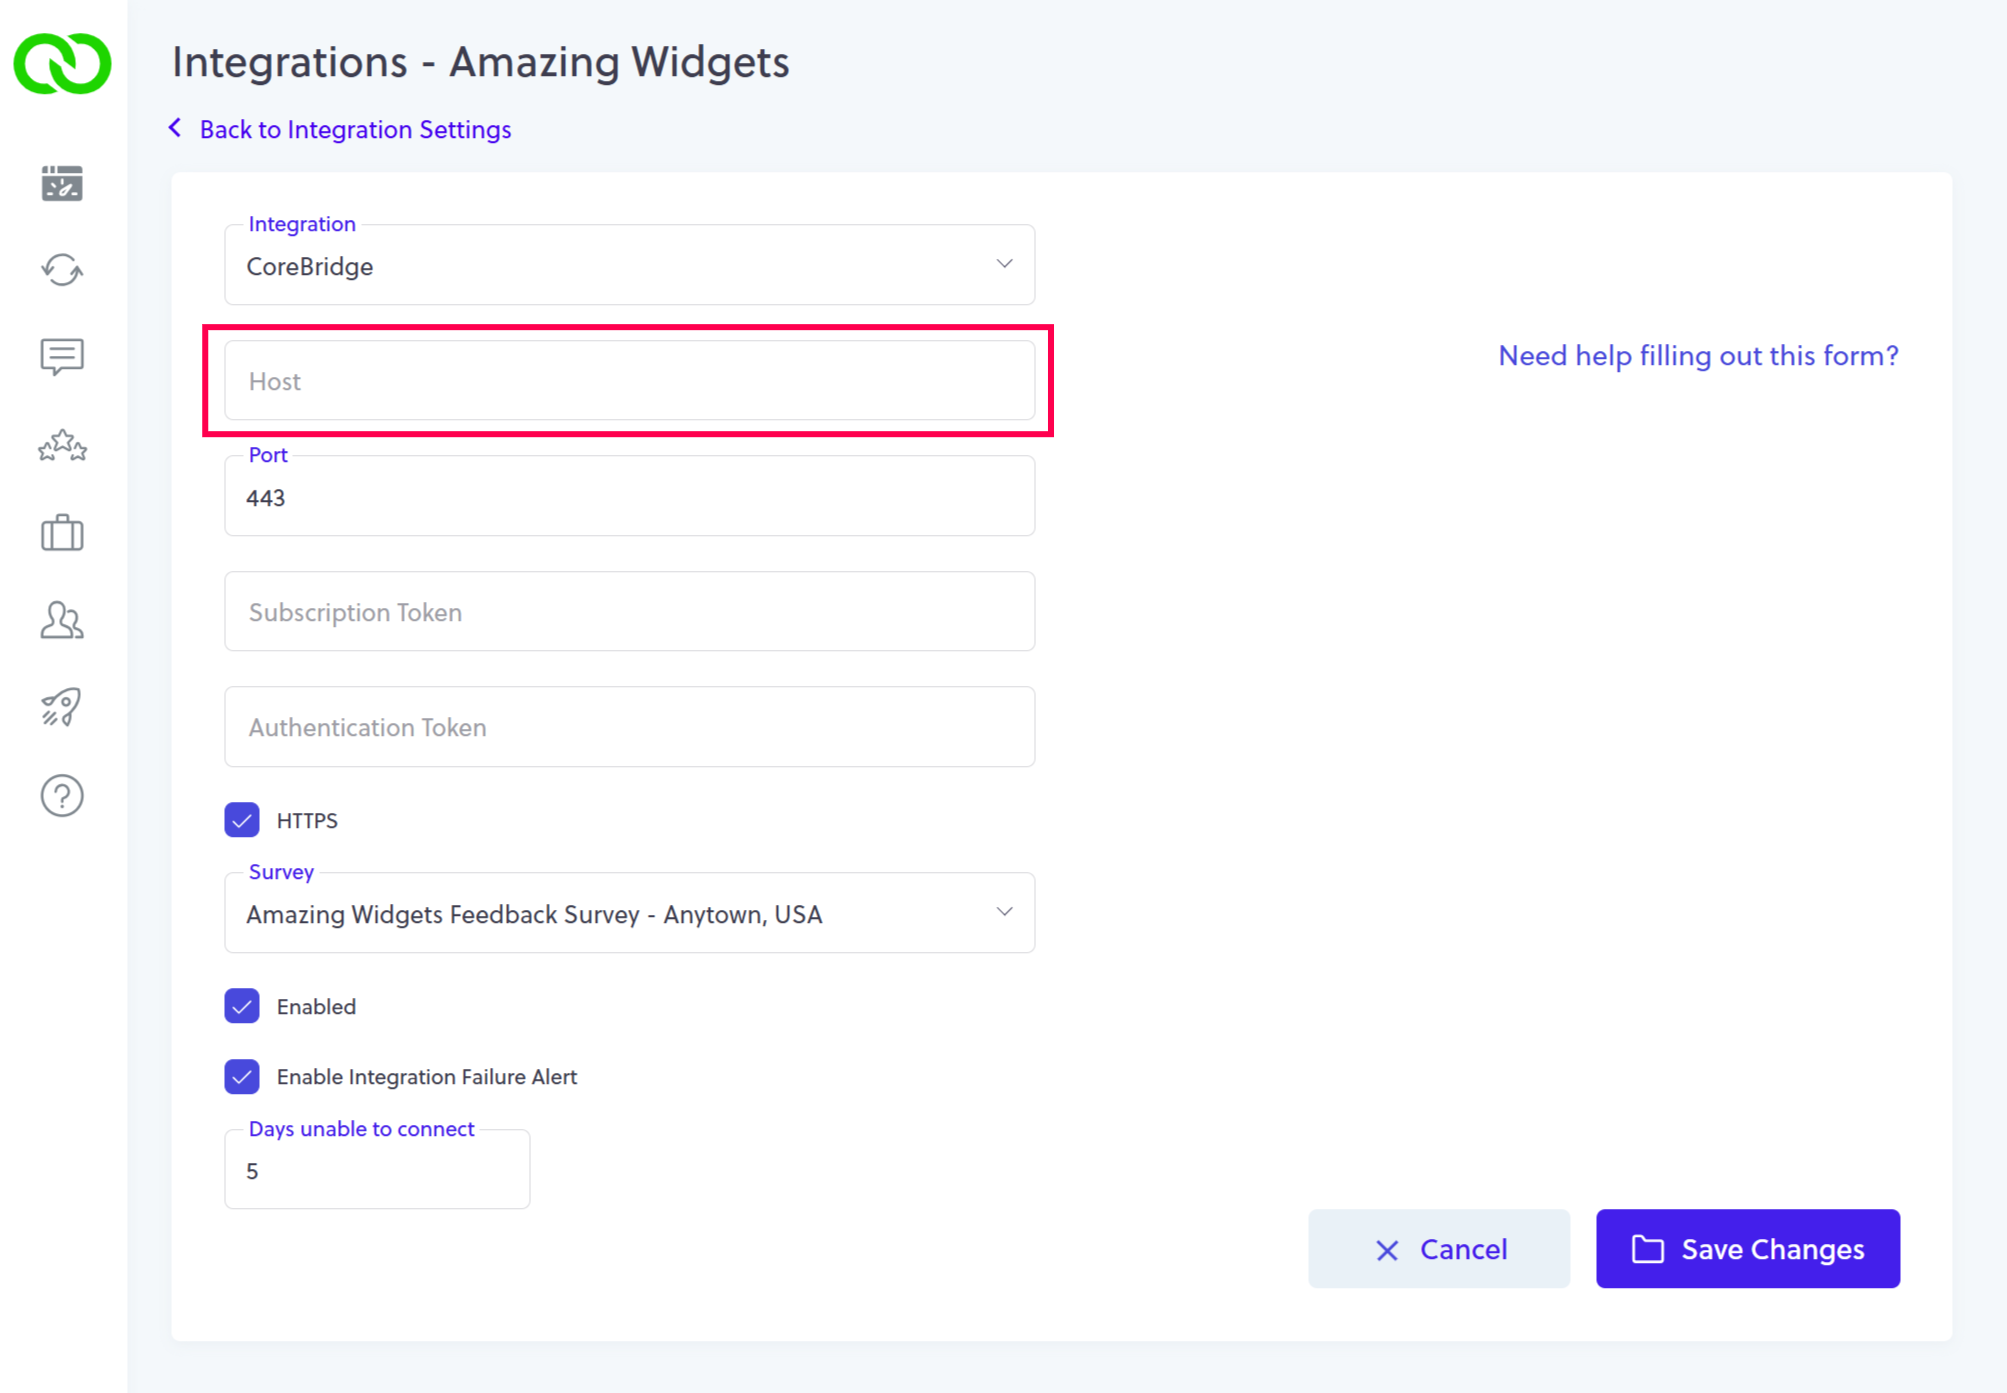
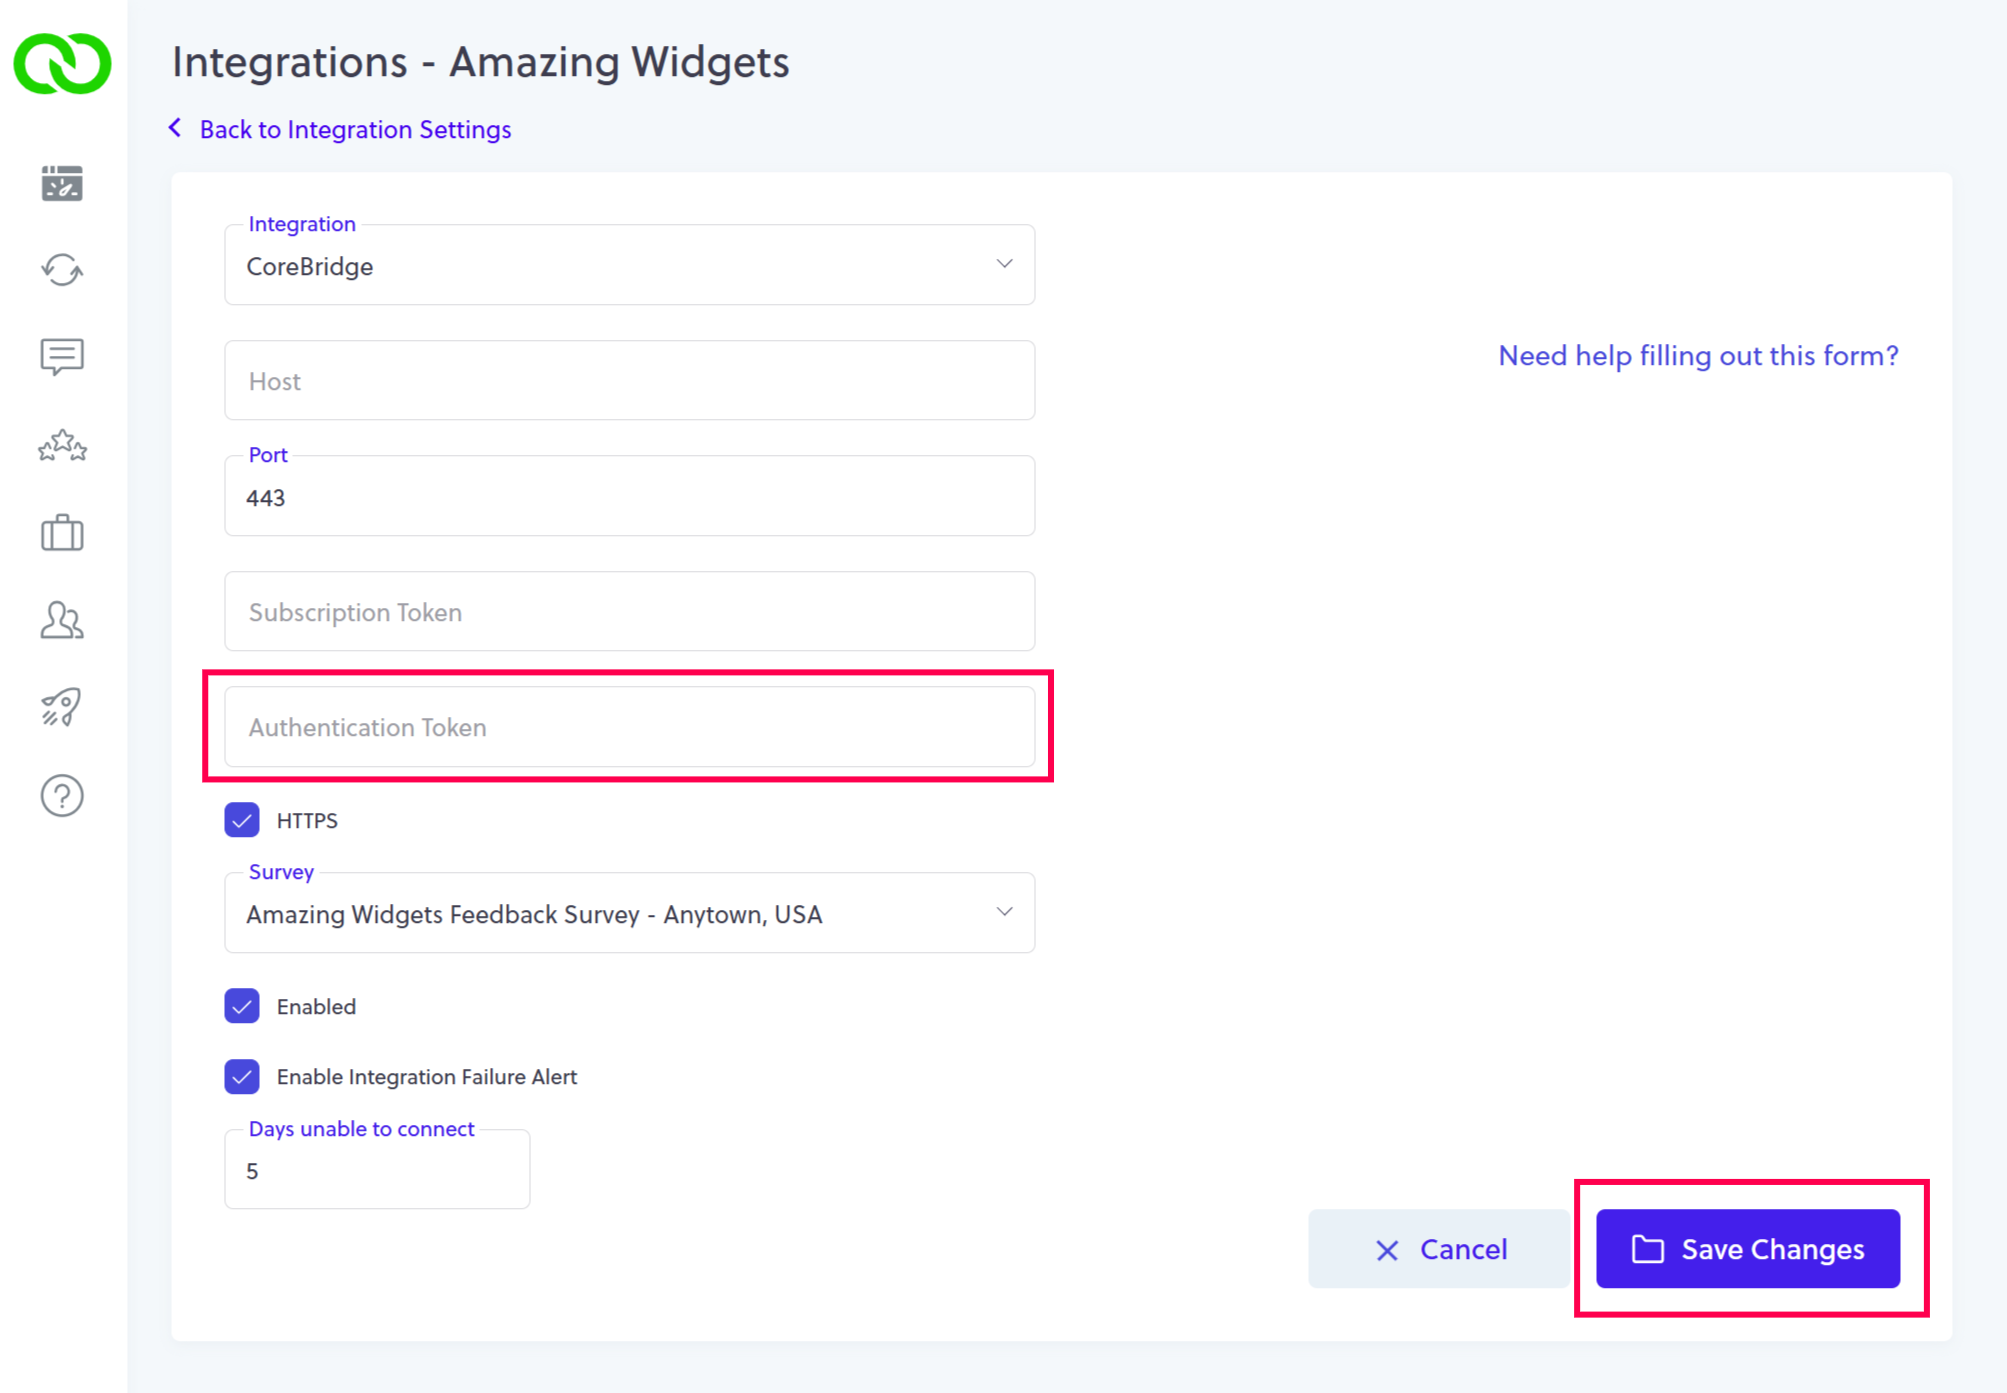
- Go to LoyaltyLoop, and copy and paste this value into the "Host" field:
- Back in CoreBridge, click Generate Tokens for LoyaltyLoop.
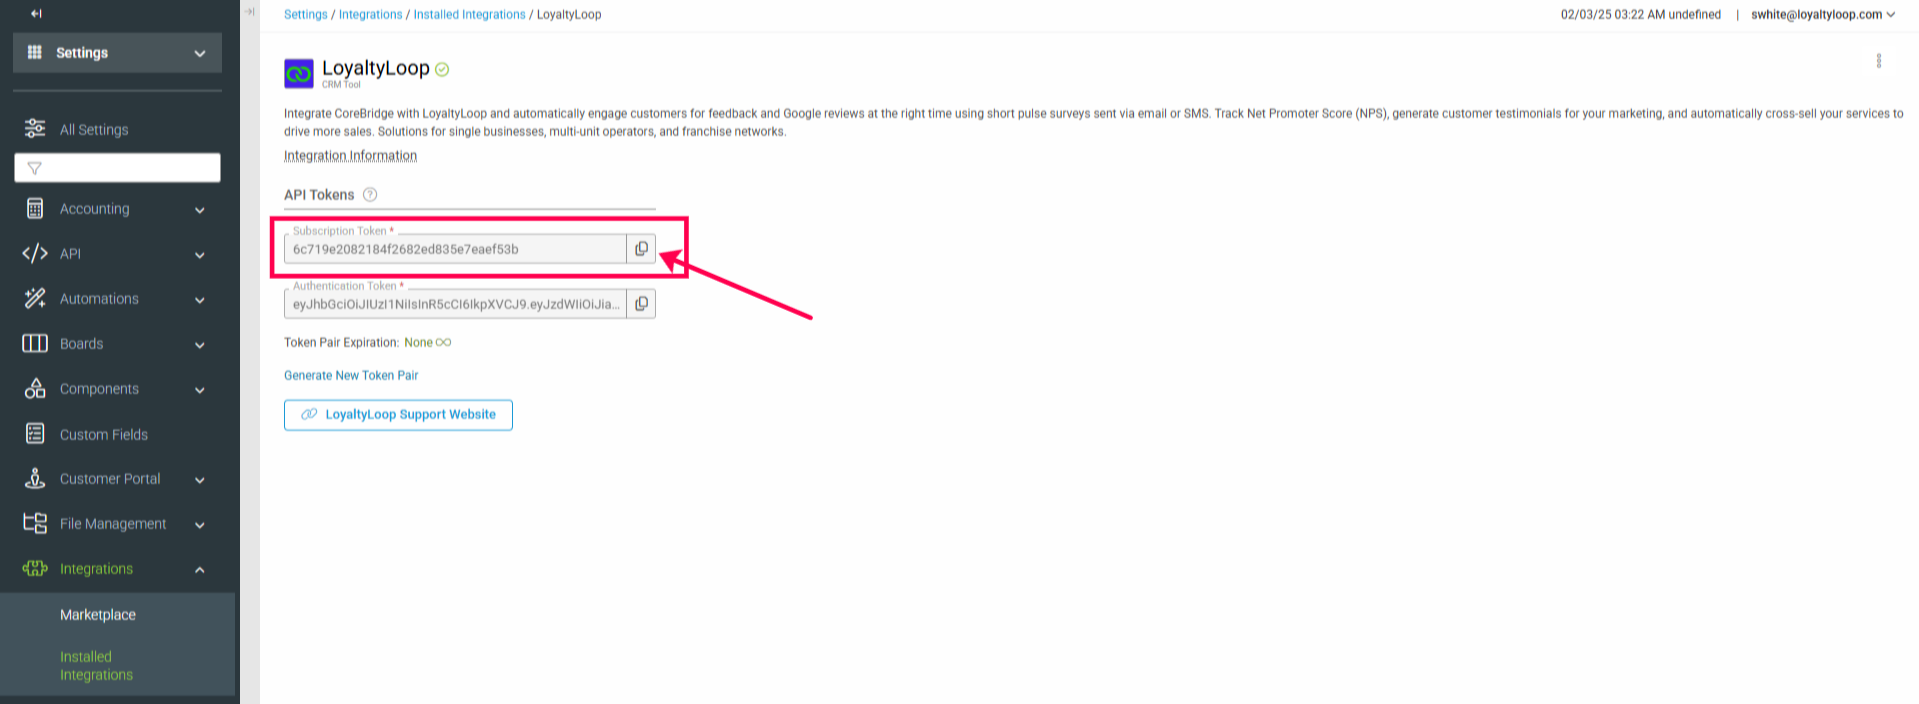
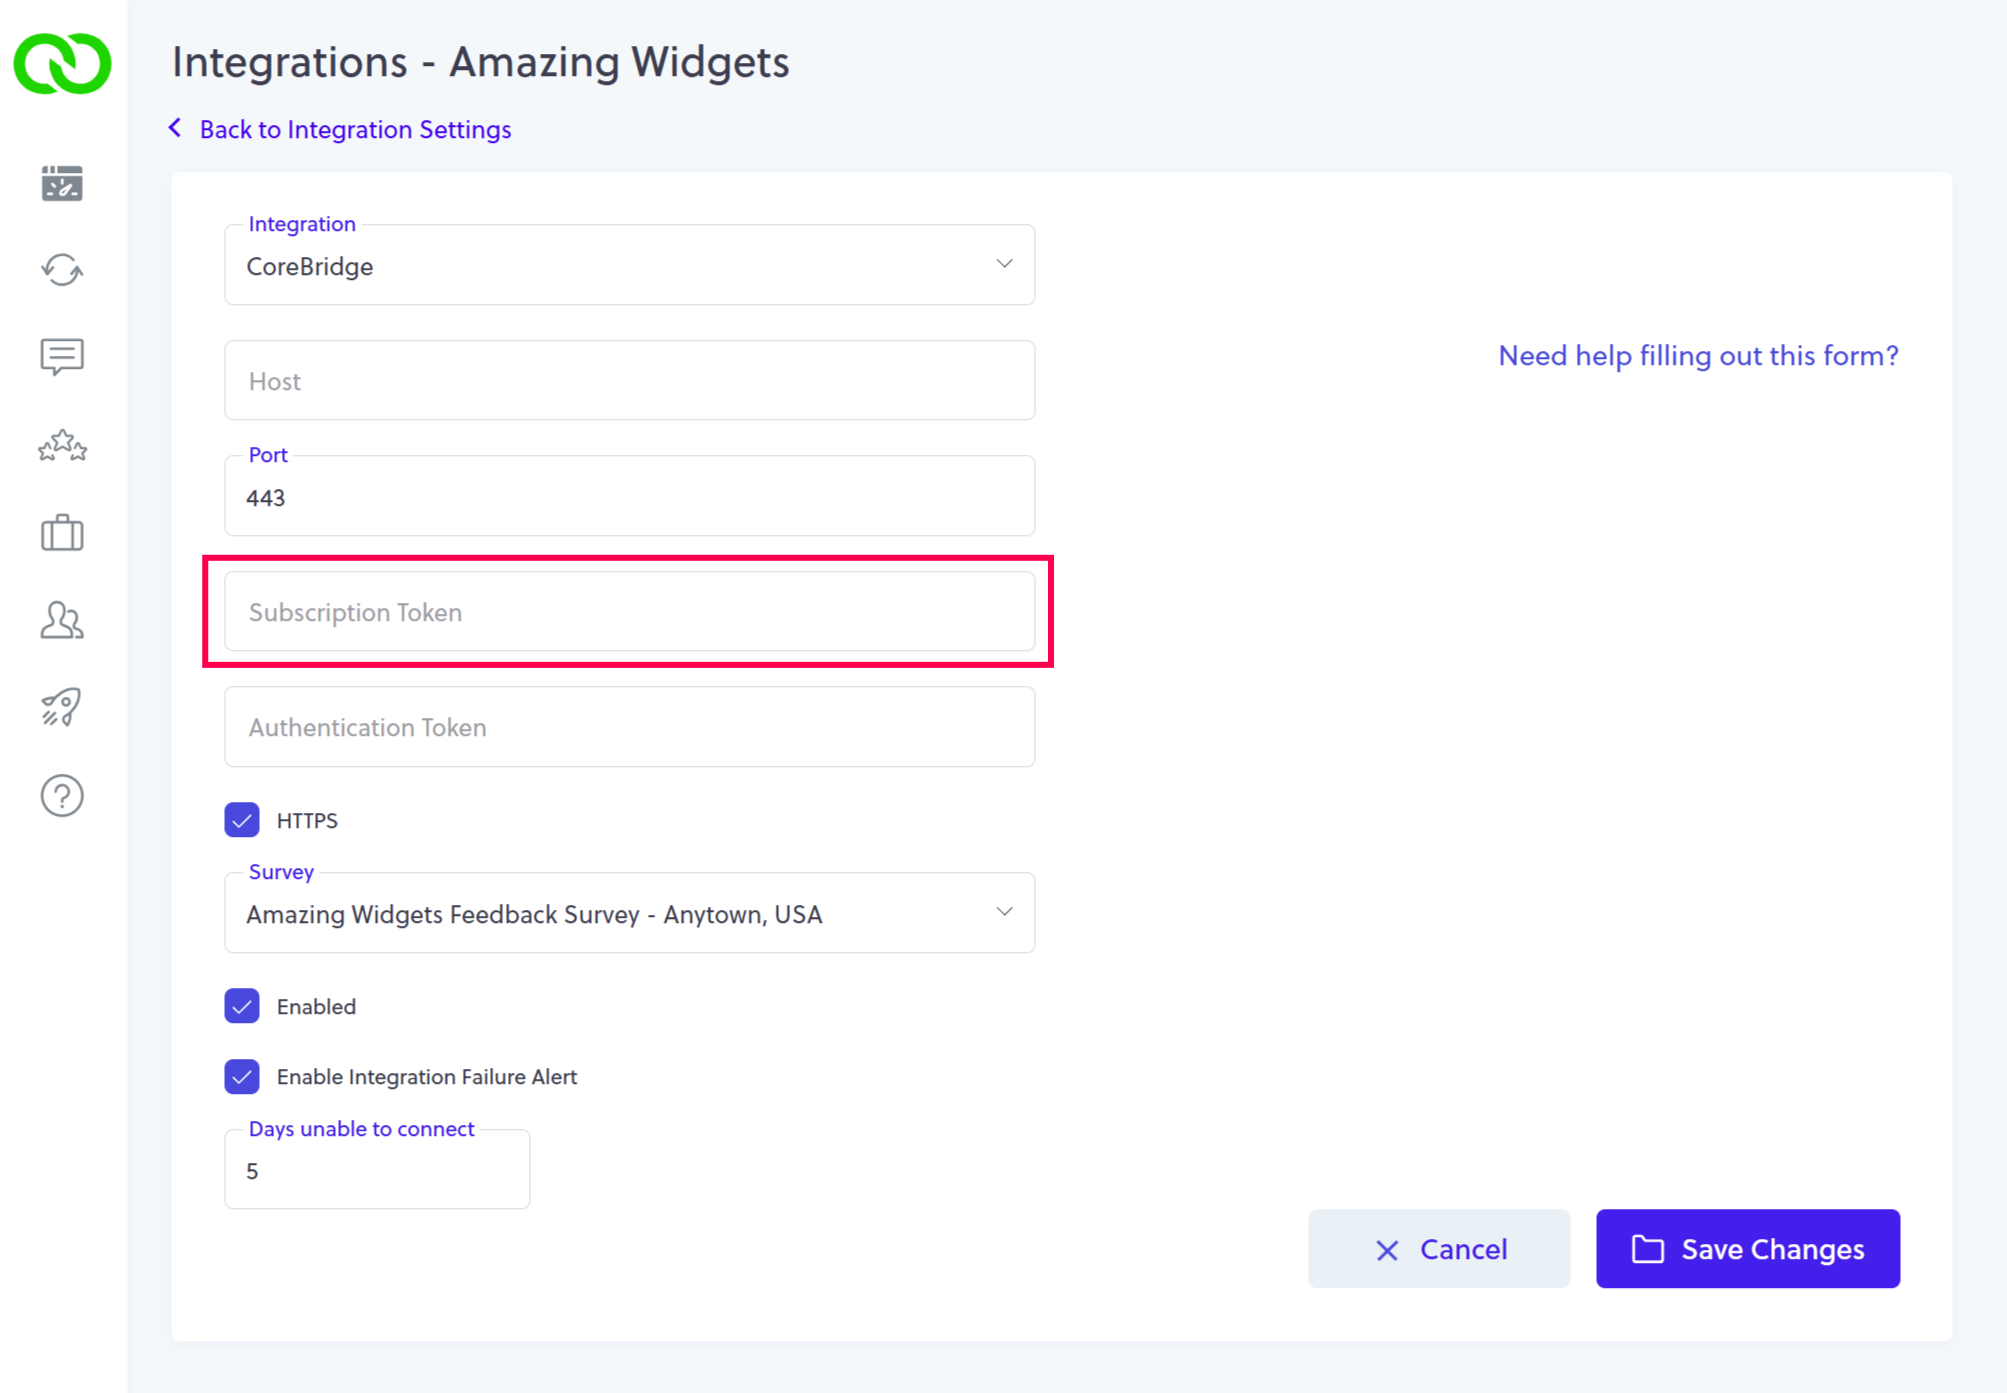
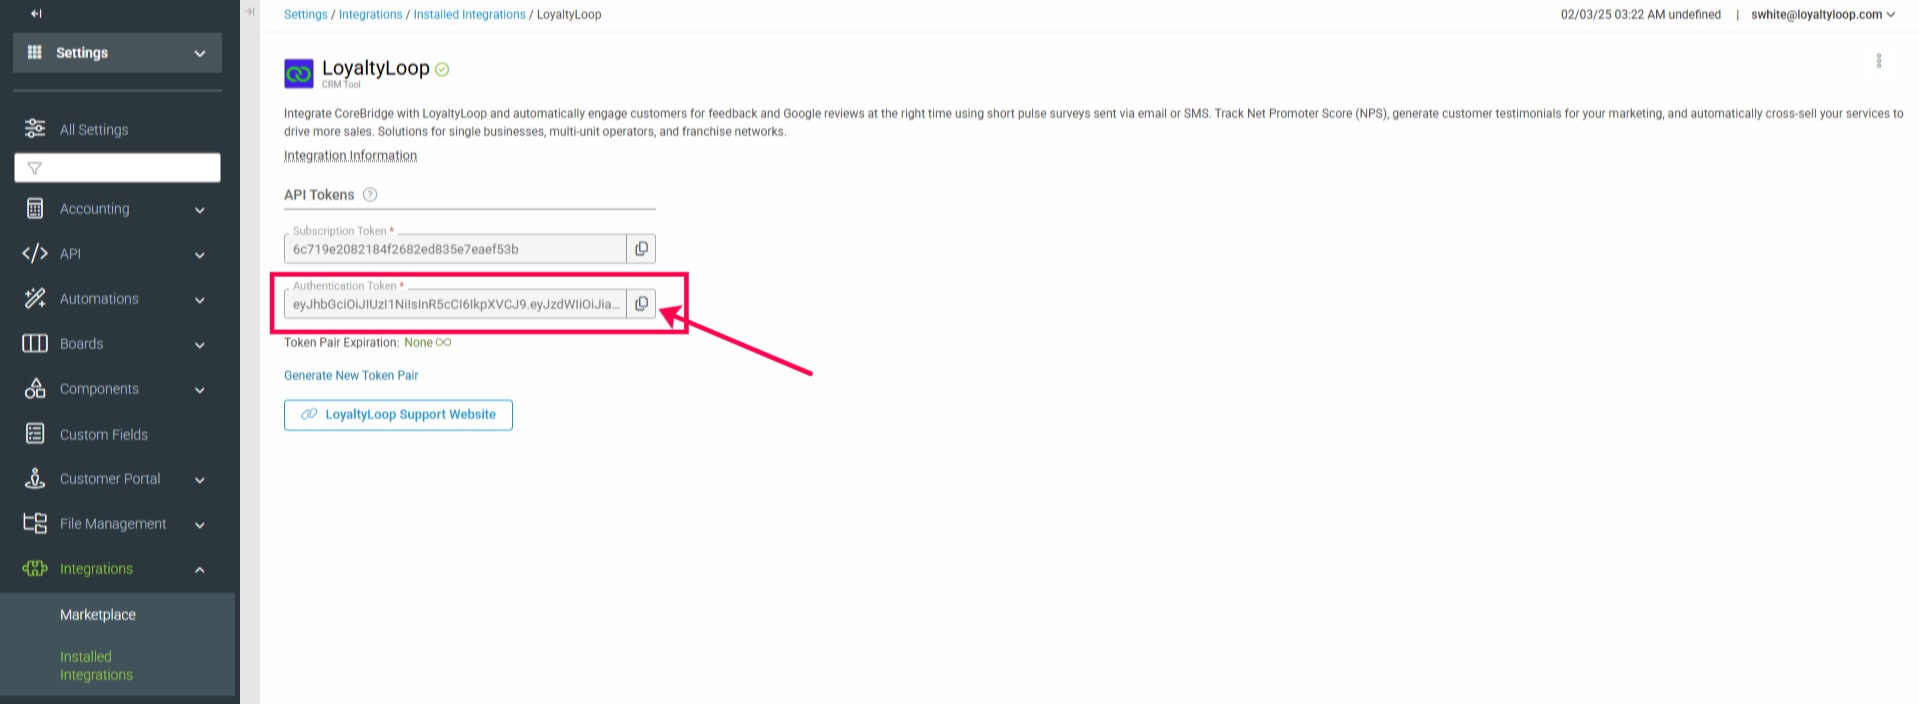
- Copy the CoreBridge Subscription Token, go to LoyaltyLoop in the other browser tab, and paste that value into the field name "Subscription Token".
- Go back to the CoreBridge browser tab, and copy the CoreBridge Authentication Token, go to LoyaltyLoop in the other browser tab, and paste that value into the field named "Authentication Token". Lastly, click Save Changes in LoyaltyLoop.

Done. You're now integrated!
Which CoreBridge fields are included in the integration?
The integration includes the most common fields related to a CoreBridge Invoice record. If you do not see a field that you require, please let us know and we'll be happy to look into adding it. Please email our support team (support@loyaltyloop.com) with the name of the field(s) needed.
- First Name
- Last Name
- Full Name
- Contact Title
- Company
- Office Phone
- Cell Phone
- CoreBridge Client ID
- Address Line 1
- Address Line 2
- City
- State
- Billing City
- Billing State
- Postal Code
- Franchise Center Number
- Entered By
- Sales Rep
- Sales Rep Email
- CSR
- PO Number
- Invoice/Job Number
- Job Type
- Job Description
- Due Date
- Ship Date
- Invoice Amount
Can I impose a standard delay when sending my survey?
Yes. To ensure your customer has had the appropriate amount of time to experience your product or service, you can impose a delay on sending your survey. As stated below, we will set a 3-day delay on the default launch configuration. If you prefer something else, please contact our support team at support@loyaltyloop.com, or 888-552-5667 option 3. Here's a blog post explaining imposed launch delays.
How do I change my survey send (launch) frequency?
With the integration enabled, your data flows to LoyaltyLoop as you close transactions. You are now in position to have your surveys sent soon after the customer experiences your business.
By default, and unless you specify otherwise, upon activation of the integration LoyaltyLoop will reconfigure your survey launch configuration as follows:
- Weekly Launch Frequency
- Default Launching Day on Tuesday
- Imposed 3-day delay
If you'd like a different launch configuration, please contact our support team at support@loyaltyloop.com or 888-552-5667 option 3.
Your existing Touch Frequency Filter (TFF) will be maintained. For example, our default TFF is 90-days, meaning customers (based on email address) who have been asked to give you feedback within the prior 90-days (or as per your specific setting), will be removed from your launch. This prevents "over-touching" the same person too often.