“You can't correct your problems without getting the bad with the good, and since our customers are given an outlet to voice concerns through LoyaltyLoop, we are now running at a much higher satisfaction rating than ever before. Thank you!”
Intuit Quickbooks
Native Automation
Automate Your Feedback Loop!
If you use Quickbooks (Online or Desktop) to run your business, and you keep track of customers details inside Quickbooks, LoyaltyLoop is the perfect customer experience and review platform for you.
Quickbooks offers native report automation functionality in both Quickbooks Online and some Desktop versions that will automatically send your Quickbooks customer contact details such as name and email address to your LoyaltyLoop account.
You can configure this native automation to trigger reports from your Quickbooks Online or Quickbooks Desktop versions.
- Set it, and forget it!
- Engage customer soon after their experience
- Send requests as often as daily
- Save time (and money) not running manual reports
Below are the guides to setting up the Quickbooks automation. There is no additional cost to your LoyaltyLoop subscription to use these reports.

Photo by Meg Boulden on Unsplash
Want to learn more?
Schedule a DemoHow to configure an automated report in Quickbooks Online (QBO)
These instructions explain how to set up your LoyaltyLoop survey export file (Step 1), manually email your first report to LoyaltyLoop (Step 2), and schedule the report to be automatically emailed to LoyaltyLoop on your selected survey launch frequency (Step 3). You will only need to set this up once. Once configured, your survey export file will be automatically sent to LoyaltyLoop on your selected schedule allowing us to execute your customer feedback loop.
Step 1: Set up your LoyaltyLoop survey QBO export report
- Sign in to your QuickBooks Online (QBO) account
- Click Reports from the left main menu
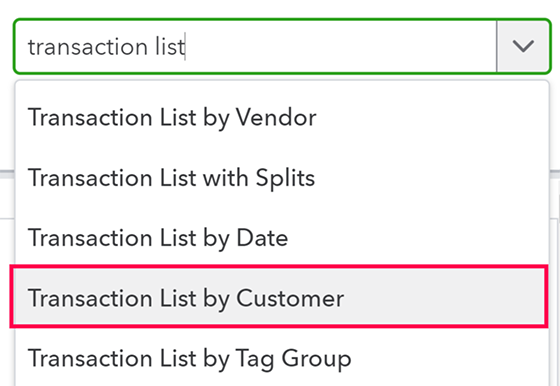
- In the report search box, search for and select Transaction List by Customer
- Give your report a name like “LoyaltyLoop Monthly Export” or “Transaction List by Customer for LoyaltyLoop”
- Click Group by, and deselect any grouping
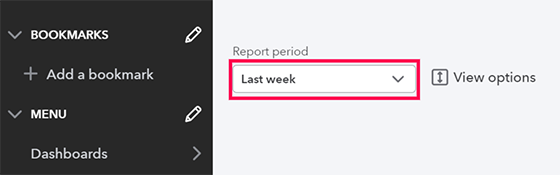
- Set the Report period to match the frequency you wish to survey your recent customers. For example, if you wish to survey customers weekly, then select “Last Week”. For daily, select “Yesterday”. For monthly, select “Last Month”.
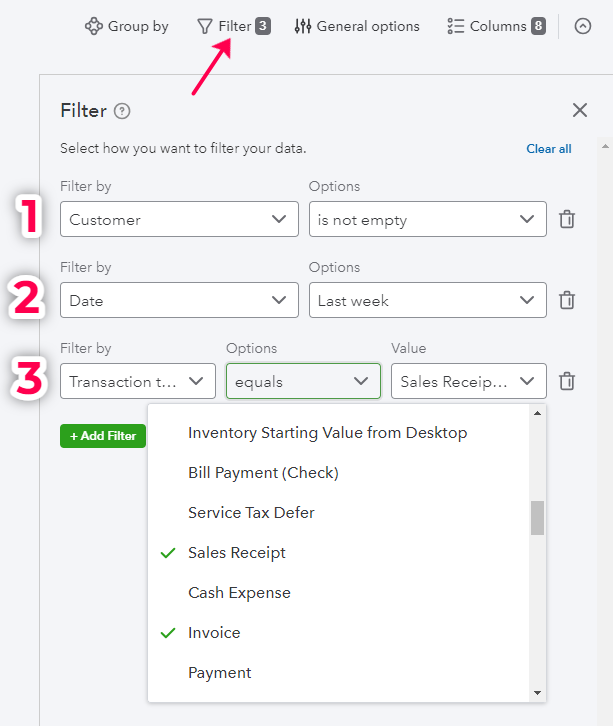
- Click Filter, and set 3 filters: (1) Customer is not empty (default), (2) Date is Last Week or the period you set from the prior step, (3) select the Transaction types to Invoice and Sales Receipt. If you also wish to survey prospects, select Estimates. If you use any other Transaction Types to track sales to your customers, select those Types too.
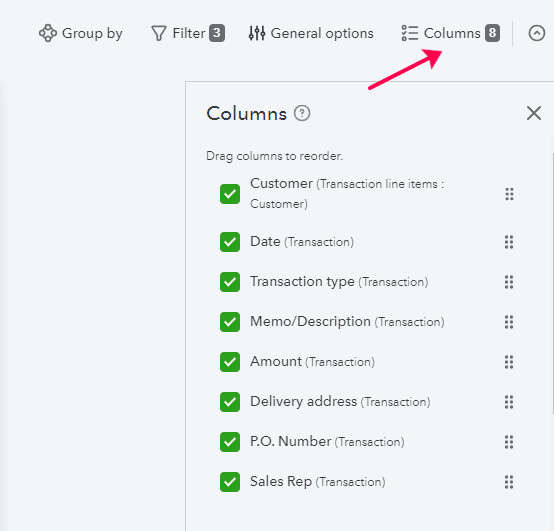
- Click Columns, and select Delivery Address (which is the email address), Customer, Billing or Shipping Address, Sales Rep, PO#. There is no limit to the fields you can include. If you see a field that you think would be helpful to have associated when you view the customer’s feedback in LoyaltyLoop, add the field.
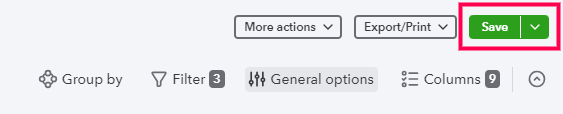
- Click Save or Save as
- Look at the report on screen. In the column labeled Delivery Address, you should see email addresses for your customers. If you do not, or if any are missing, add email addresses to the customer’s record. Make sure you have a process to enter email addresses for each new customer in the future. NOTE: Do not worry about duplicate email addresses, if you see any. LoyaltyLoop will apply filters to remove duplicates, remove bad email addresses, and remove any customer surveyed in the prior 90/120/180 days per your system settings.


Step 2: Manually email your first report to LoyaltyLoop
- First, make sure you have your LoyaltyLoop Launch File Email Address handy. Your Launch File Email Address is uniquely coded to your survey and your account. The email address uses a plus (+) symbol that fully conforms with valid email address structure.
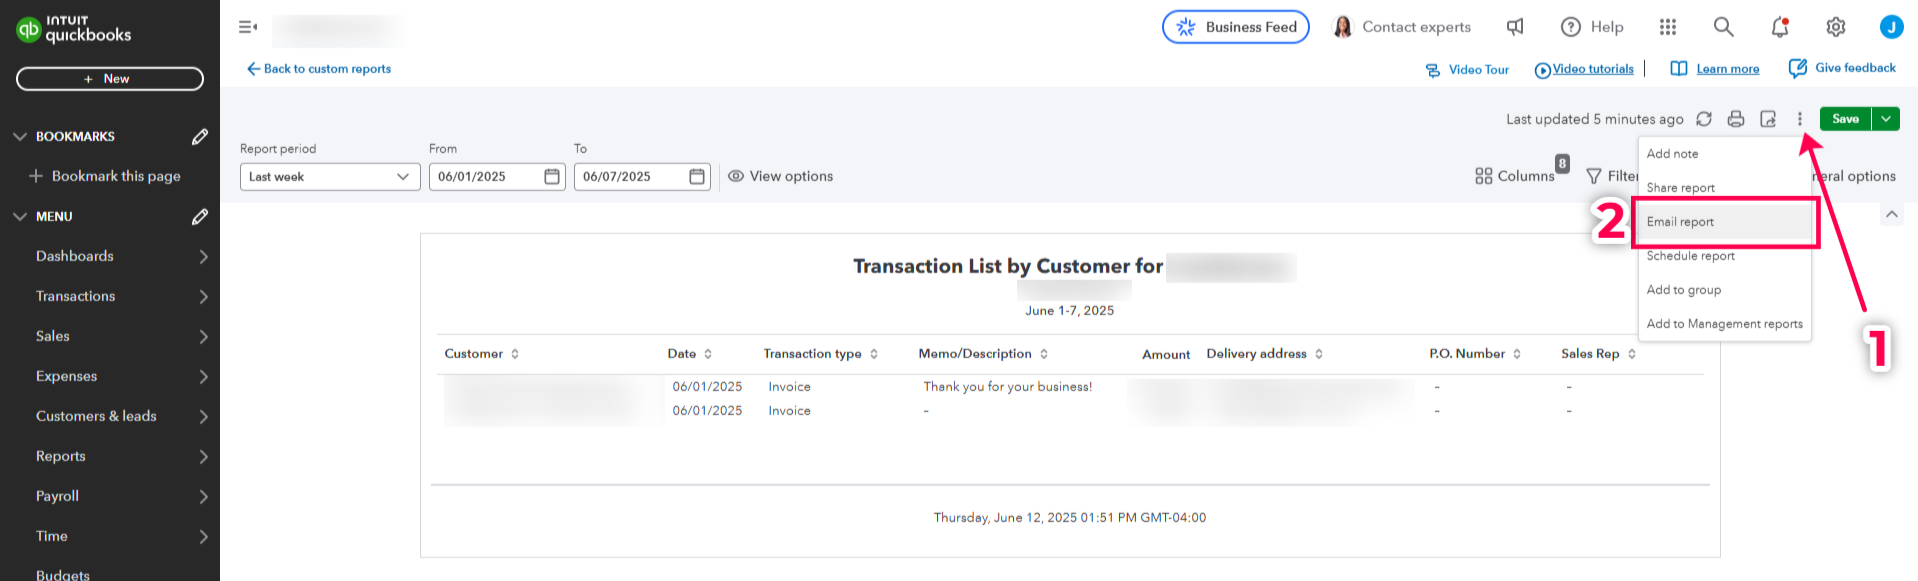
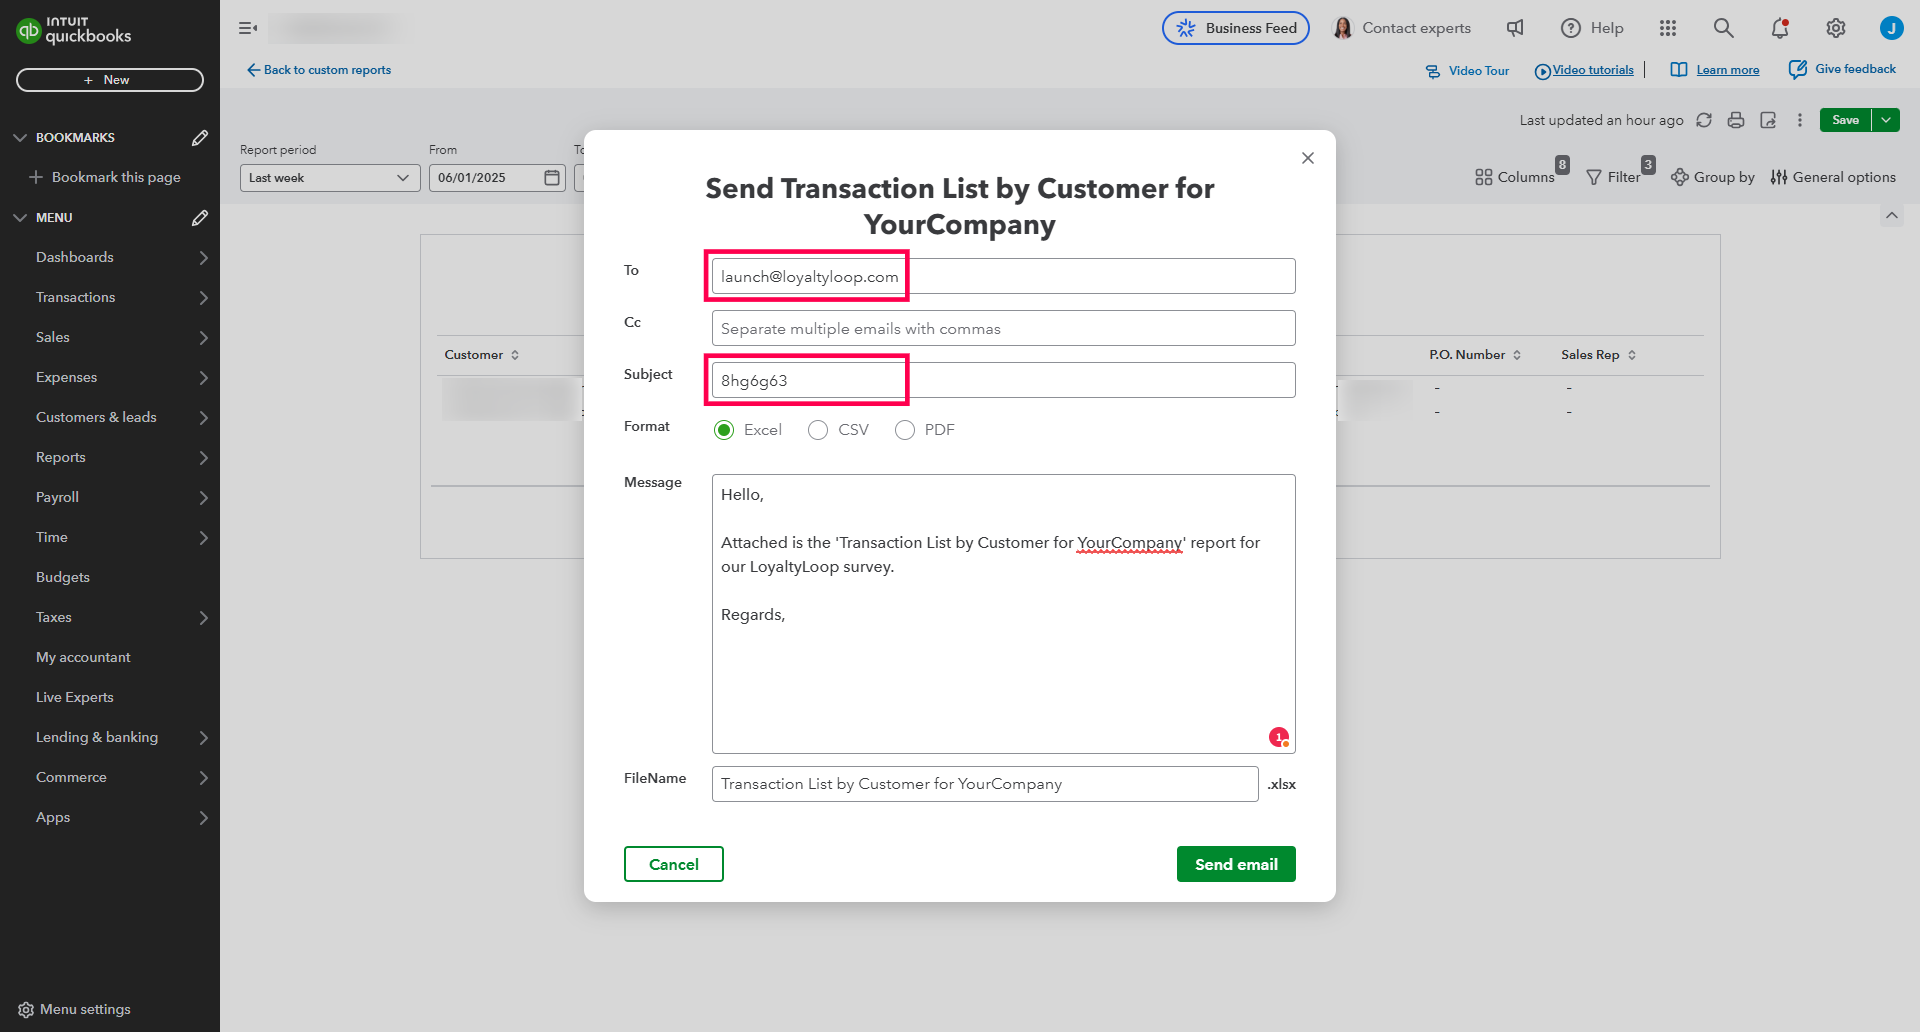
- While viewing your report, click the 3-dot icon (More actions) next to the Save button in the upper right of QBO, then click “Email report” on the drop-down menu.
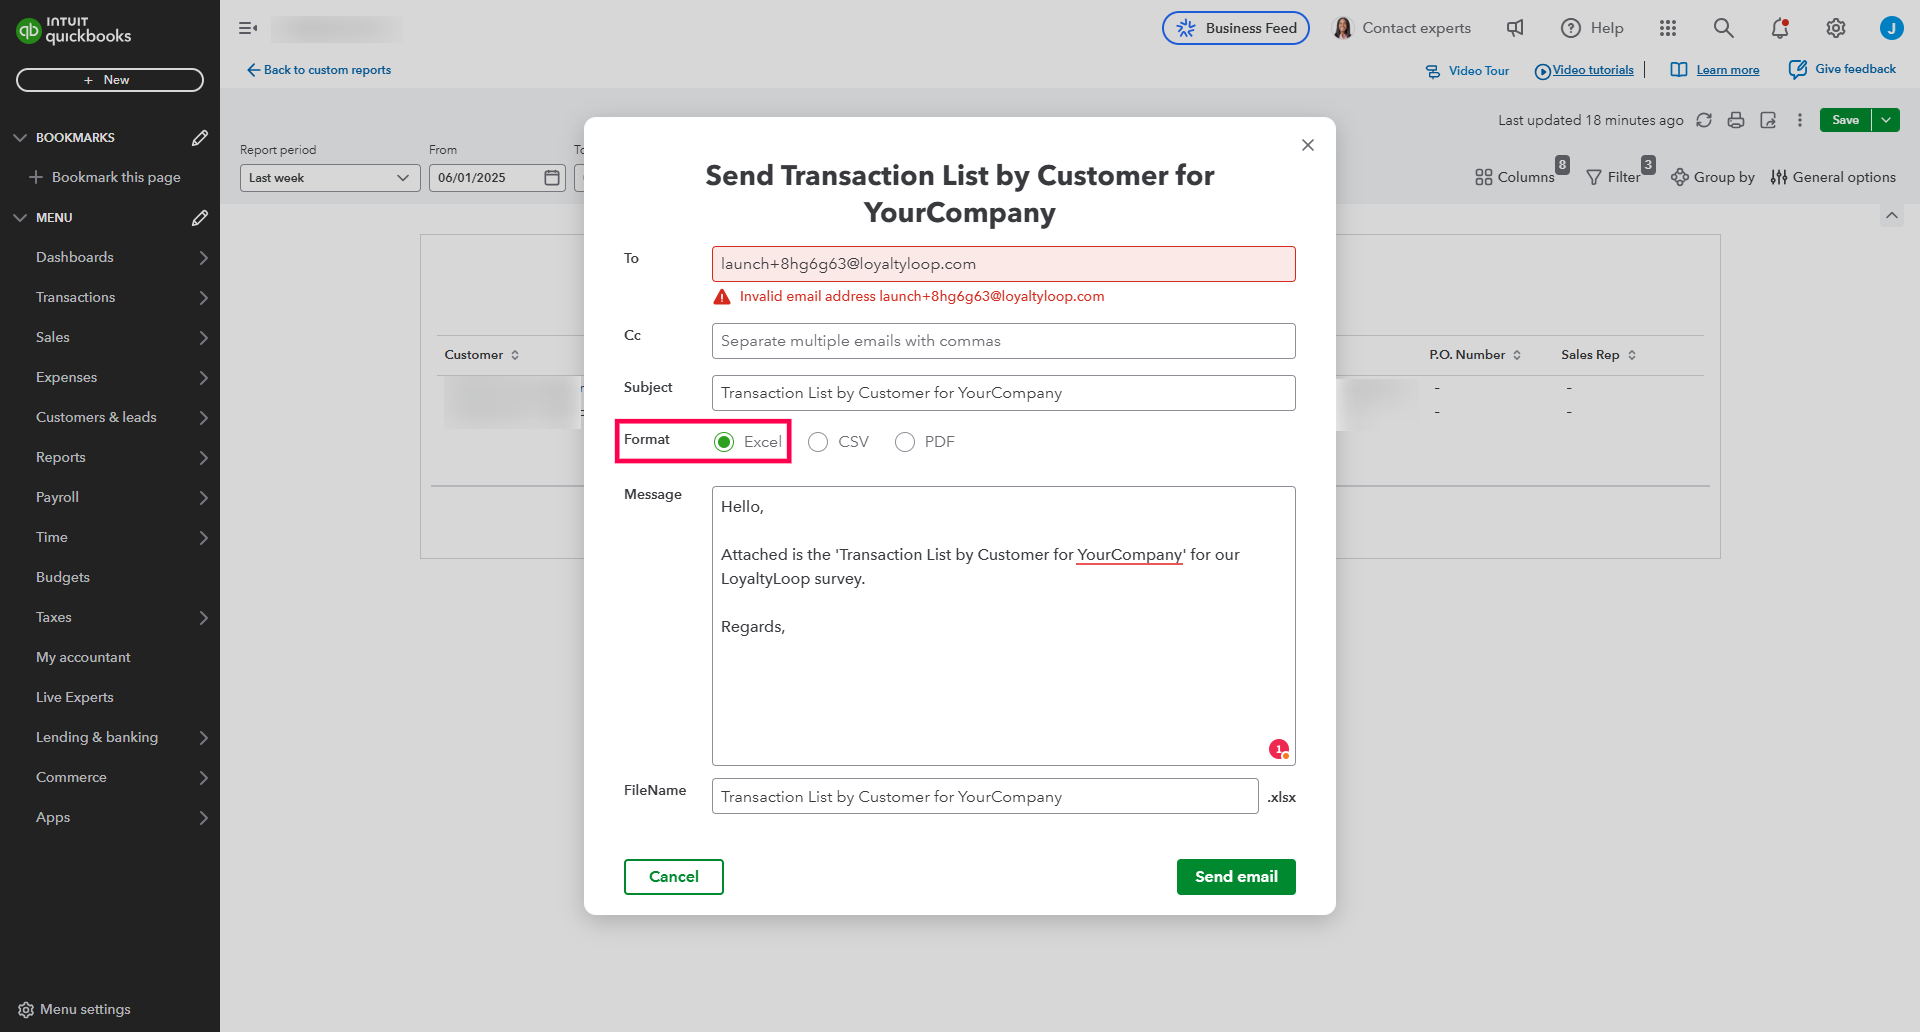
- On the email window, enter your LoyaltyLoop Launch File Email Address in the To field, and set the Format to Excel, then click Send Email. If the email is sent, you can move on to Step 3, if it throws an error, continue to the next item here in Step 2.
- In our experience some QBO instances support the valid email schema of the Launch File Email Address, and other instances do not. If yours
fails, don't worry. Simply replace your Launch File Email Address with launch@loyaltyloop.com AND paste the code following the plus (+) sign
from your Launch File Email Address into the start of the Subject line of the QBO email form, then click Send
Email.
For example, if your Launch File Email Address is launch+8hg6g63@loyaltyloop.com, you would paste the code 8hg6g63 into the start of the Subject line. You do not need to add anything else to the Subject. If the email is sent, you can move on to Step 3, if not, please reach out to our support team to complete your QBO report set up.
Step 3: Schedule your report to send automatically
After successfully sending your first report to either your Launch File Email Address or the alternative, launch@loyaltyloop.com, we can now schedule your automated report
- While viewing your report, click the 3-dot icon (More actions) next to the Save button in the upper right of QBO, then click “Schedule report” on the drop-down menu.
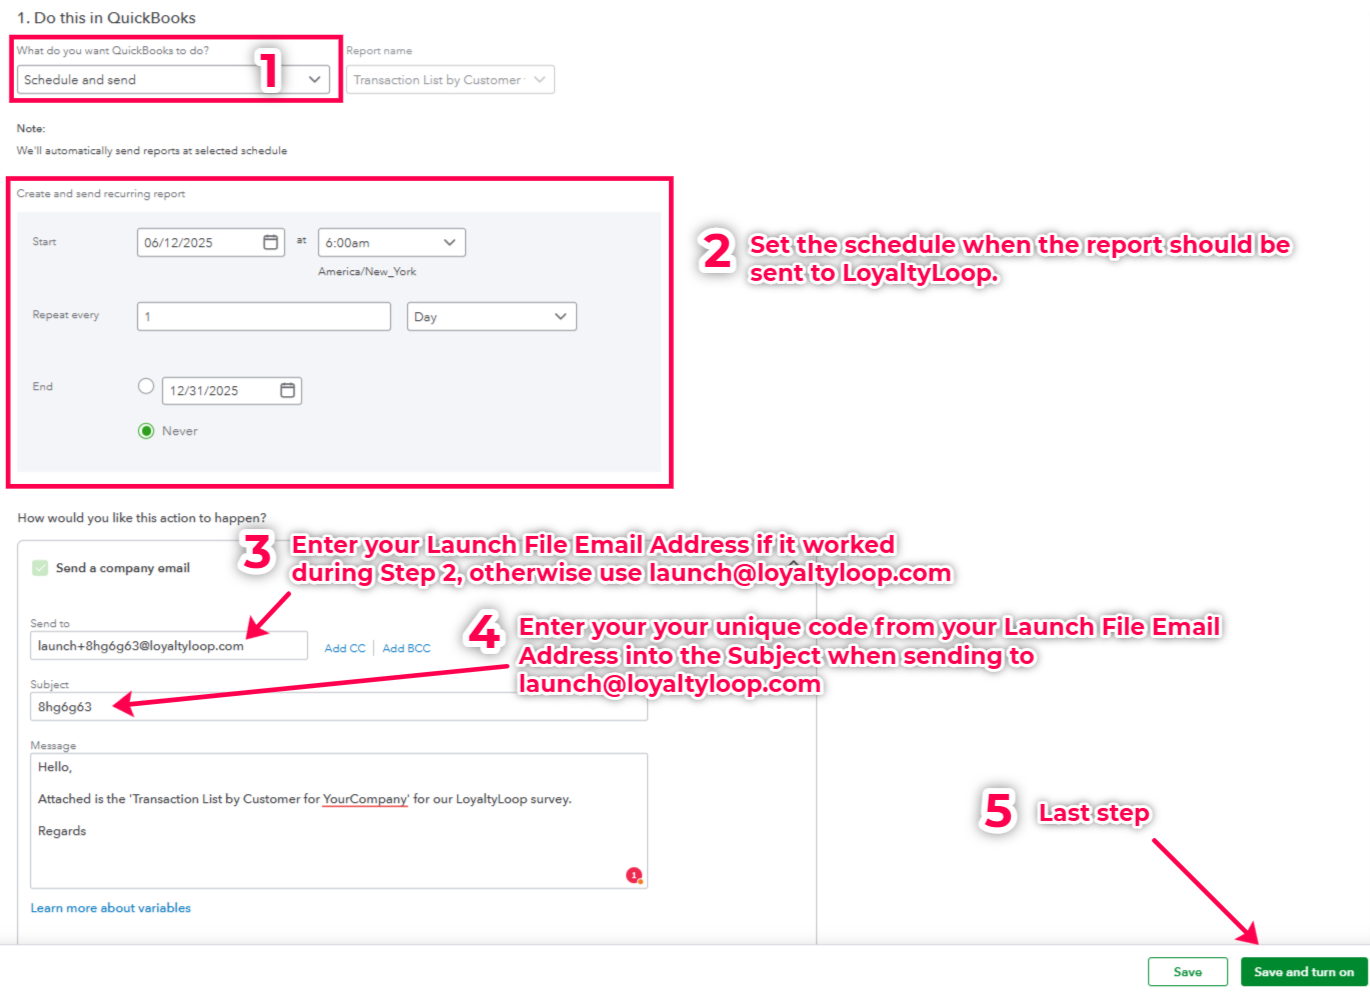
- On the next screen (shown below), set QBO to Schedule and Send.
- Set the schedule to start tomorrow at a time before 8am. If you wish to launch your surveys weekly, set the schedule to repeat every 1 week on either a Monday, Tuesday or Wednesday. If you wish to launch daily, set the schedule repeat every 1 day. Set the end to "never".
- If your first report was successfully sent in Step 2 using your Launch File Email Address, then enter that in the Send to field, otherwise enter launch@loyaltyloop.com and paste the code from your Launch File Email Address into the Subject line.
- Lastly, click Save and turn on.

Your surveys will be sent (aka launched) the day after the data is received. LoyaltyLoop only launches on weekdays, excluding US federal holidays.
You're all set! Your report is now scheduled to be sent to LoyaltyLoop so your customer feedback surveys launch automatically.
How to configure an automated report in Quickbooks Desktop
QuickBooks Desktop has several versions, but the menus should look very similar to those in this guide. To generate customer lists for LoyaltyLoop, please use these steps as a general guide, and use other resources such as videos on YouTube for scheduled reports in Quickbooks Desktop for you specific version. This guide was generated using QuickBooks Pro 2015 Edition.
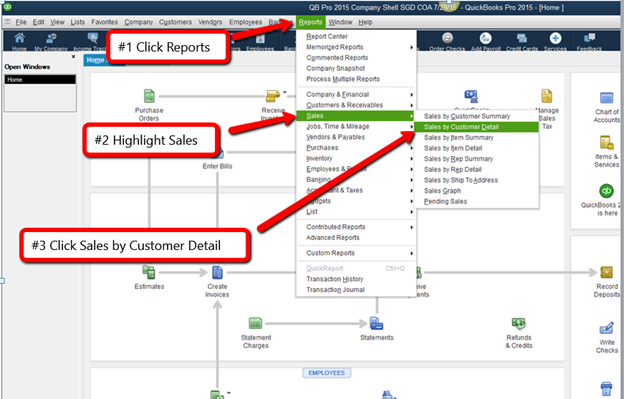
- Please go to Reports/Sales/Sales by Customer Detail as directed below.
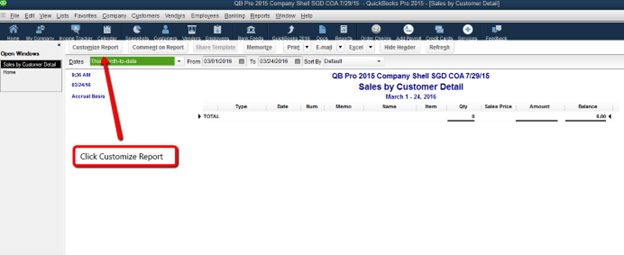
- Once the Sales by Customer Detail is visible on your screen please click Customize Reports.
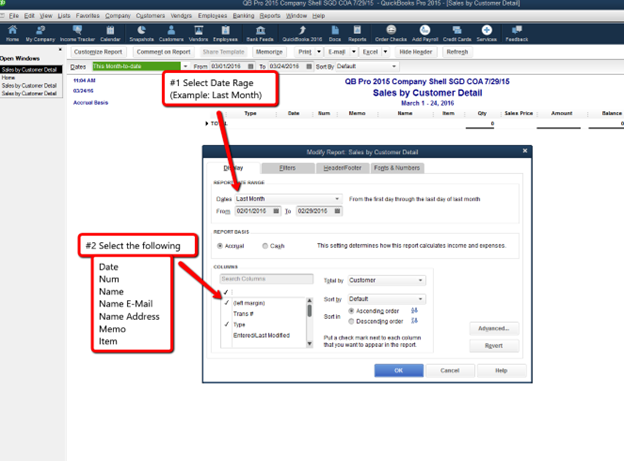
- Within the pop-up box select the date you would like. Select the data range that corresponds to your chosen LoyaltyLoop launch frequency. Meaning, if you wish to survey customers weekly, select “Last Week”, or if you wish to survey customers monthly, select “Last Month”. Review and select the fields to include in your report. For most businesses, the 7 fields shown (#2) is sufficient.
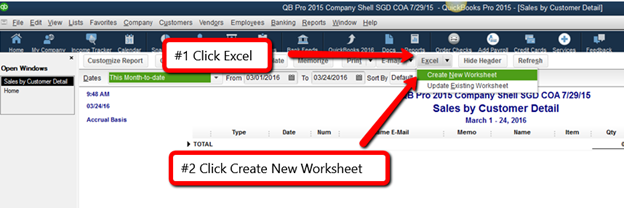
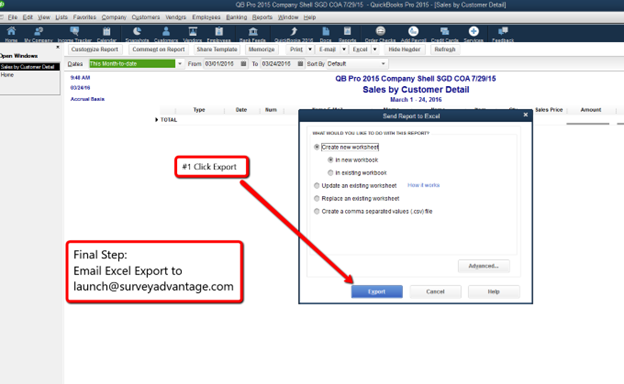
- Click Excel/Create New Worksheet as shown below.
- Click Export and save to a folder of your choice. Sign in to LoyaltyLoop, click Launches from the left main menu and upload your report to your Launch Pad. You can also email the report to your unique Launch File Email Address.
- If your version of QuickBooks allows you to schedule and email the report automatically, set the report to run on a daily, weekly or monthly basis (to match your desired LoyaltyLoop launch frequency), and set the TO field for the email to you and your unique Launch File Email Address.