October 2022
UPDATE - Alerts & Notifications
We've introduced a new, easier, and more secure way of configuring your alerts and notifications. This update applies to both Basic and Promoter plan subscribers. Admin Users can now send notices to non-users, control notices for their users, and lock user settings to prevent changes.
NEW - Email Friendly Names
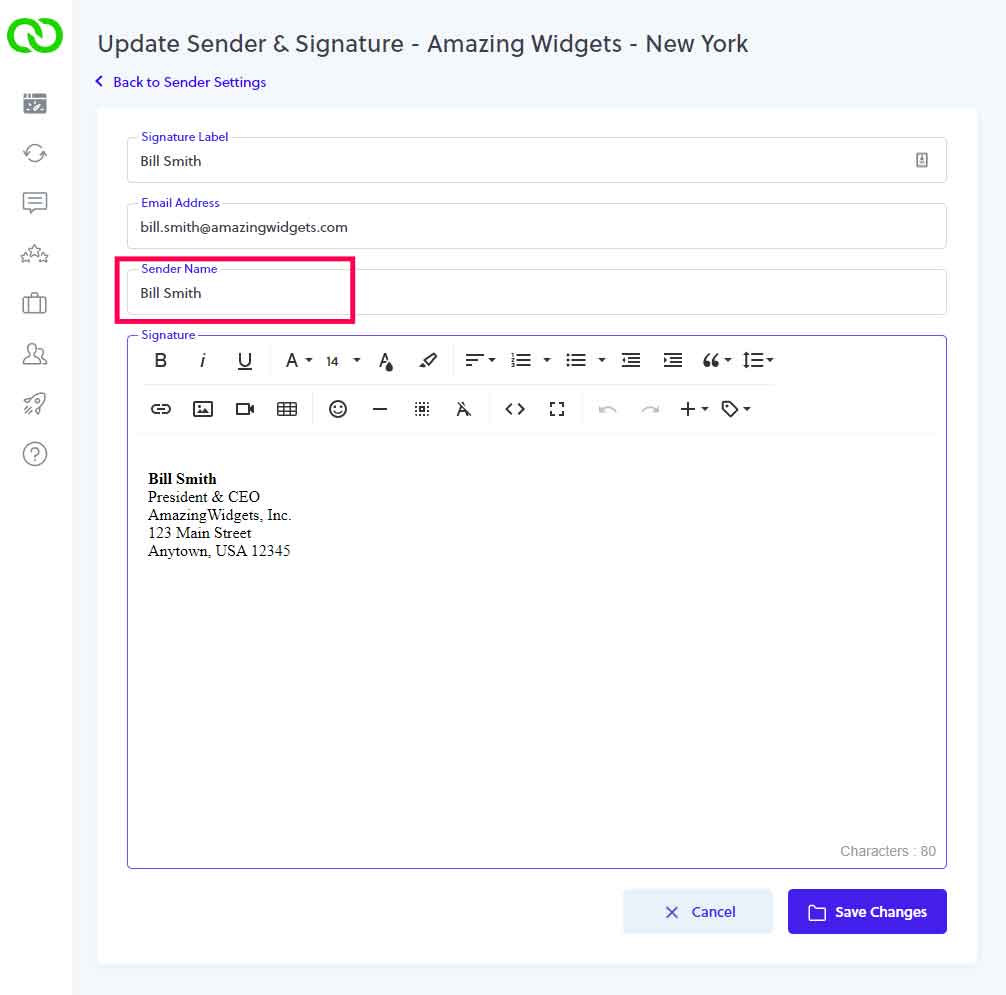
We've updated LoyaltyLoop so you can create your friendly name for all your LoyaltyLoop emails. Set your friendly name in Senders & Signatures settings to display as "John Smith" instead of "jsmith@amazingwidgets.com" in email clients like Outlook and Gmail.

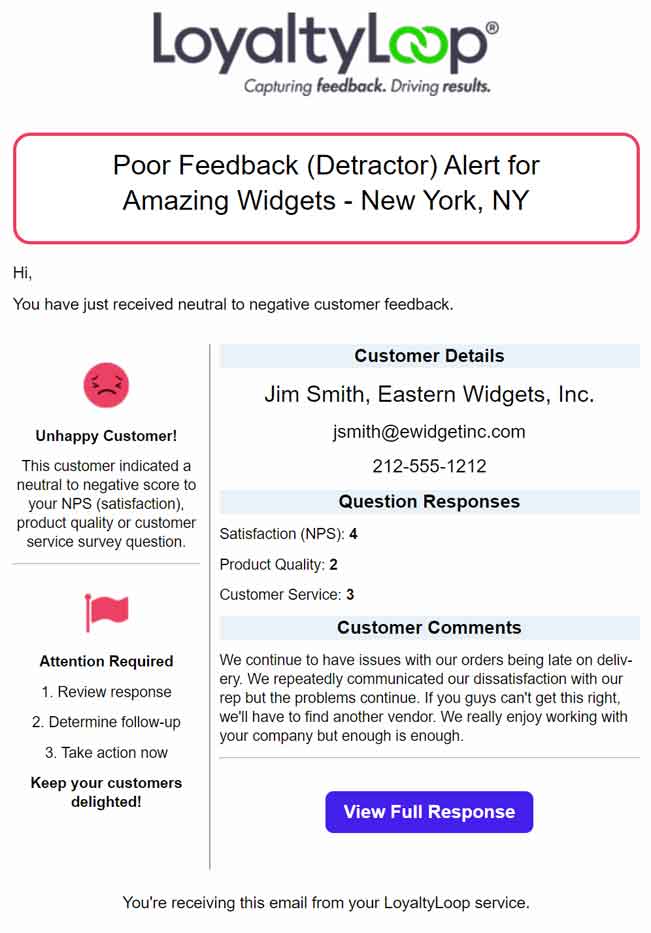
Review and change your LoyaltyLoop survey and customer-facing materials routinely. The 3 things to refresh are: the entire copy of your emails, the survey questions you're asking, and the appearance of both. Keep your feedback process fresh and on-brand to maintain customer engagement.

Go to Launches and Response Rates and click on the figures for any given launch to see everyone who was sent your survey, all email addresses that were bad and did not get sent, and everyone who gave a response.
Click Launches then Campaign History. Click on the campaign you'd like to view. You can see the composition of your email campaign on the left, and everyone who received it on the right. Click the Preview Campaign button and step through the emails to see what each customer received.

LoyaltyLoop released their Print and Sign industry segment Loyalty Leadership awards for the quarter ending September 30, 2022. The awards recognize businesses in North America that attain the highest Net Promoter Score for their industry segment during the quarter.