“You can't correct your problems without getting the bad with the good, and since our customers are given an outlet to voice concerns through LoyaltyLoop, we are now running at a much higher satisfaction rating than ever before. Thank you!”
Automate Your Feedback Loop!
If you are a managed service provider (MSP), technology service provider (TSP) or internal IT team running Autotask, LoyaltyLoop is the perfect customer experience and review platform for you.
Datto Autotask has native report automation functionality that will send your Autotask customer contact info (i.e., customers to be surveyed) to your LoyaltyLoop account automatically.
You can configure this native automation to trigger reports for your primary customer contacts, and/or the contact associated with a closed ticket.
- Set it, and forget it!
- Engage customer soon after their experience
- Send requests as often as daily
- Save time (and money) not running manual reports
Below, you'll find our Datto Autotask report guide, walking you through the automation setup procedure. There is no additional cost to your LoyaltyLoop subscription to use these reports.

Tips before starting:
- To avoid sending the same customer other surveys, ensure all native Autotask customer feedback surveys are disabled. In Autotask, go to Admin, Automation, then Email Notifications & Surveys, then Surveys. Then disable conflicting native surveys.
- Throughout our directions below, we reference "Account" as an Autotask element. Your Autotask may reference this same element as a "Client". For example, "Primary Account Contact" may be "Primary Client Contact" in your Autotask version.
- If you plan to send the Active Primary Contact survey for Autotask, make sure you move any inactive customers to inactive in Autotask, as LoyaltyLoop's integration will fetch "active" accounts to engage.
- If you use custom fields and need to include them when generating your LoyaltyLoop report, please follow the instructions here.
How to configure an automated report in Autotask for your Primary Customer Contact
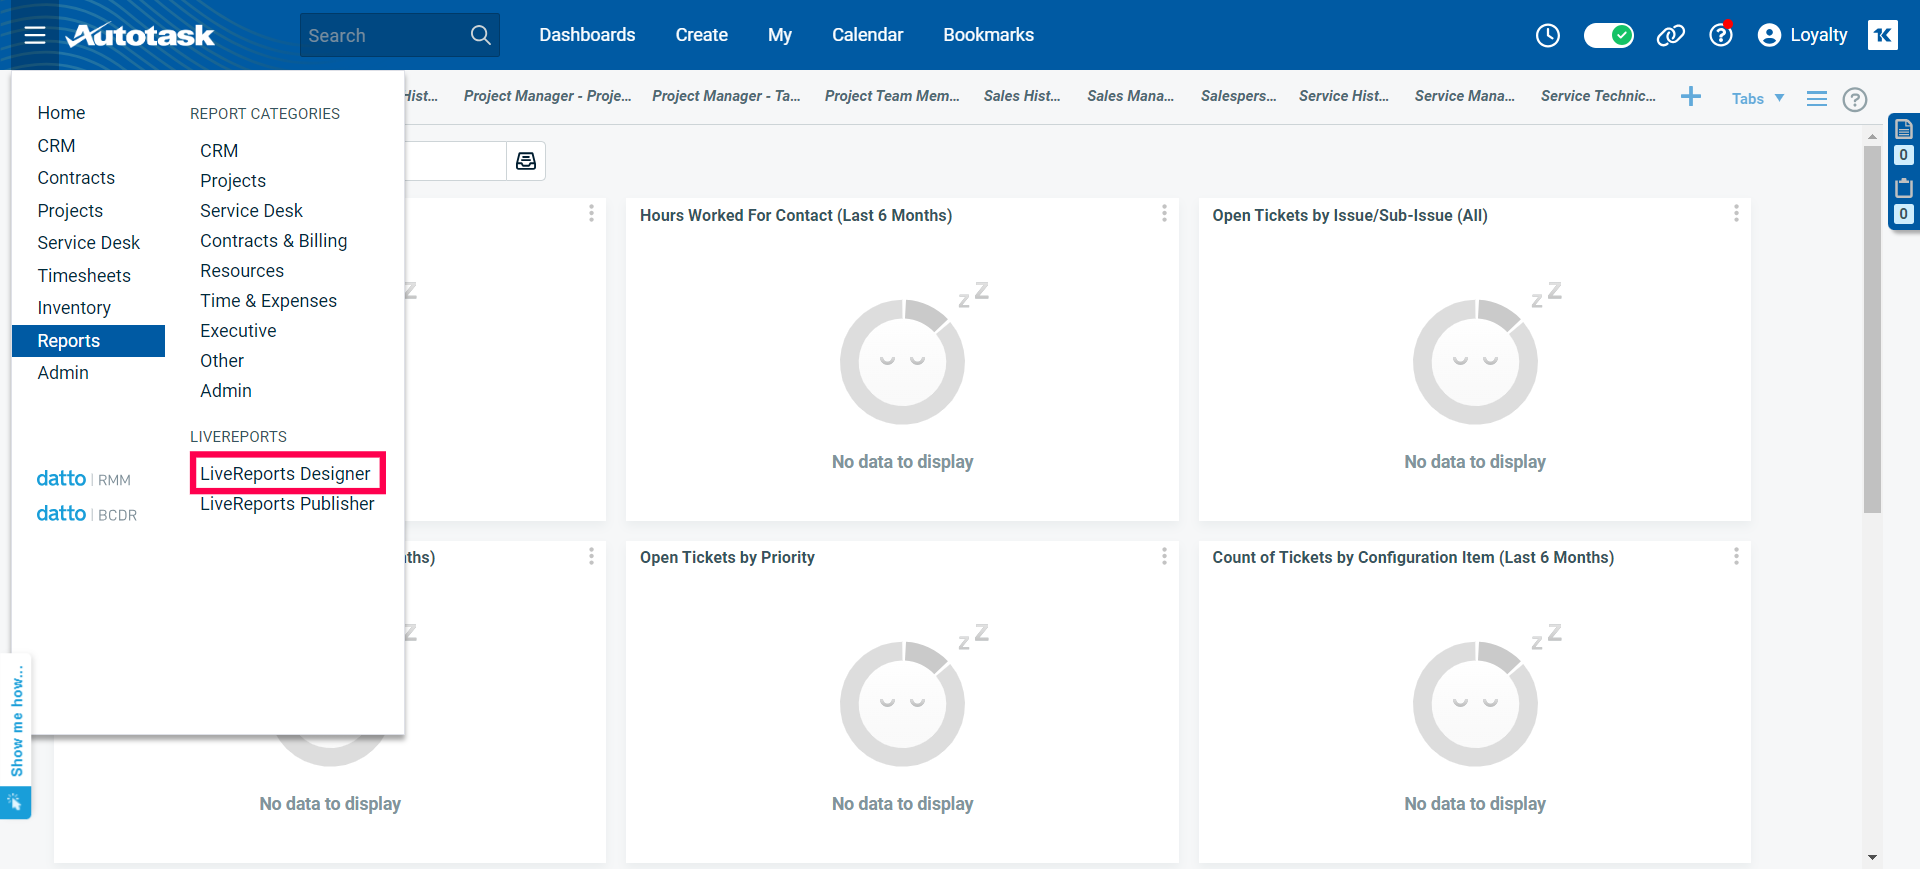
- First Navigate to Main Menu from the burger bar in the top left corner, highlight reports and select LiveReports Designer
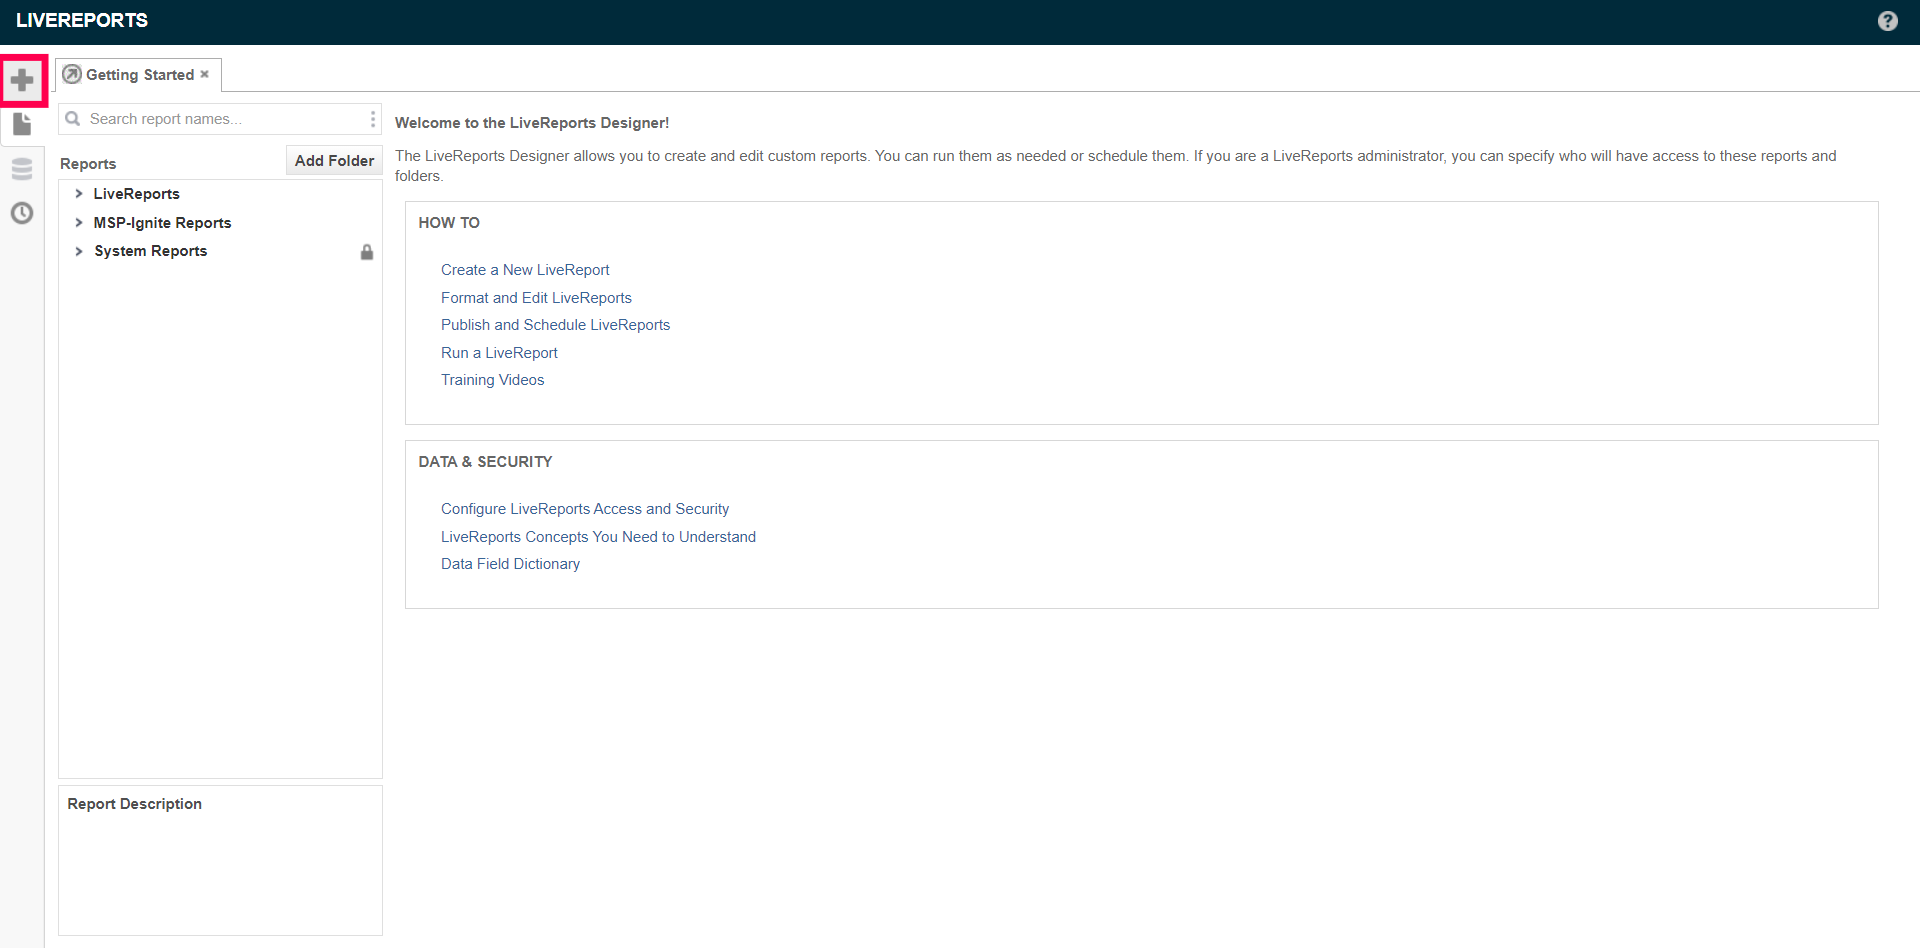
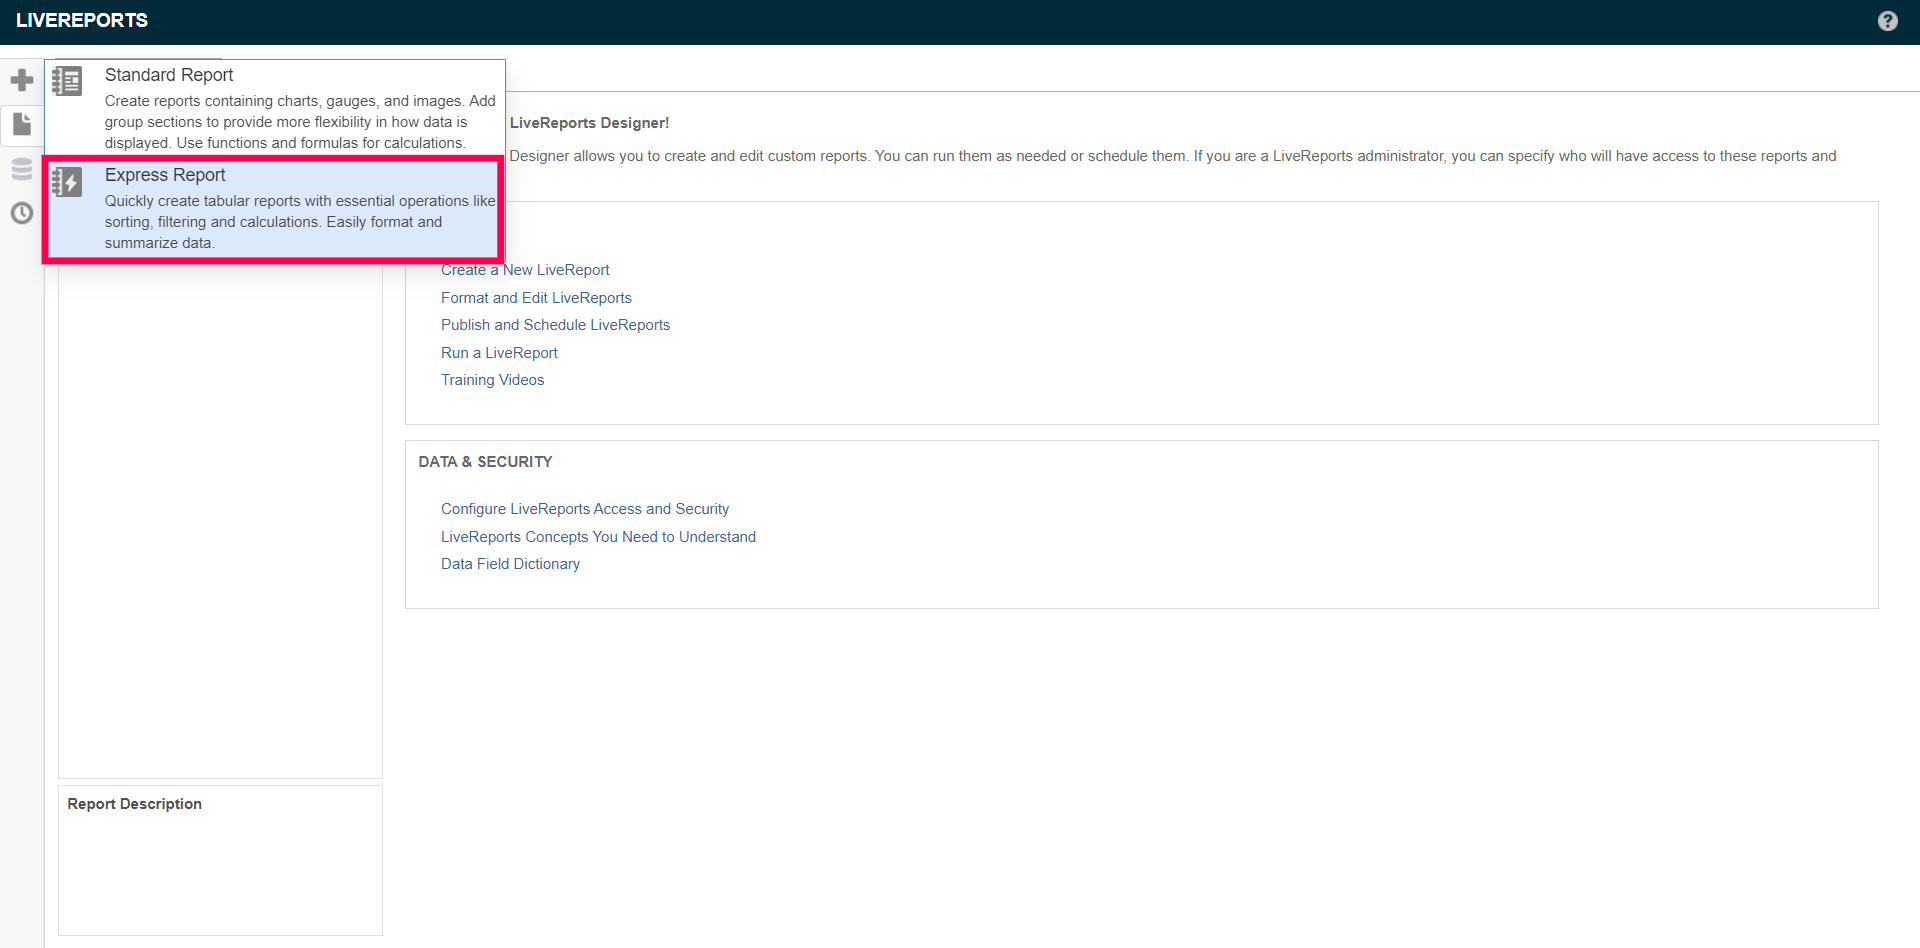
- Next, select the “+” icon to create a new report
- Select Express Report
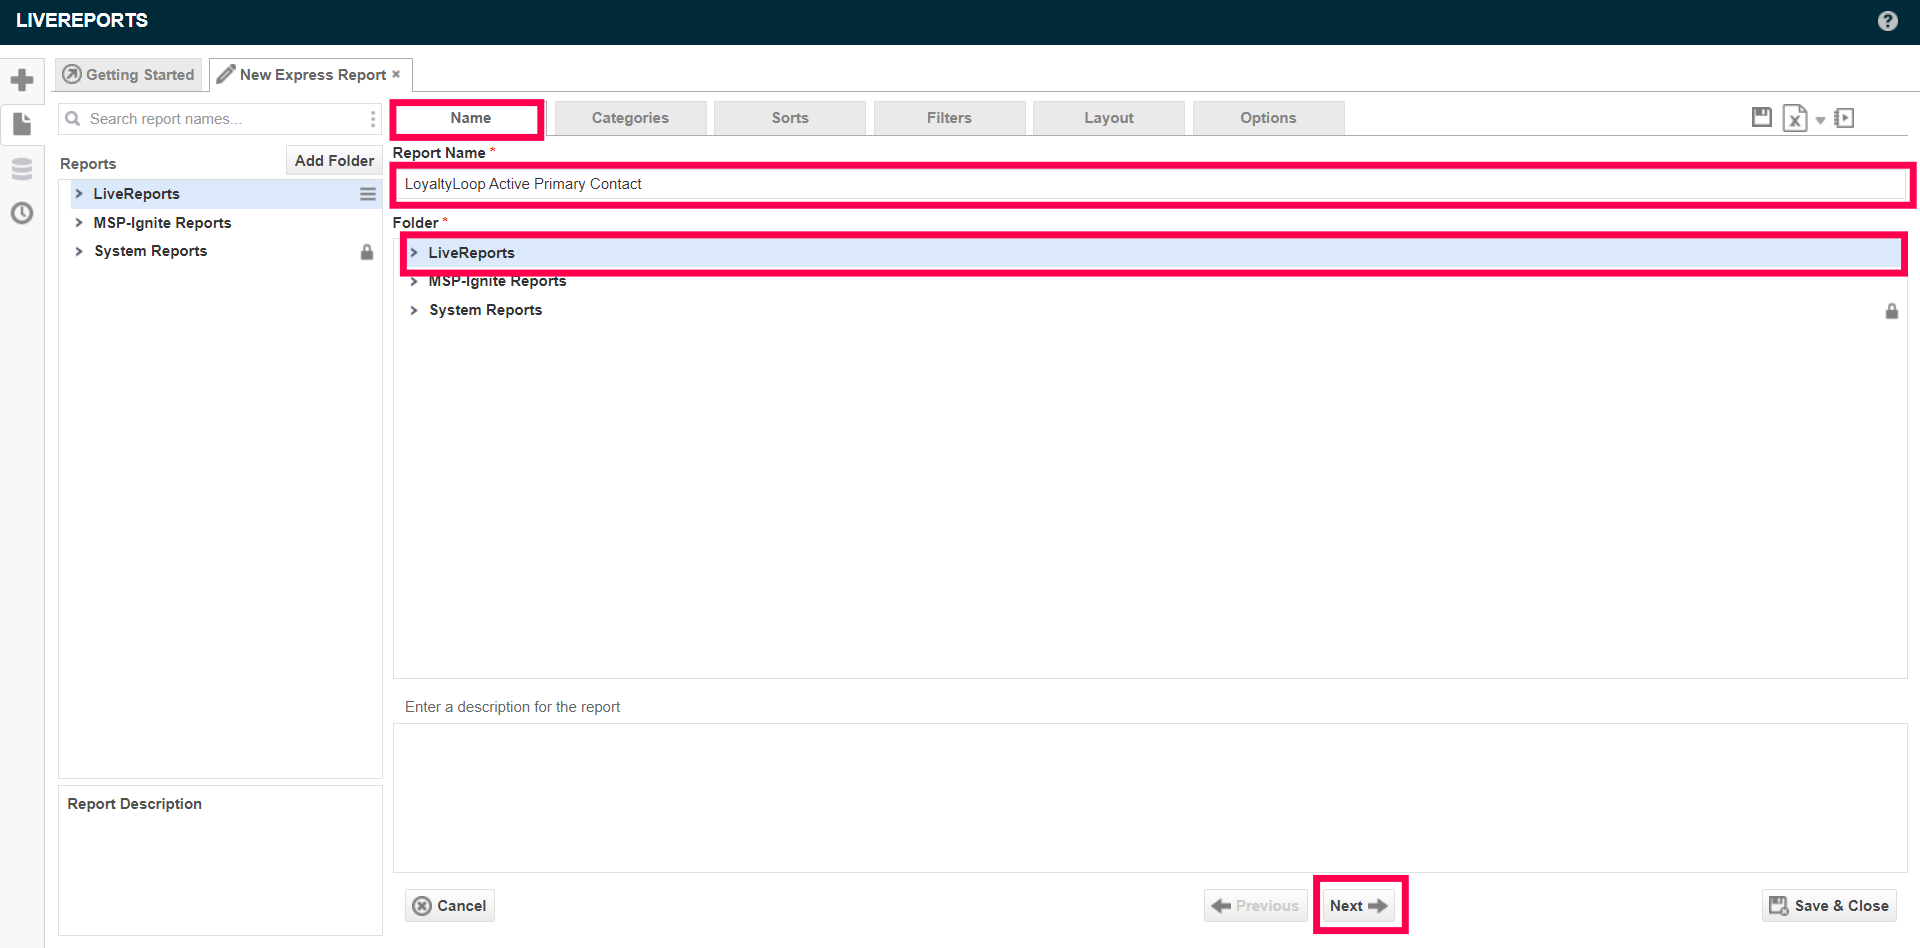
- Name your report “LoyaltyLoop Active Primary Contact” and save your report as a “LiveReport”. Report must be saved as a LiveReport. LiveReports can be scheduled to run automatically.
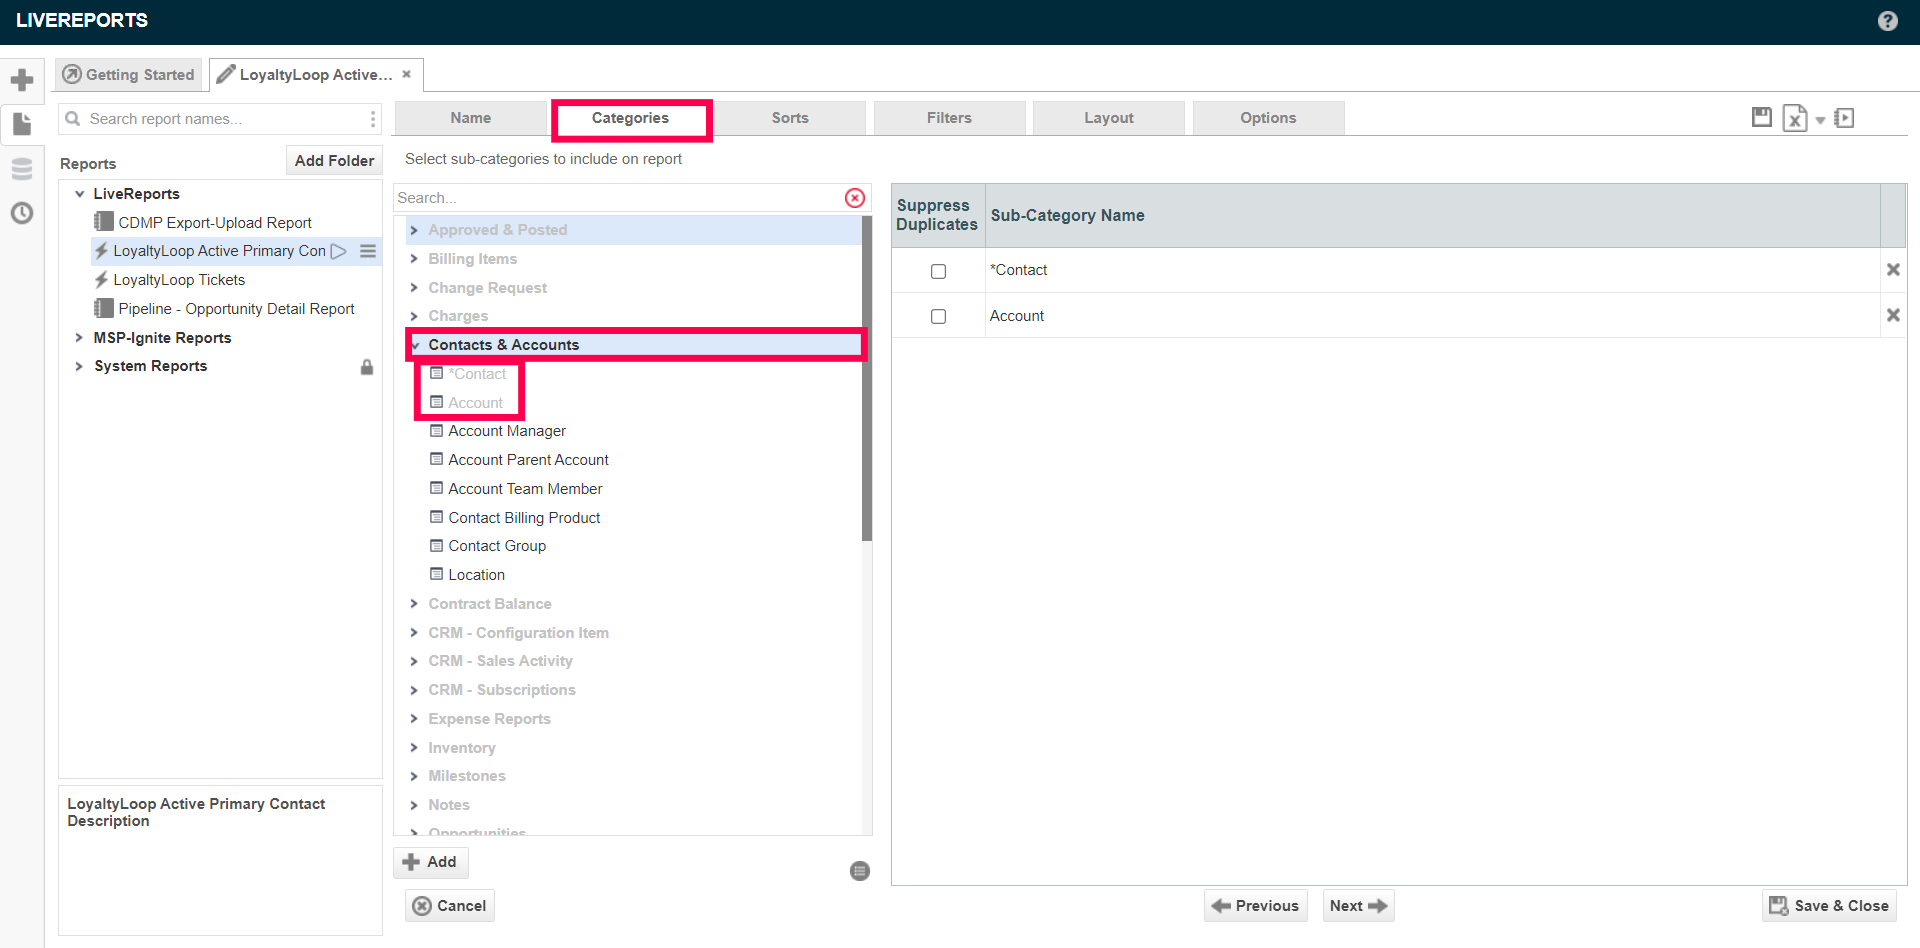
- Next, select Categories from the top menu. For this report from the Contacts & Accounts category select *Contact and Account
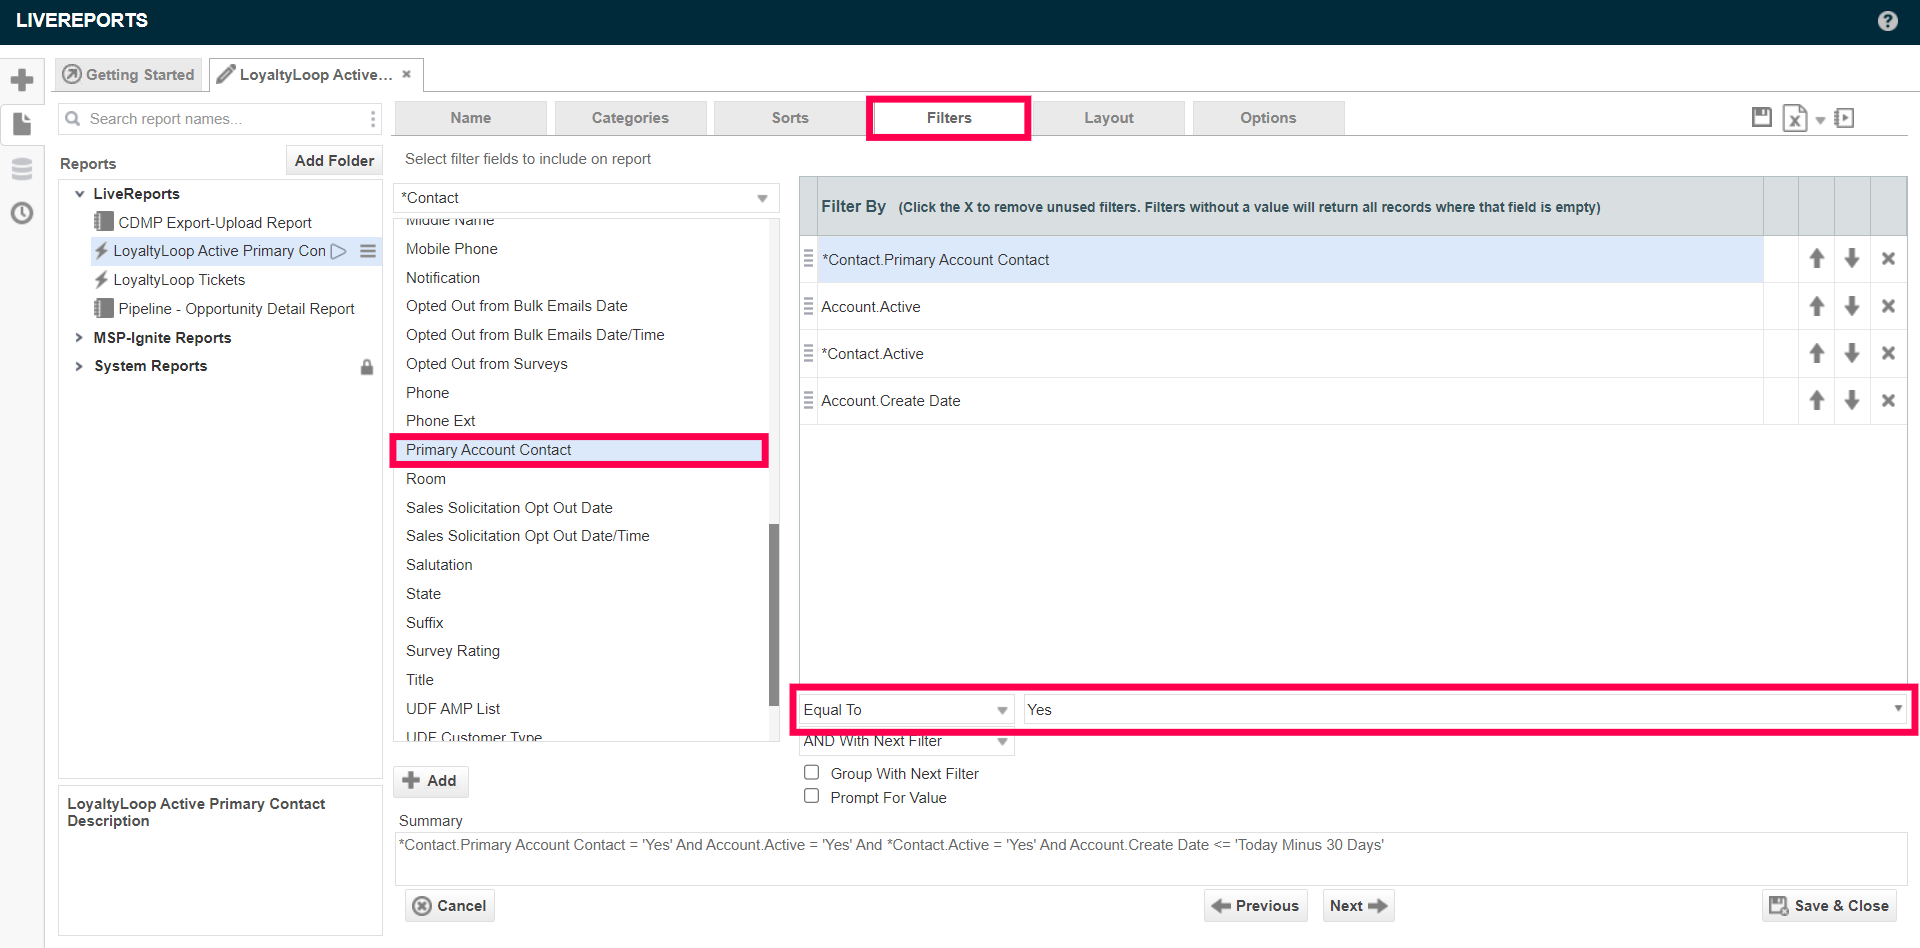
- Next, select Filters from the top menu. From the dropdown menu select *Contact -Primary Account Contact and set Equal To Yes.
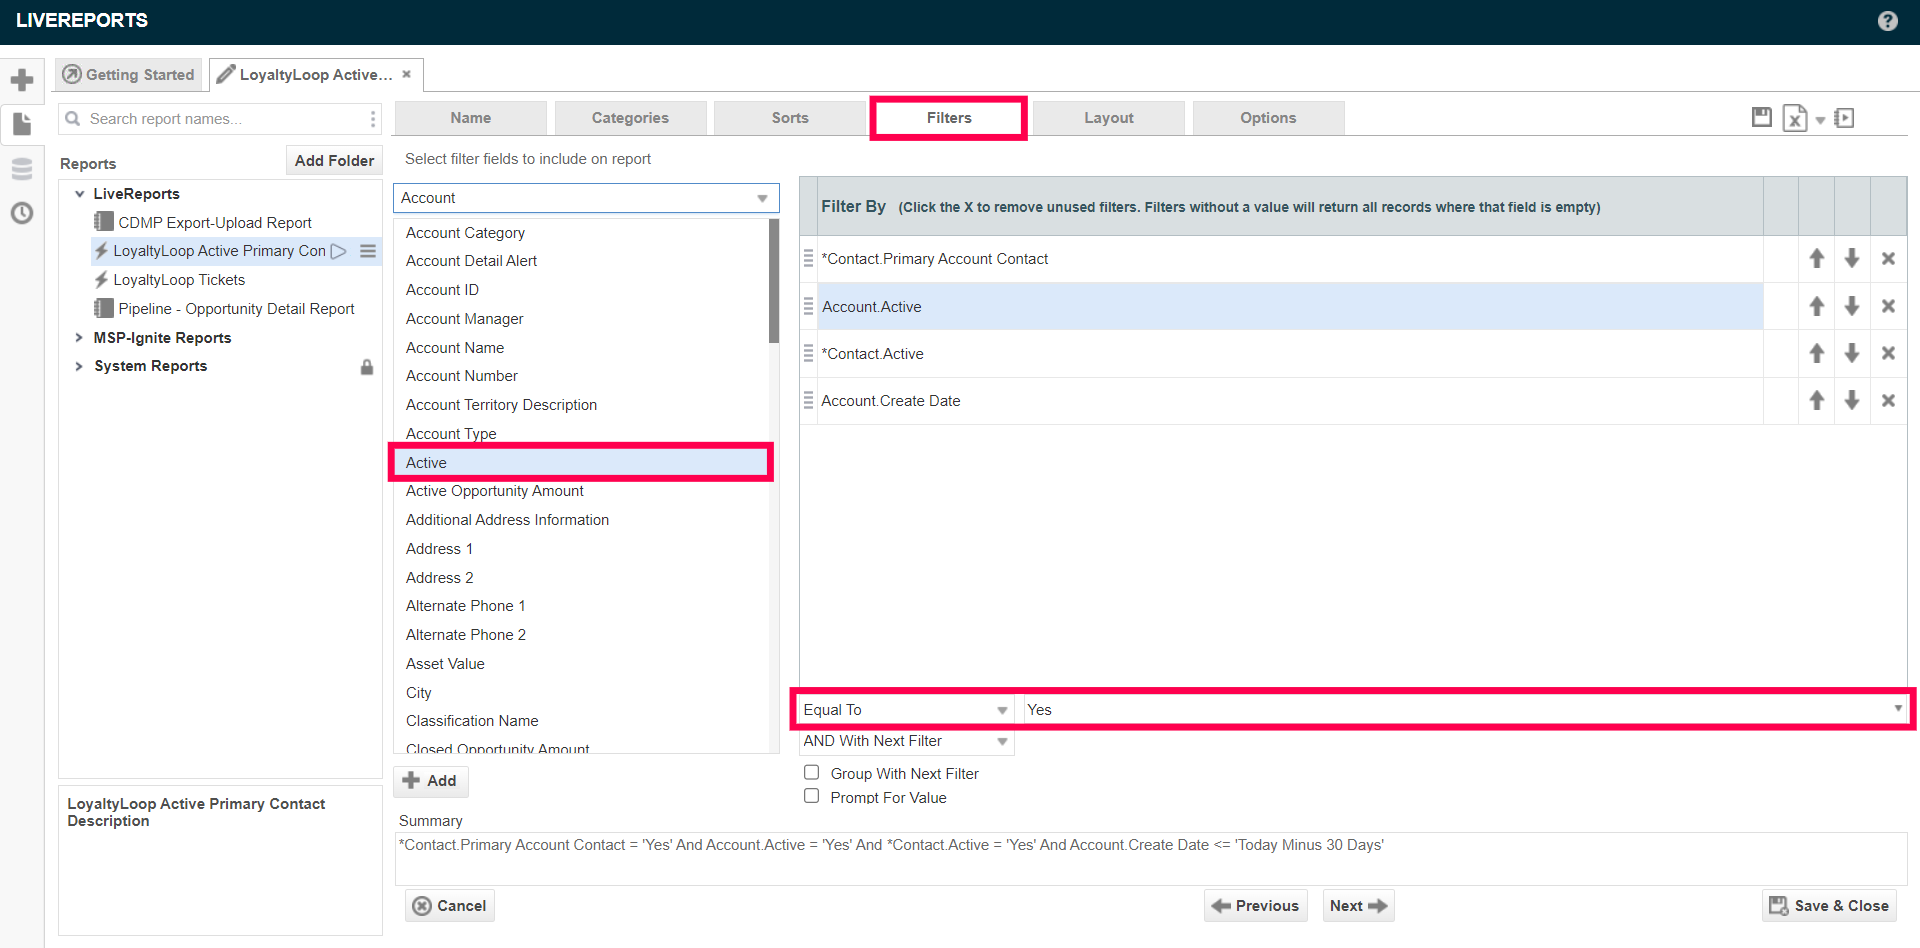
- Next, from the dropdown menu select Account - Active and set Equal To Yes
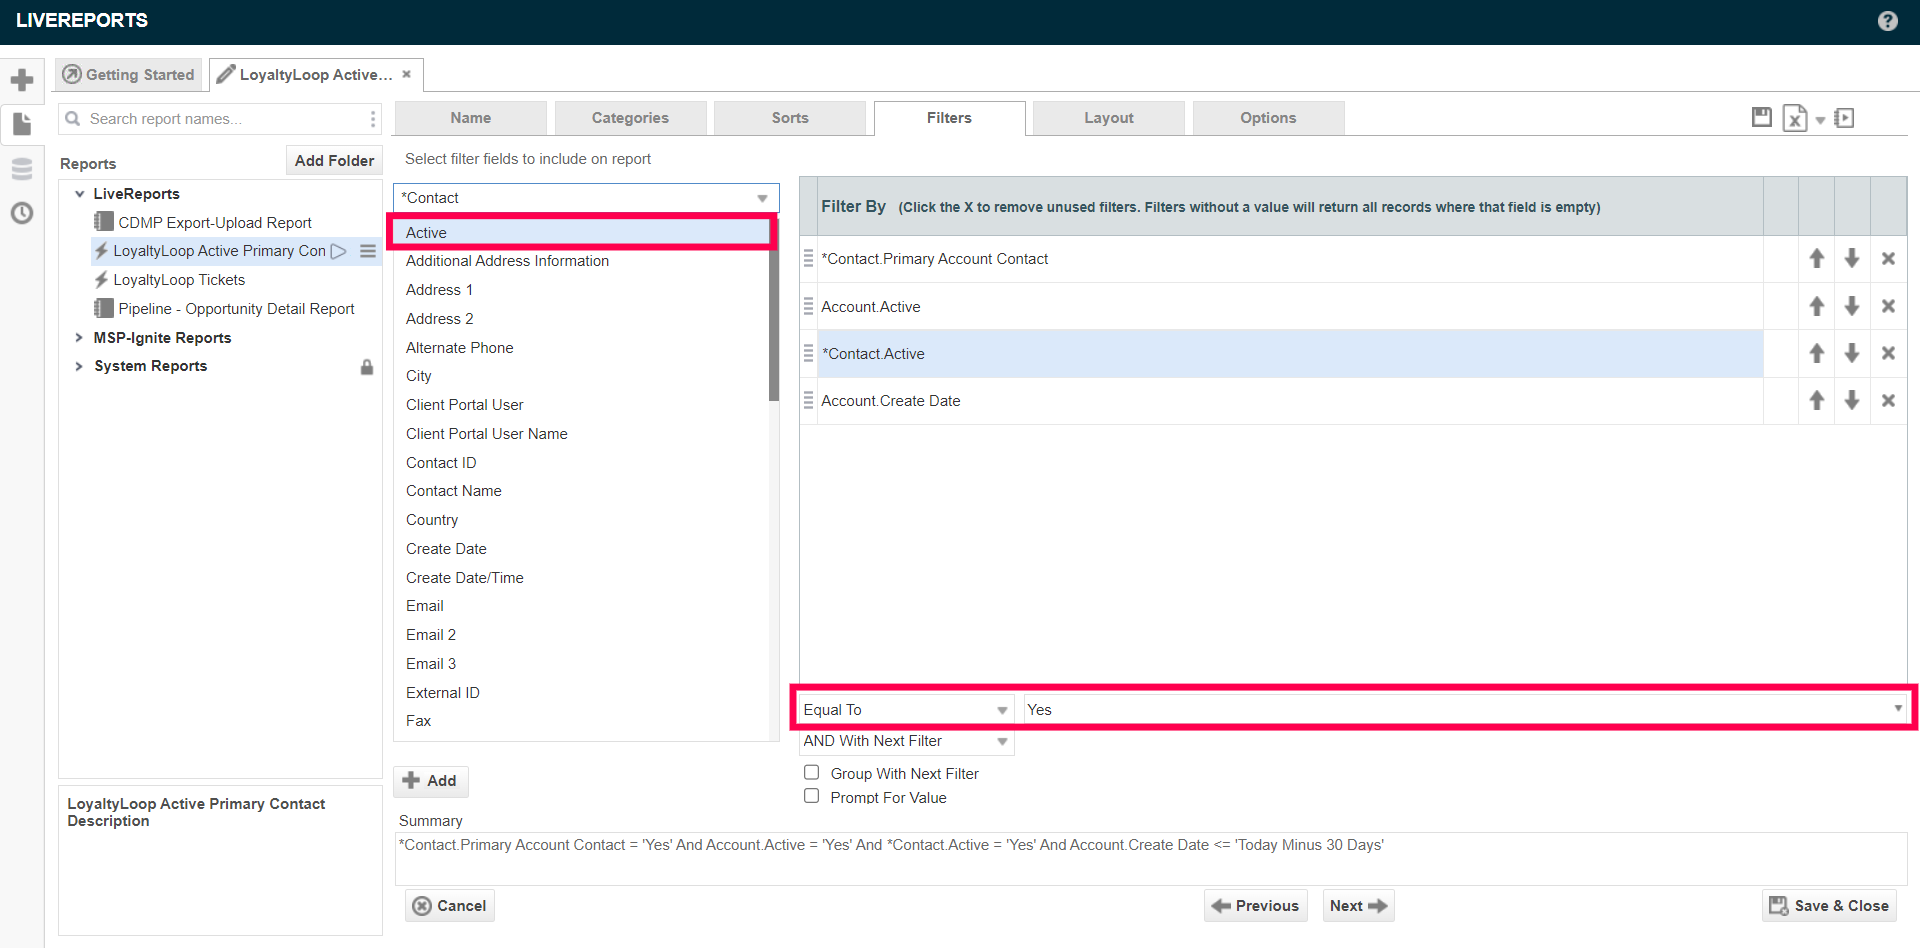
- Next from the dropdown menu select *Contact - Active and set Equal To Yes
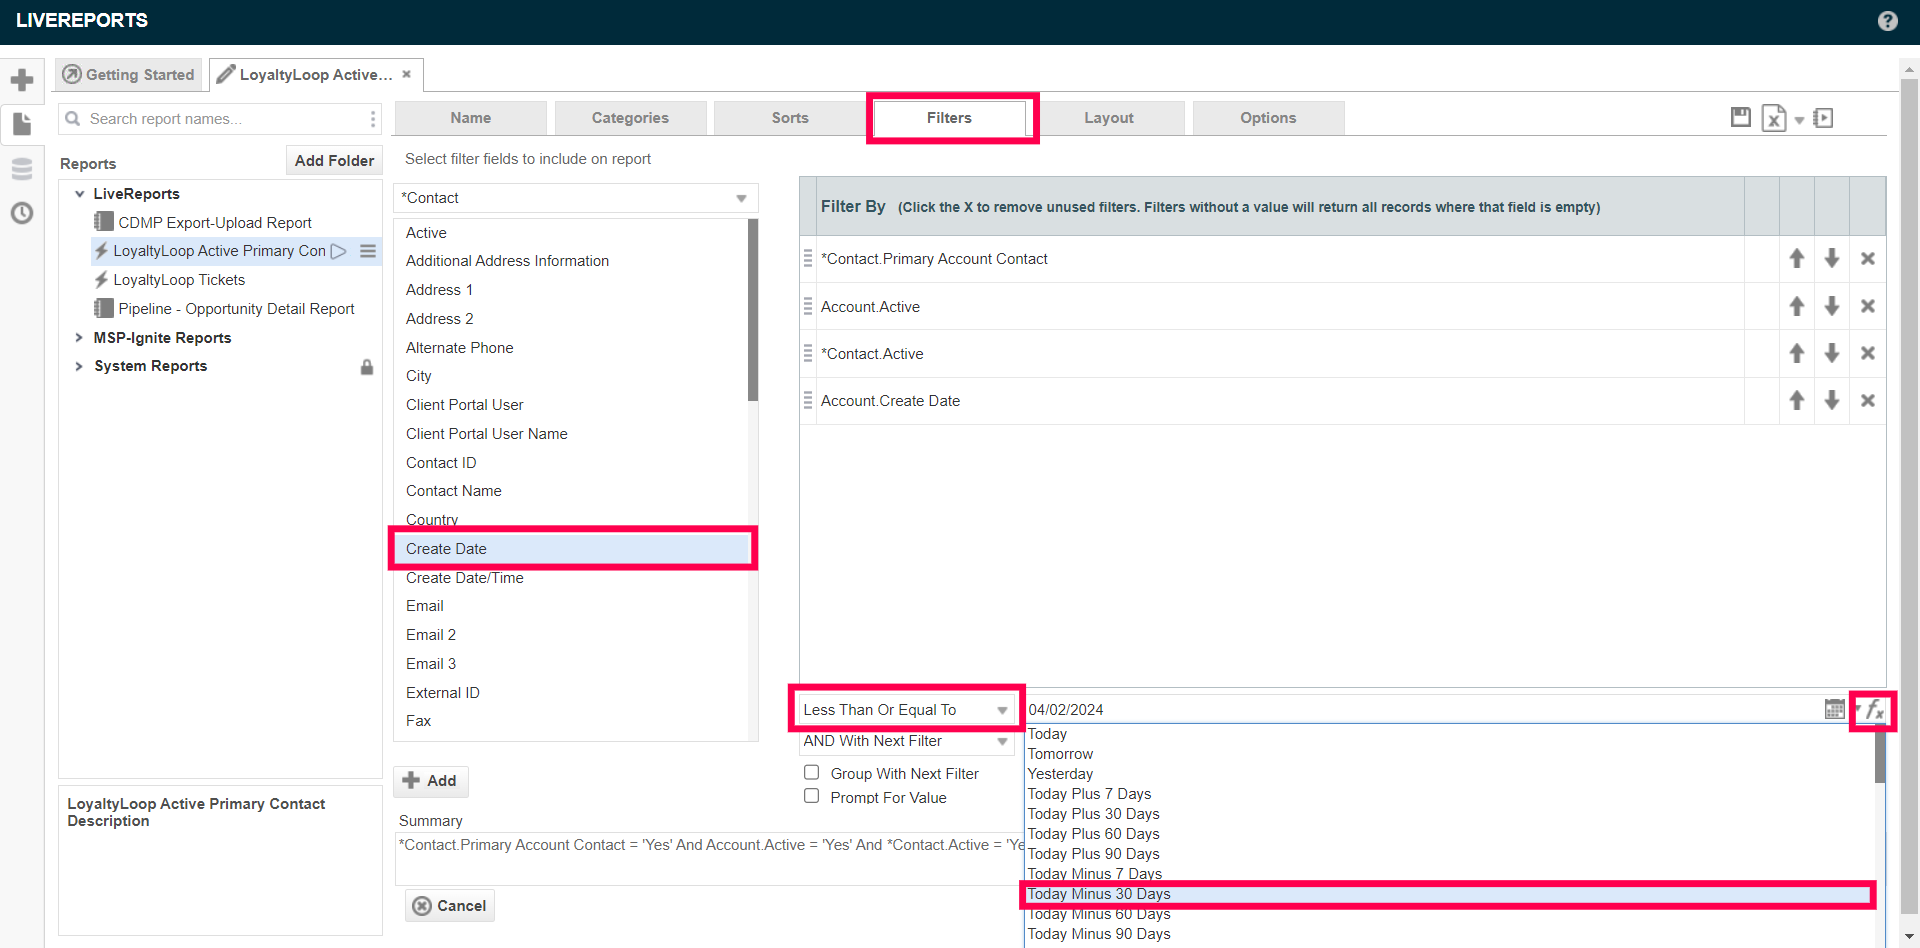
- Next, from the dropdown menu select *Contact - Create Date and set Less Than or Equal To Today Minus 30, 60, or 90 days (using the fx button). This means a contact will not be eligible to receive their first LoyaltyLoop survey until they have been a customer for at least 30 (60, or 90) days. If your business practices differ, you can set this date range however you please.
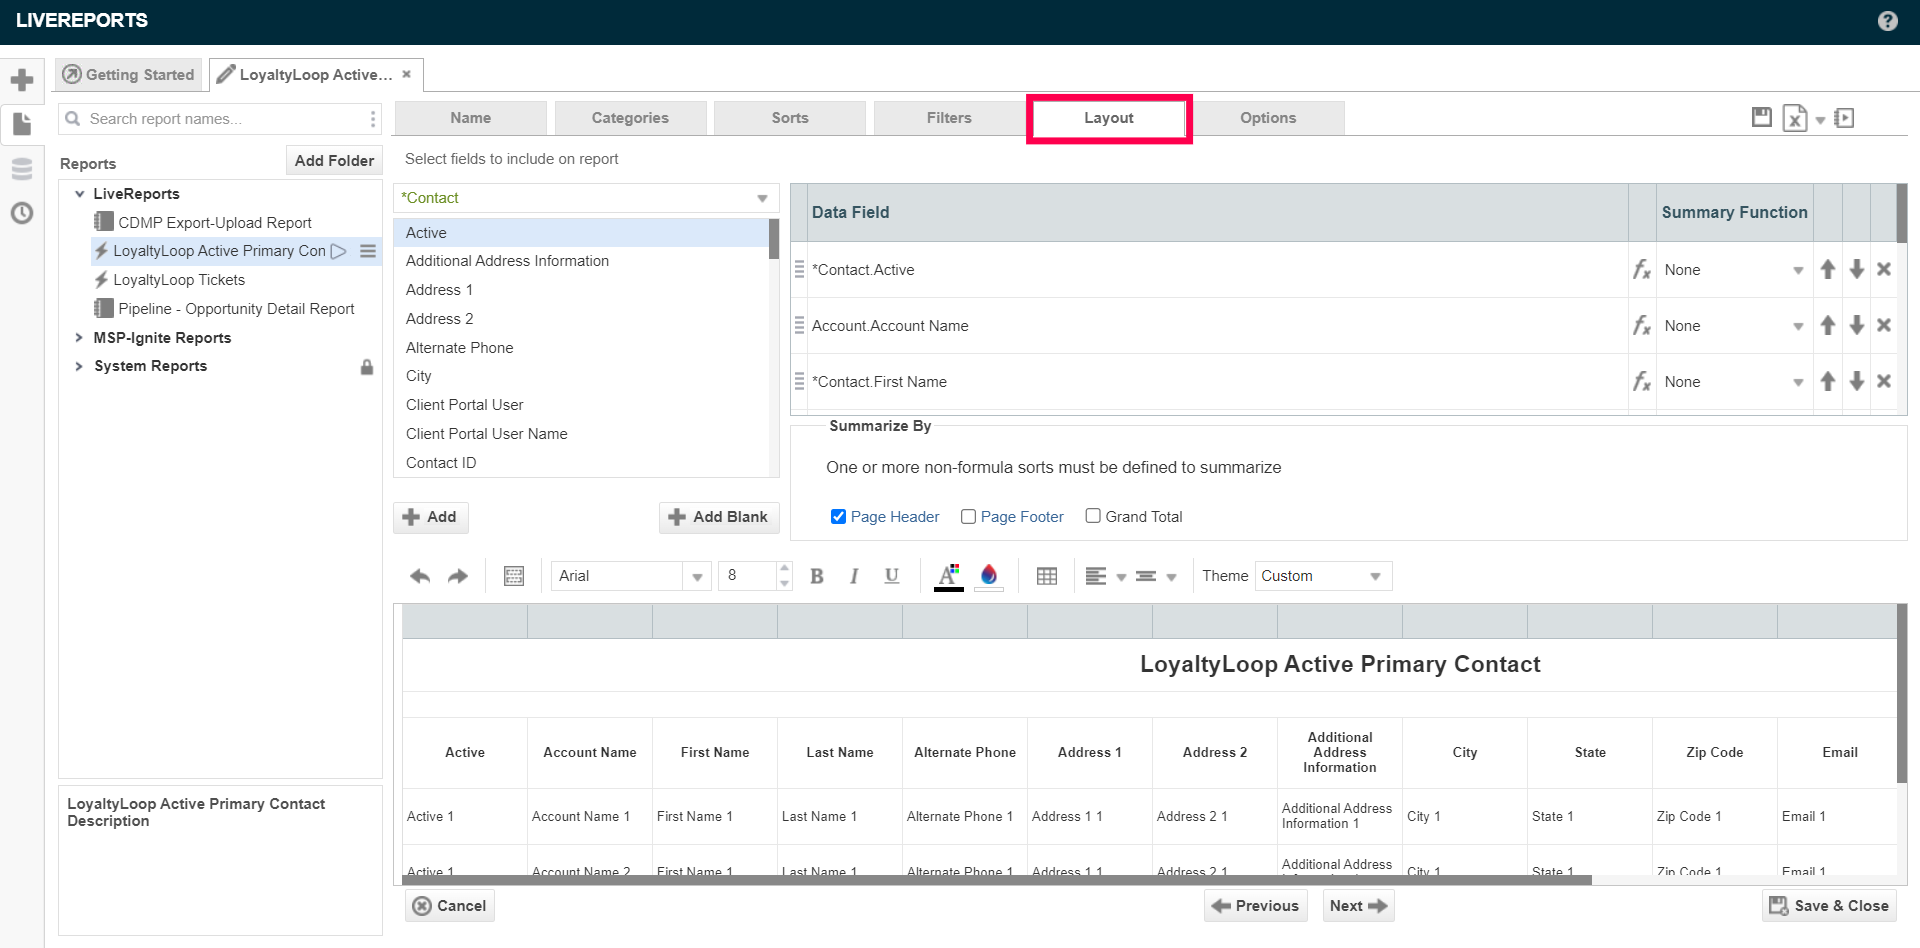
- Next, from the top menu select Layout. Now configure the data fields that will be included in the report. Recommended fields include:
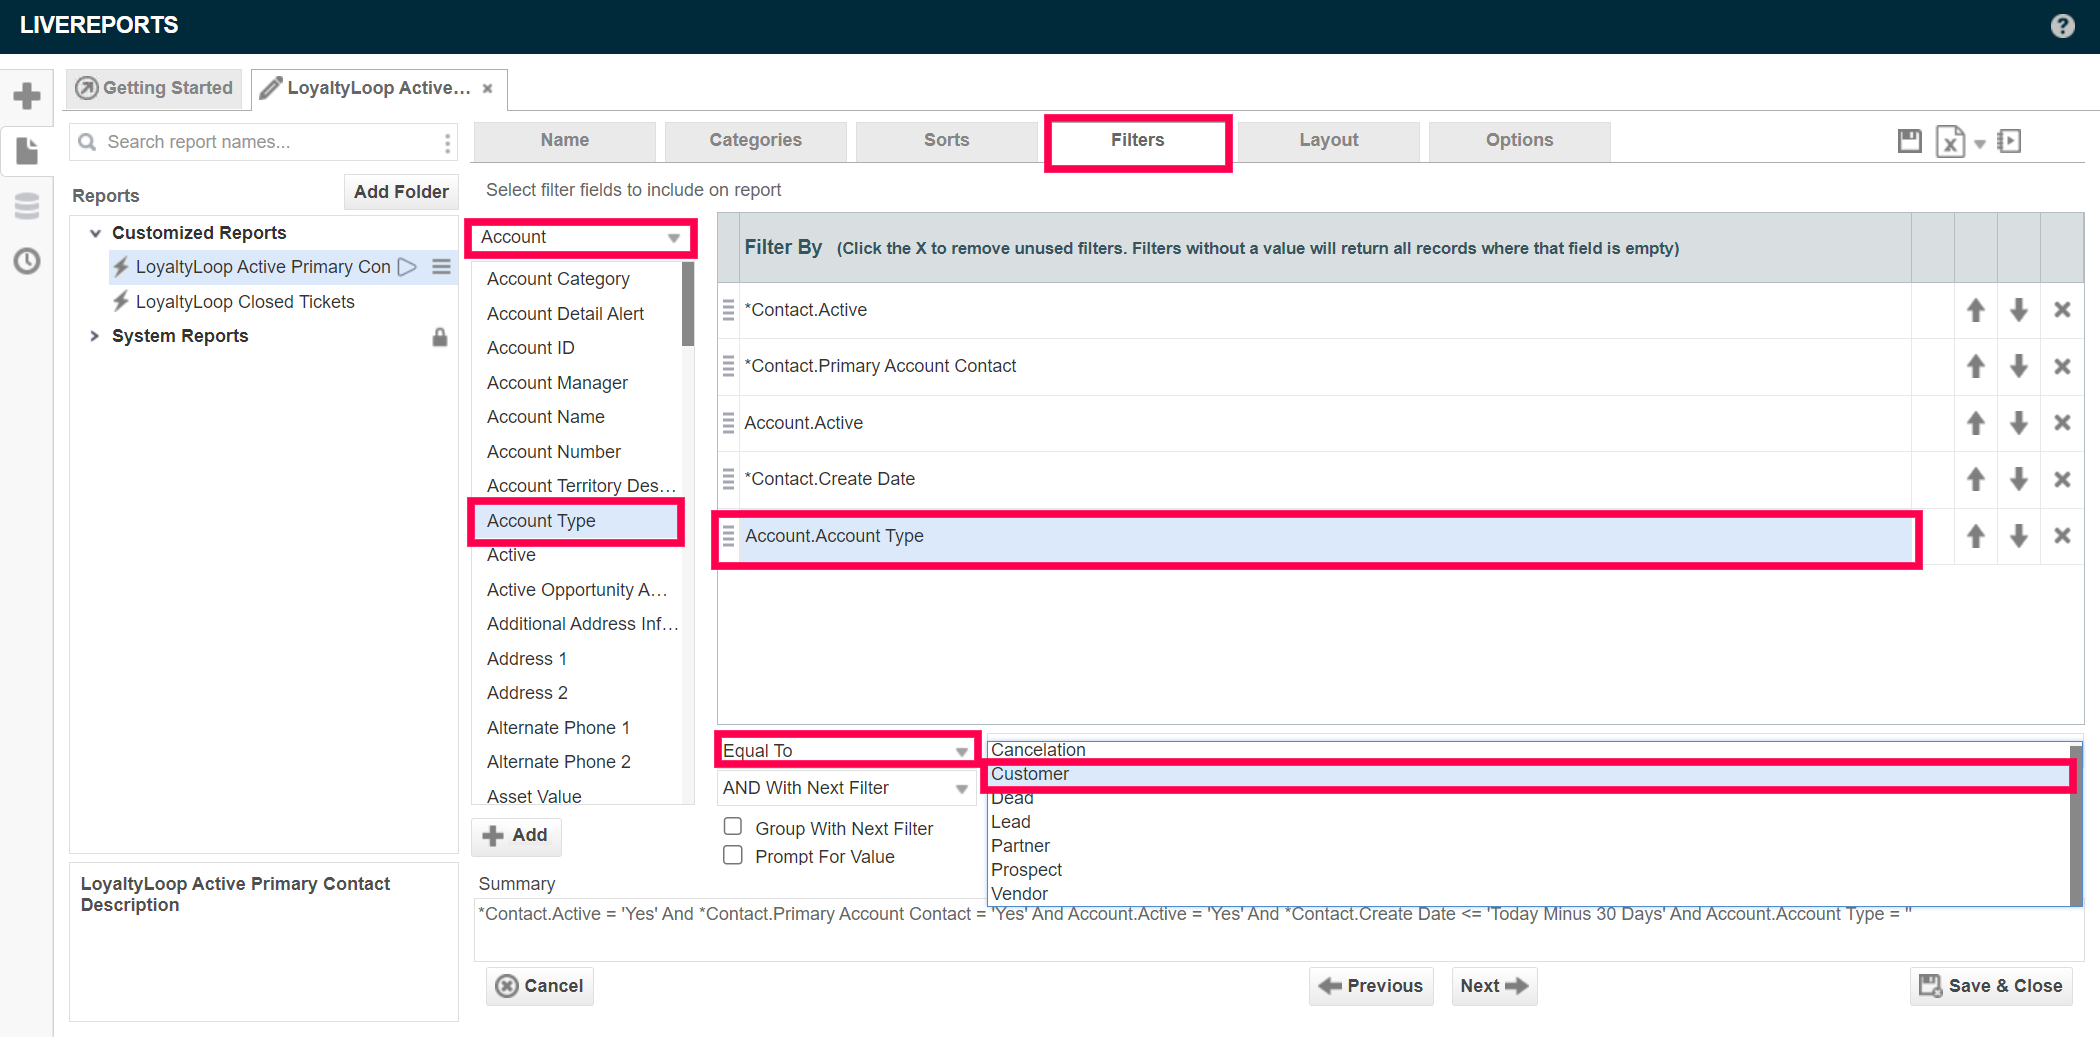
If your AutoTask includes Account Types other than closed customers, we recommend adding an Account Type Filter to your report. From the dropdown menu select Account Type and set Equal to Customer. Add filters to include or exclude other Account Types as appropriate for your business.
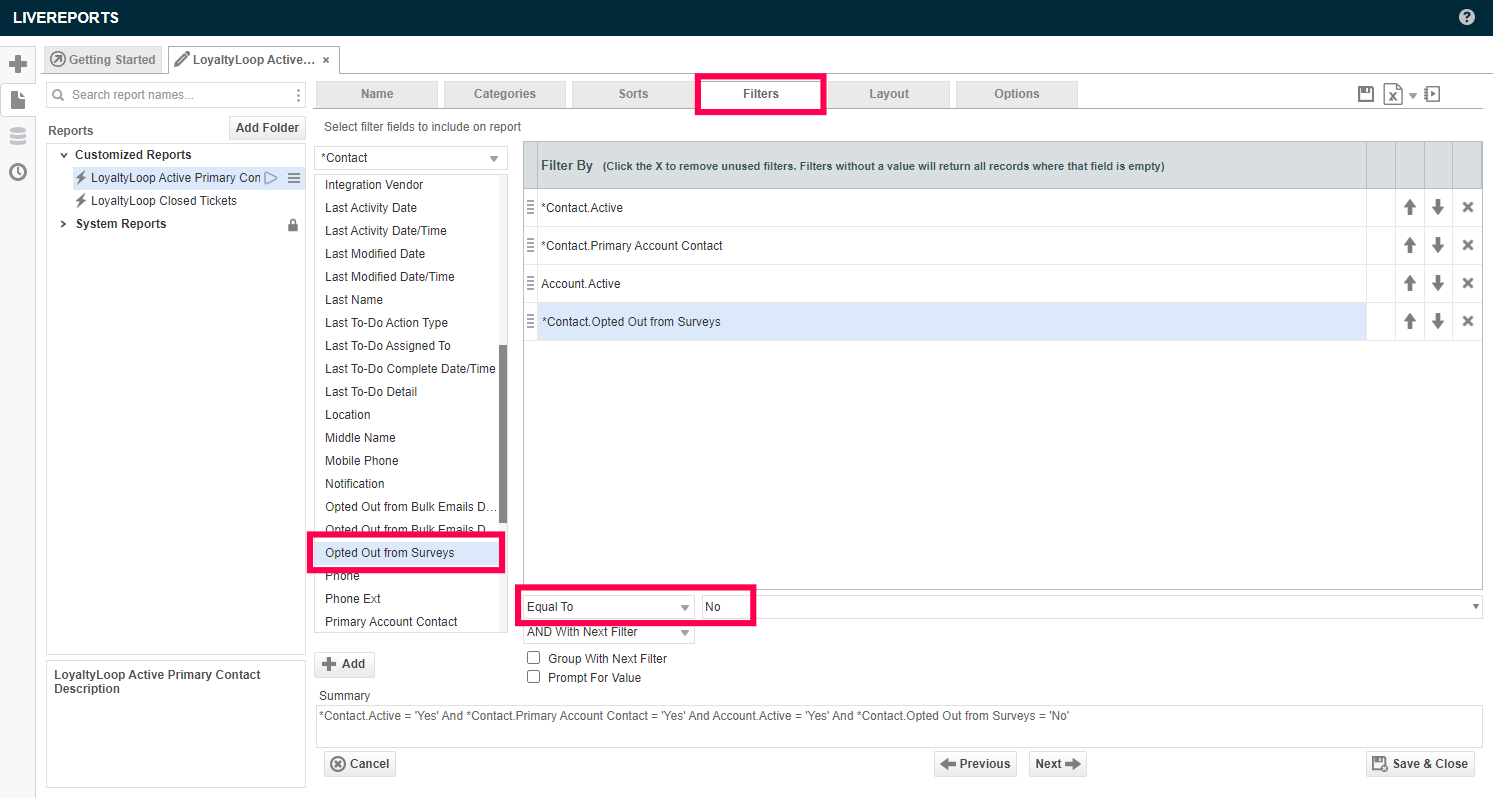
If you use the Contact flag Opted out from surveys, add that Filter to your report, and set the value to Equal to No.
- Contact.Email (Required)
- Contact.First Name
- Contact.Last Name
- Account.Account Name
- Contact.Address 1
- Contact.Address 2
- Contact.City
- Contact.State
- Contact.Phone Number
- Contact.ZipCode
- Account.Account Manager
- Account.Create Date
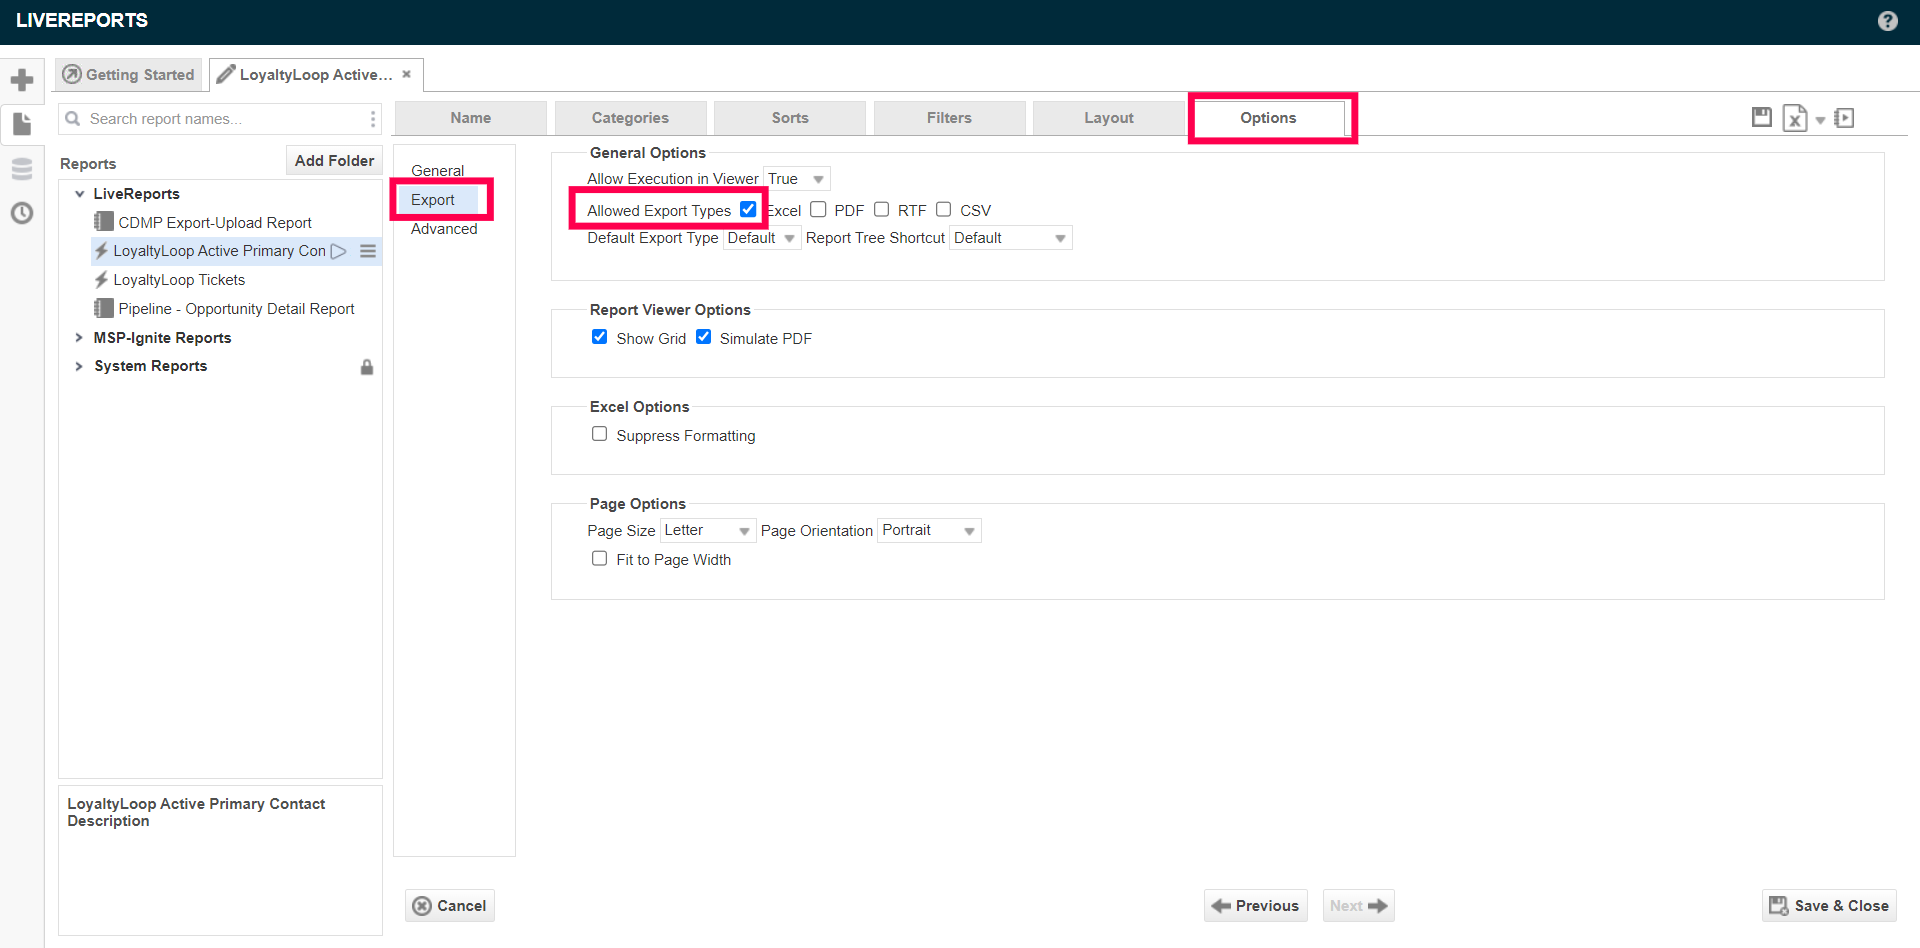
- Next, from the top menu select Options. Set the Allowed Export Types to Excel and select “Save & Close” button in the bottom right corner of the window.
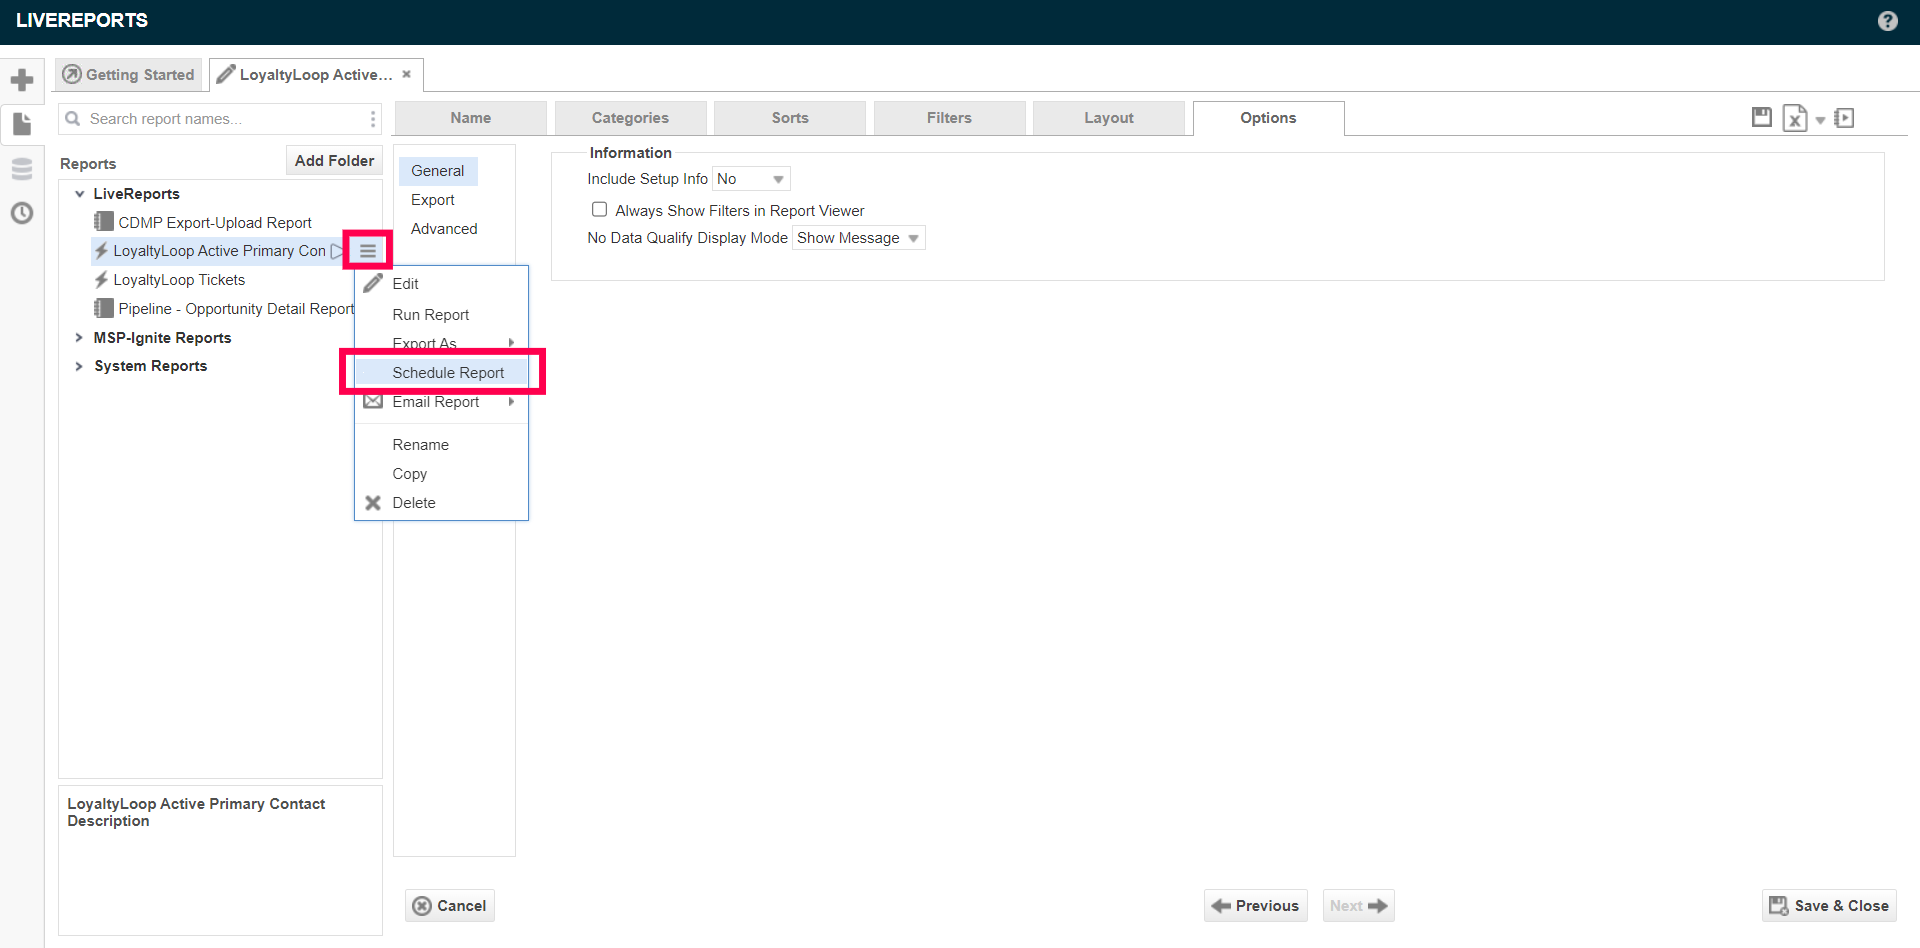
- Next, to schedule your report select the burger menu from the left window next to the report saved as LoyaltyLoop Active Primary Contact Report. From there, select Schedule Report.
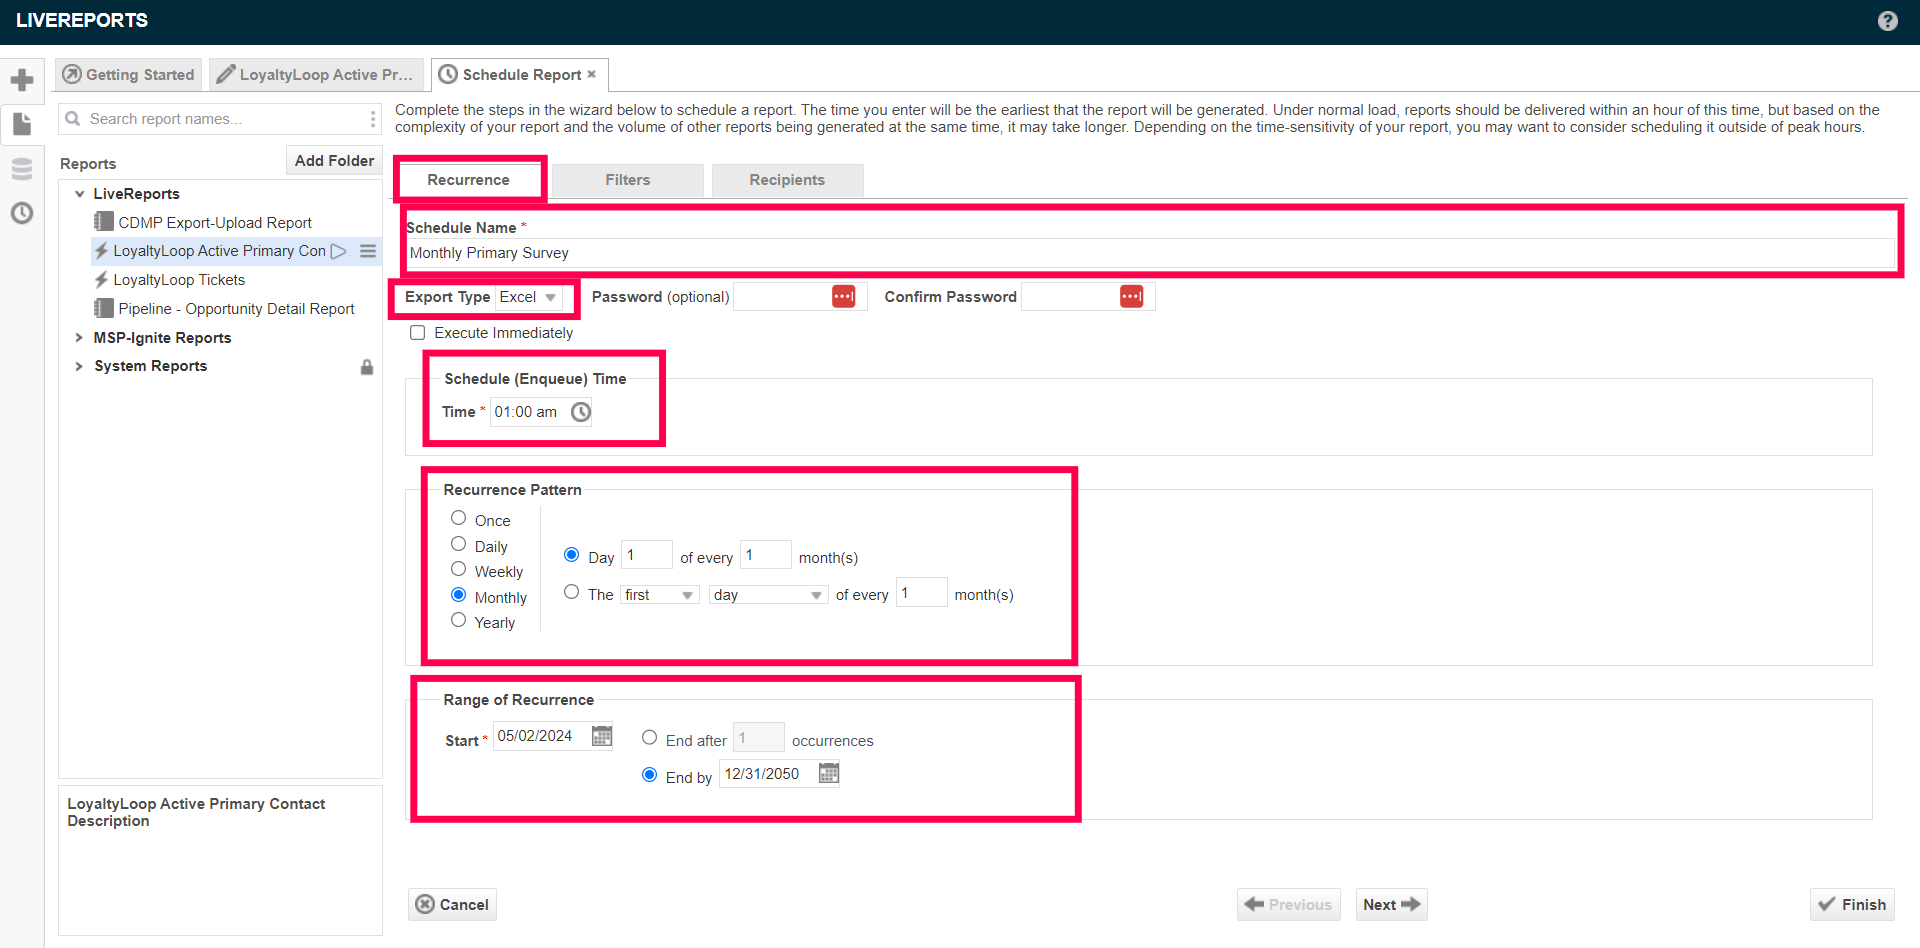
- Next, configure the Recurrence. Name the Schedule and set Export Type Excel. Schedule Time (recommended 1:00 am) and the Recurrence Pattern (recommended the first day of every 1 month(s) with an end date of 12/31/2050)
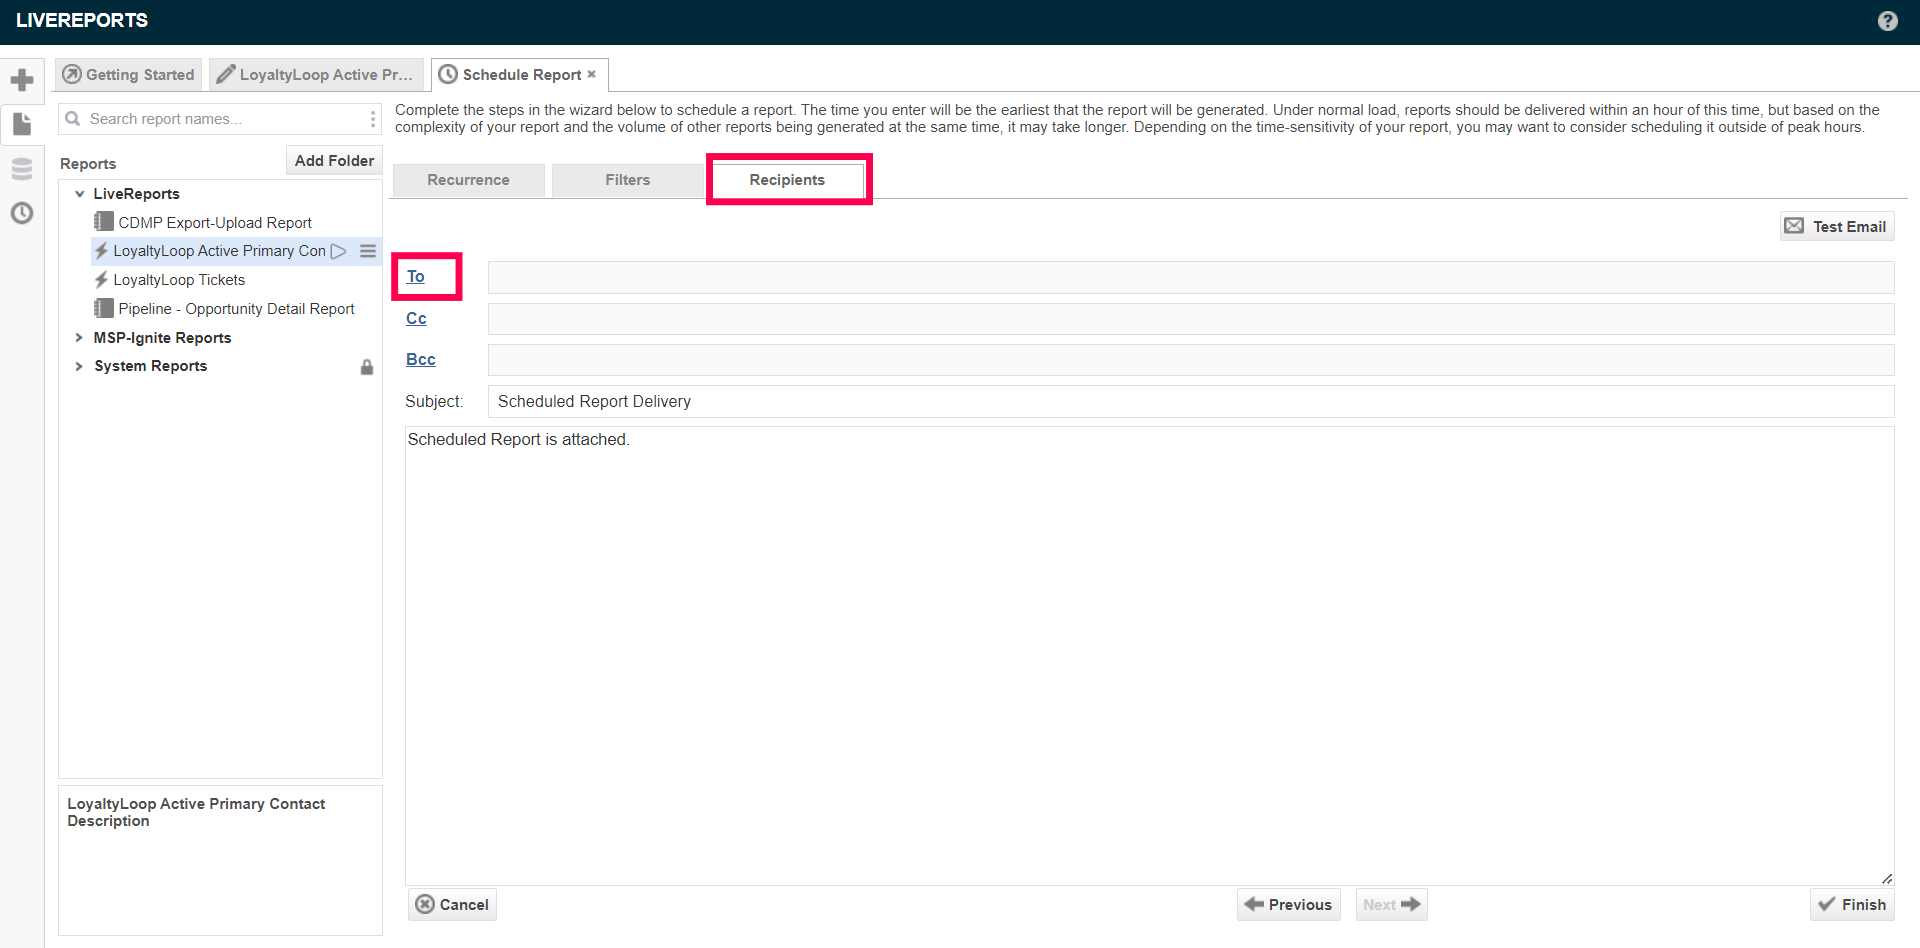
- Next, select Recipients and select To:
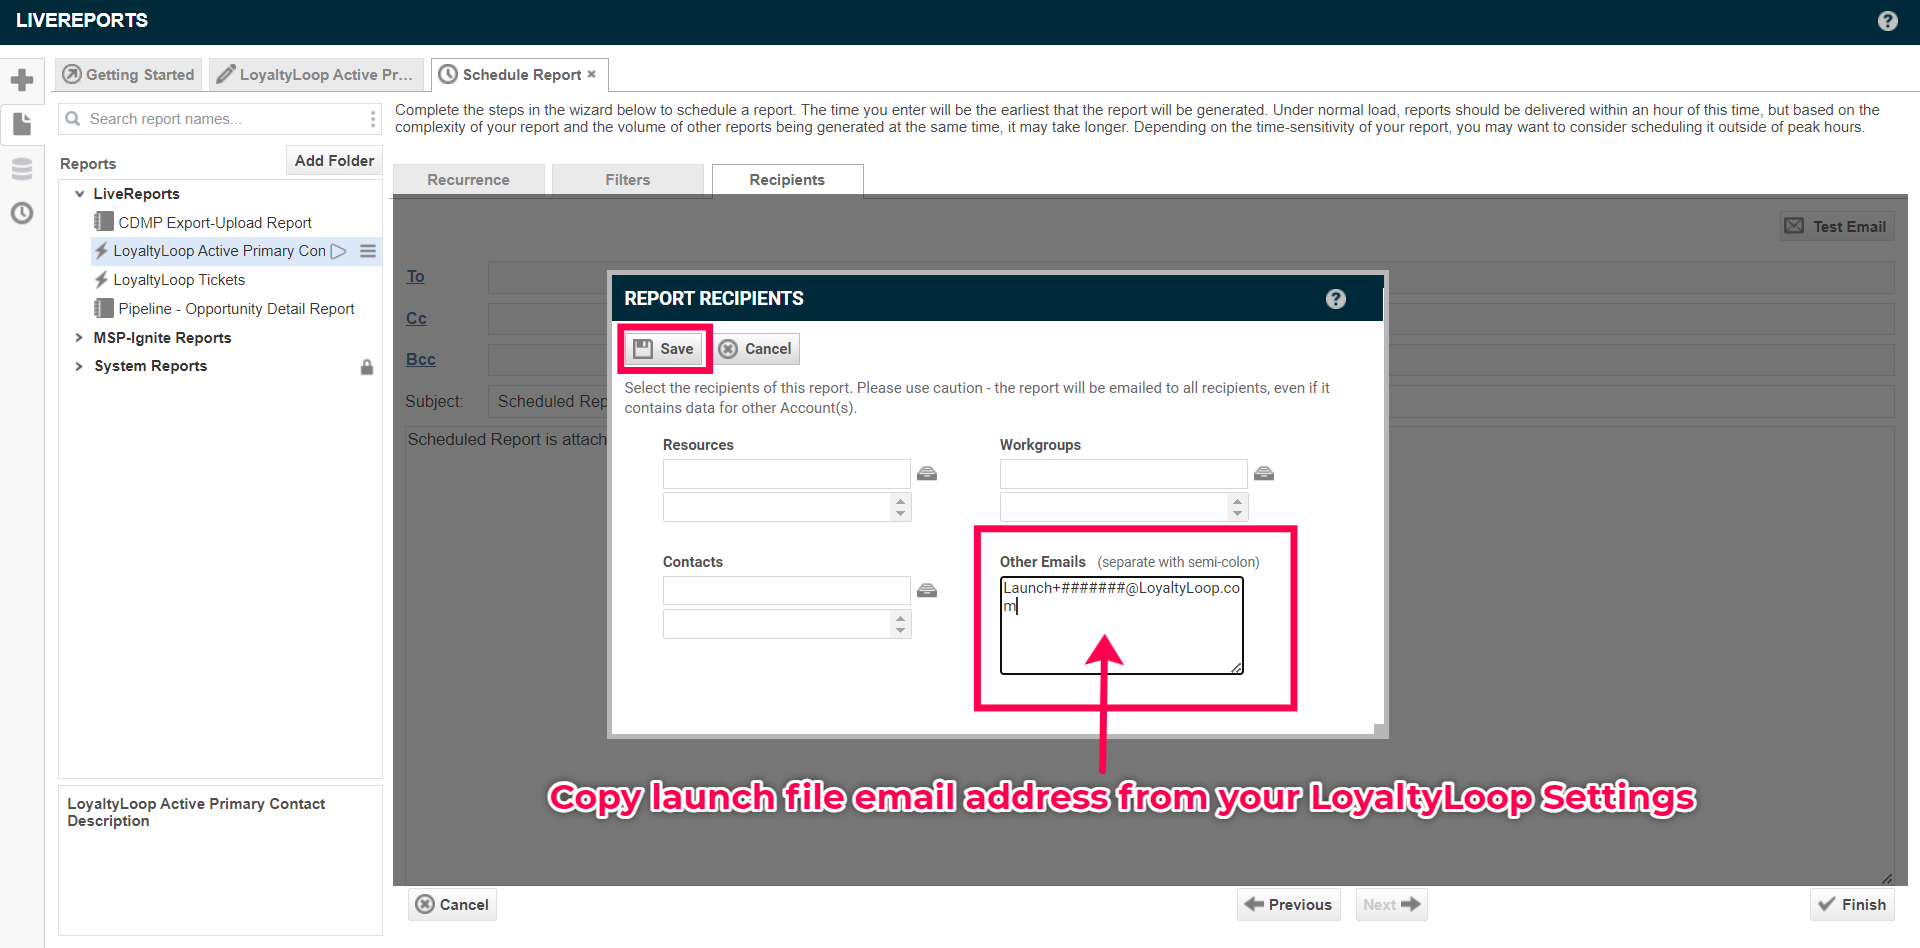
- Next, copy your Launch File Email Address from your LoyaltyLoop Primary Contact survey.
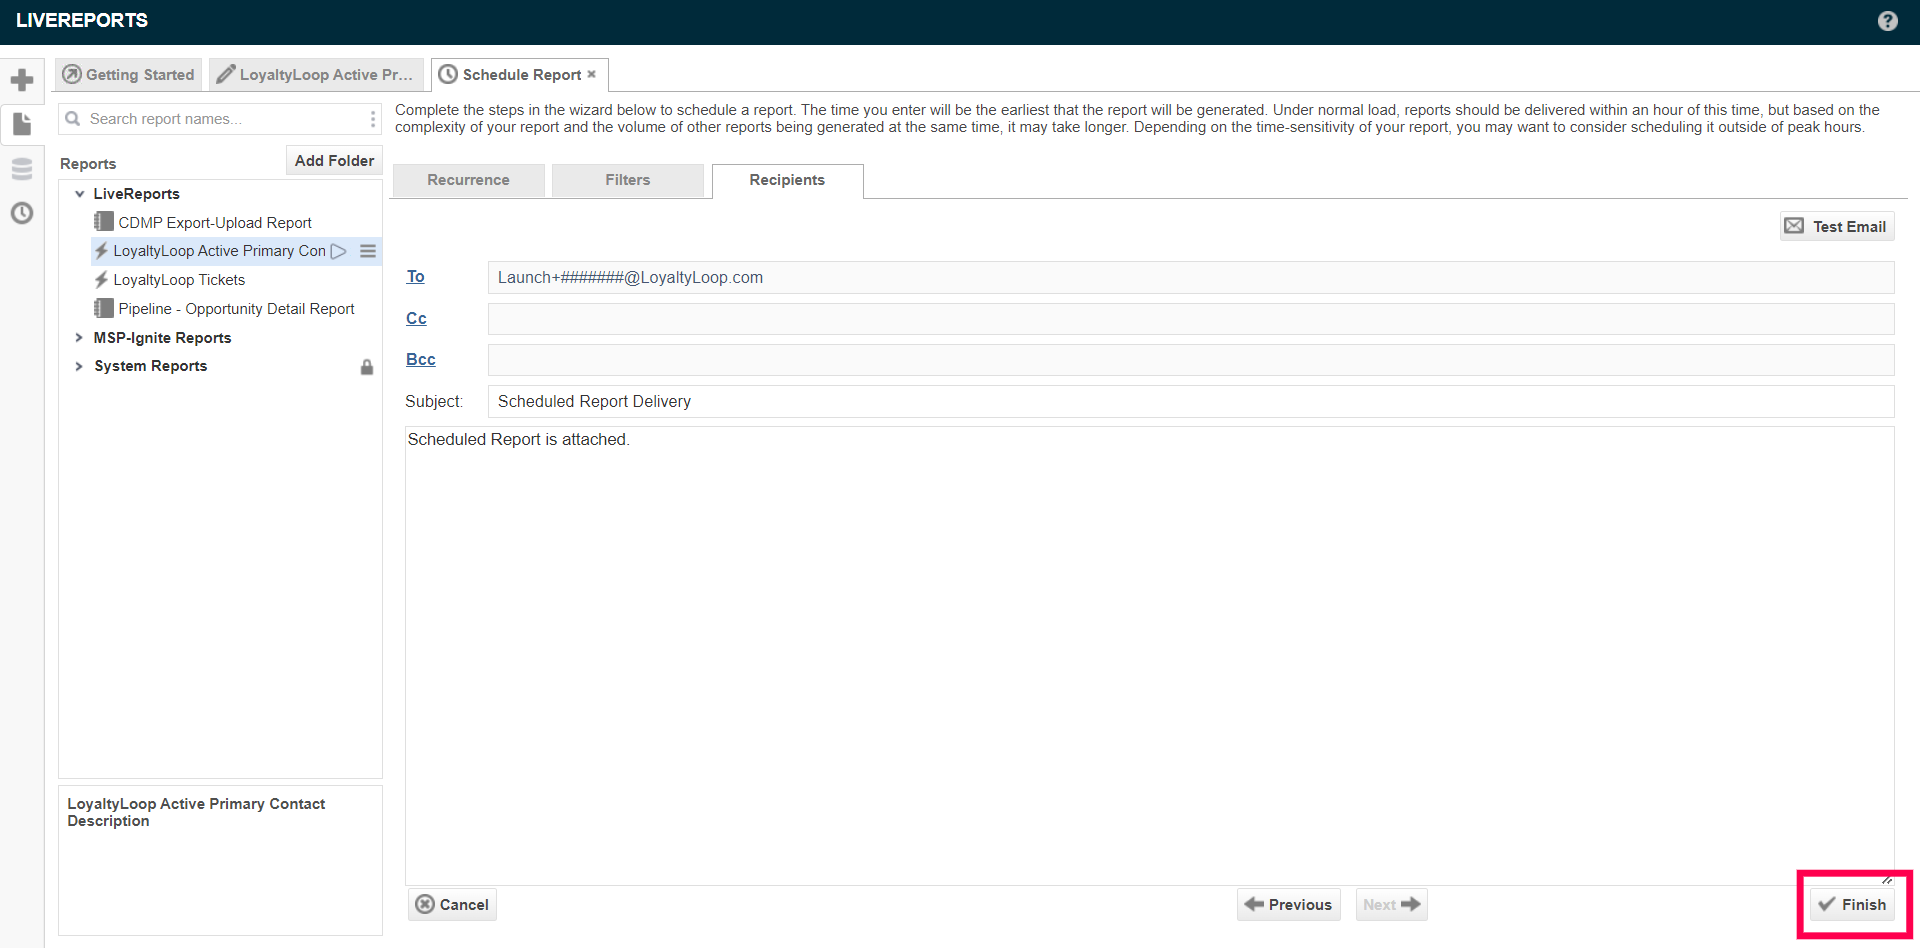
- Select Finish
How to add User-Defined Fields to Accounts
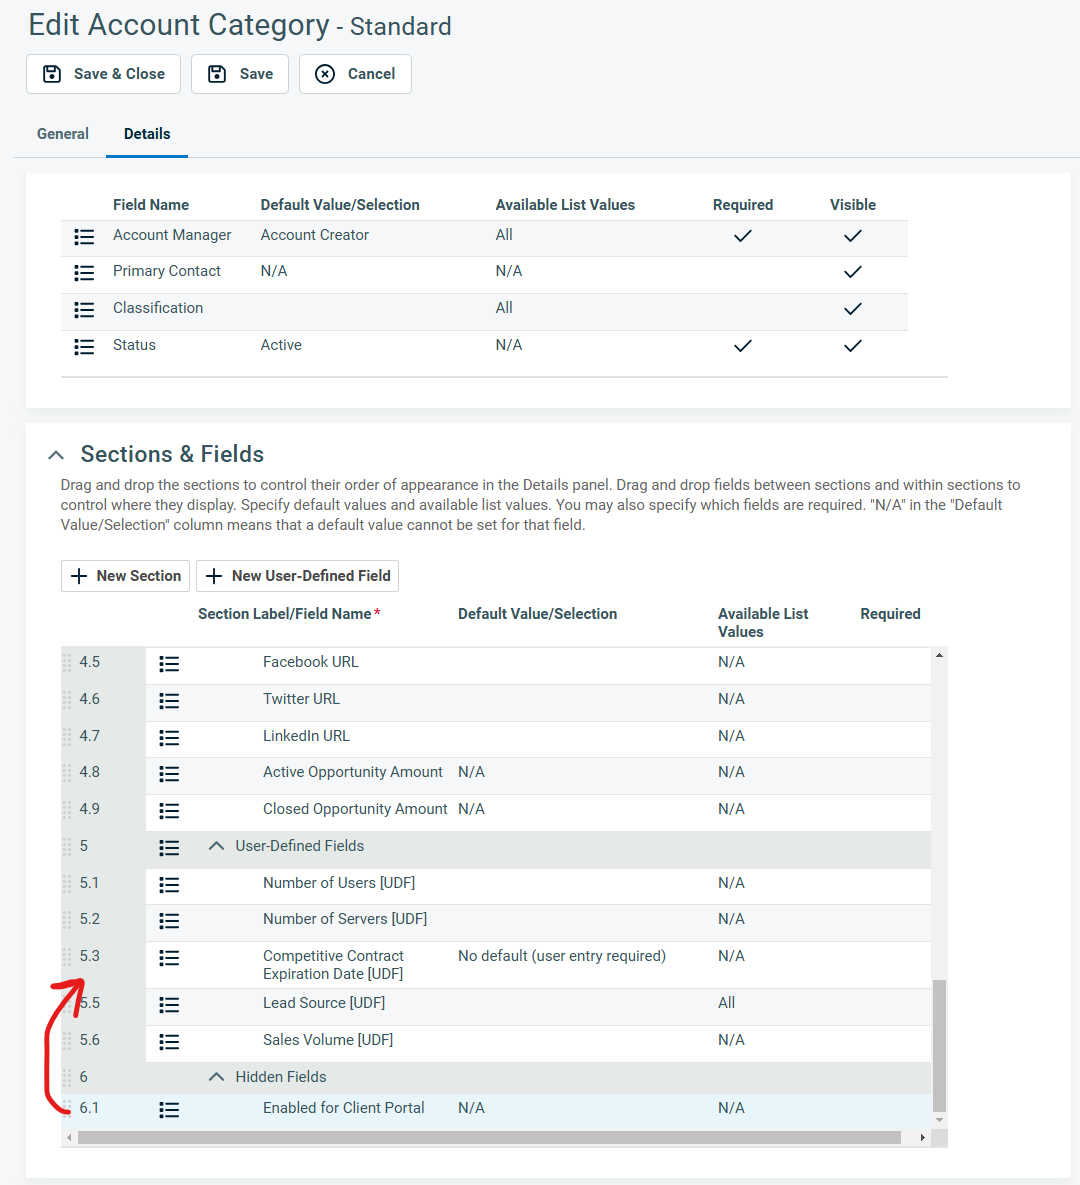
Once you've added User-Defined Fields to the Accounts, you must then add the User-Defined Fields to your Account Category. Here's how:
- Go to Admin > Features & Settings > Accounts and Contacts > Account Categories > select EDIT for the Standard (default) category.
- Next, go to the Details tab and scroll down to the Sections & Fields section to make your new User-Defined Fields visible.
- Use your cursor to grab the data fields to place them anywhere you want in your Sections & Fields section.
- Be sure to Save & Close when you finish.
- Reach out to your Franchise Support team if you have any questions or need any help.
How to configure an automated report in Autotask for your Closed Ticket Contacts
- First Navigate to Main Menu from the burger bar in the top left corner, highlight reports and select LiveReports Designer
- Next, select the “+” icon to create a new report
- Select Express Report
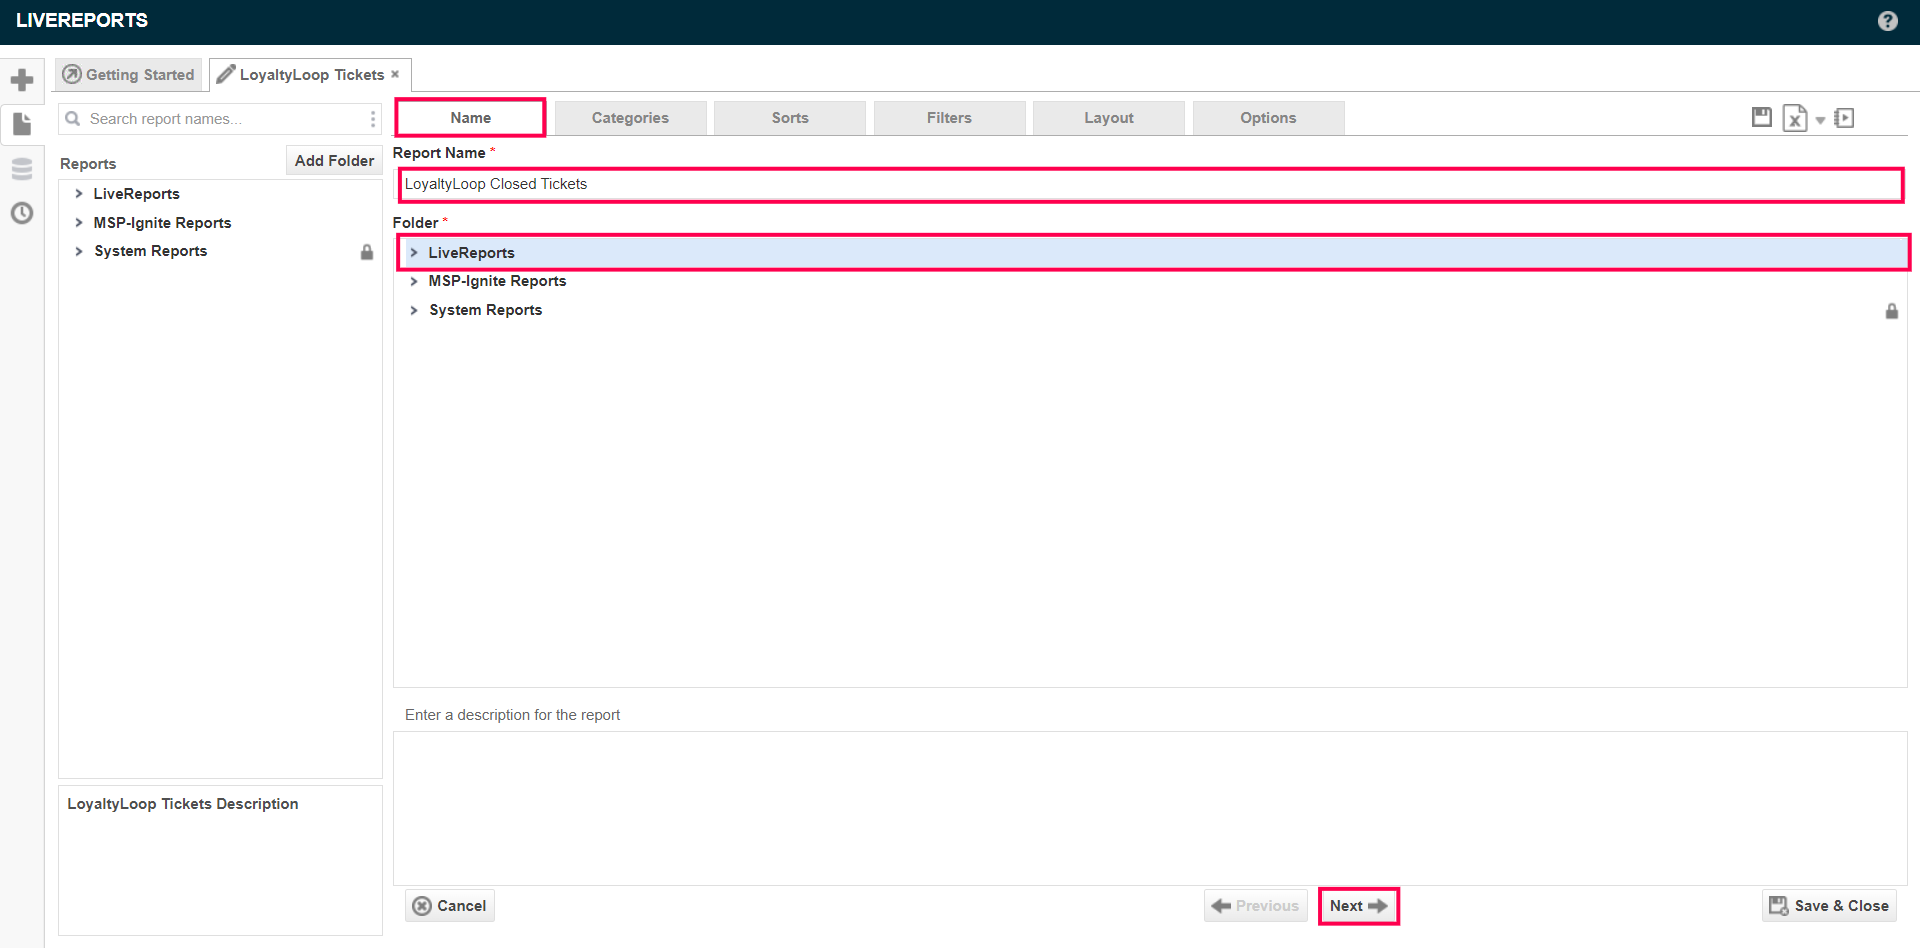
- Name your report “LoyaltyLoop Closed Tickets” and save your report as a “LiveReport”. Report must be saved as a LiveReport. LiveReports can be scheduled to run automatically.
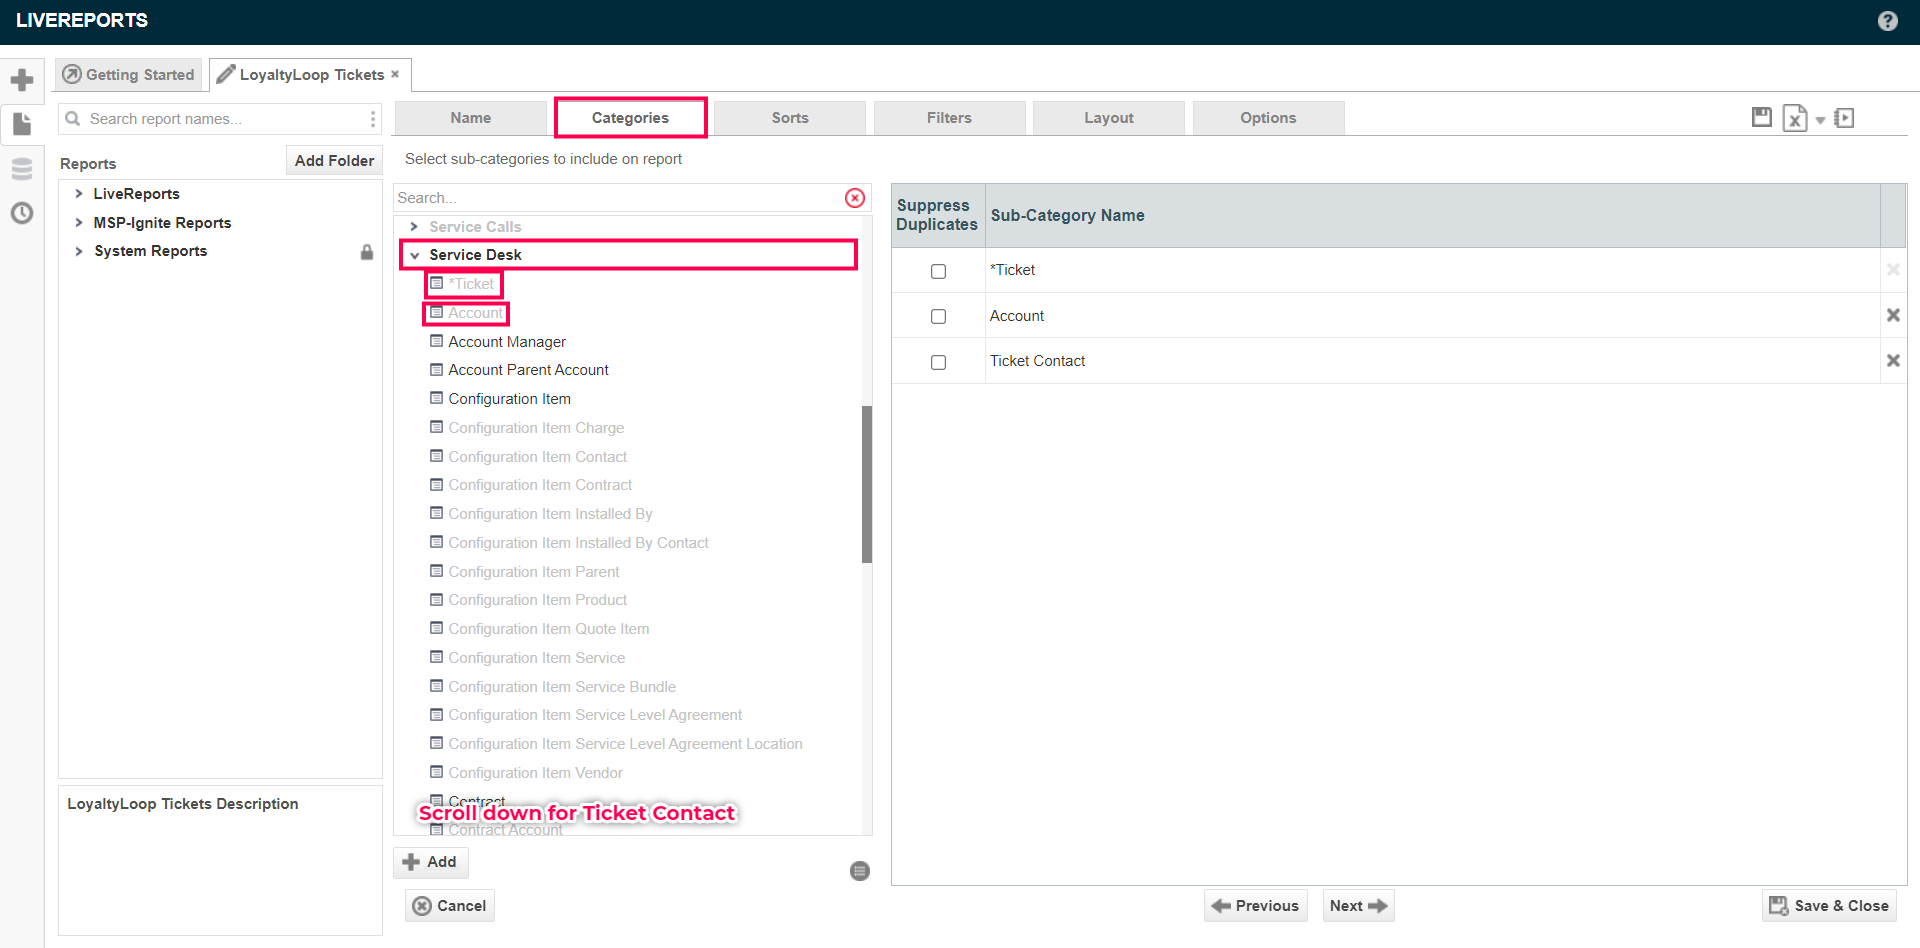
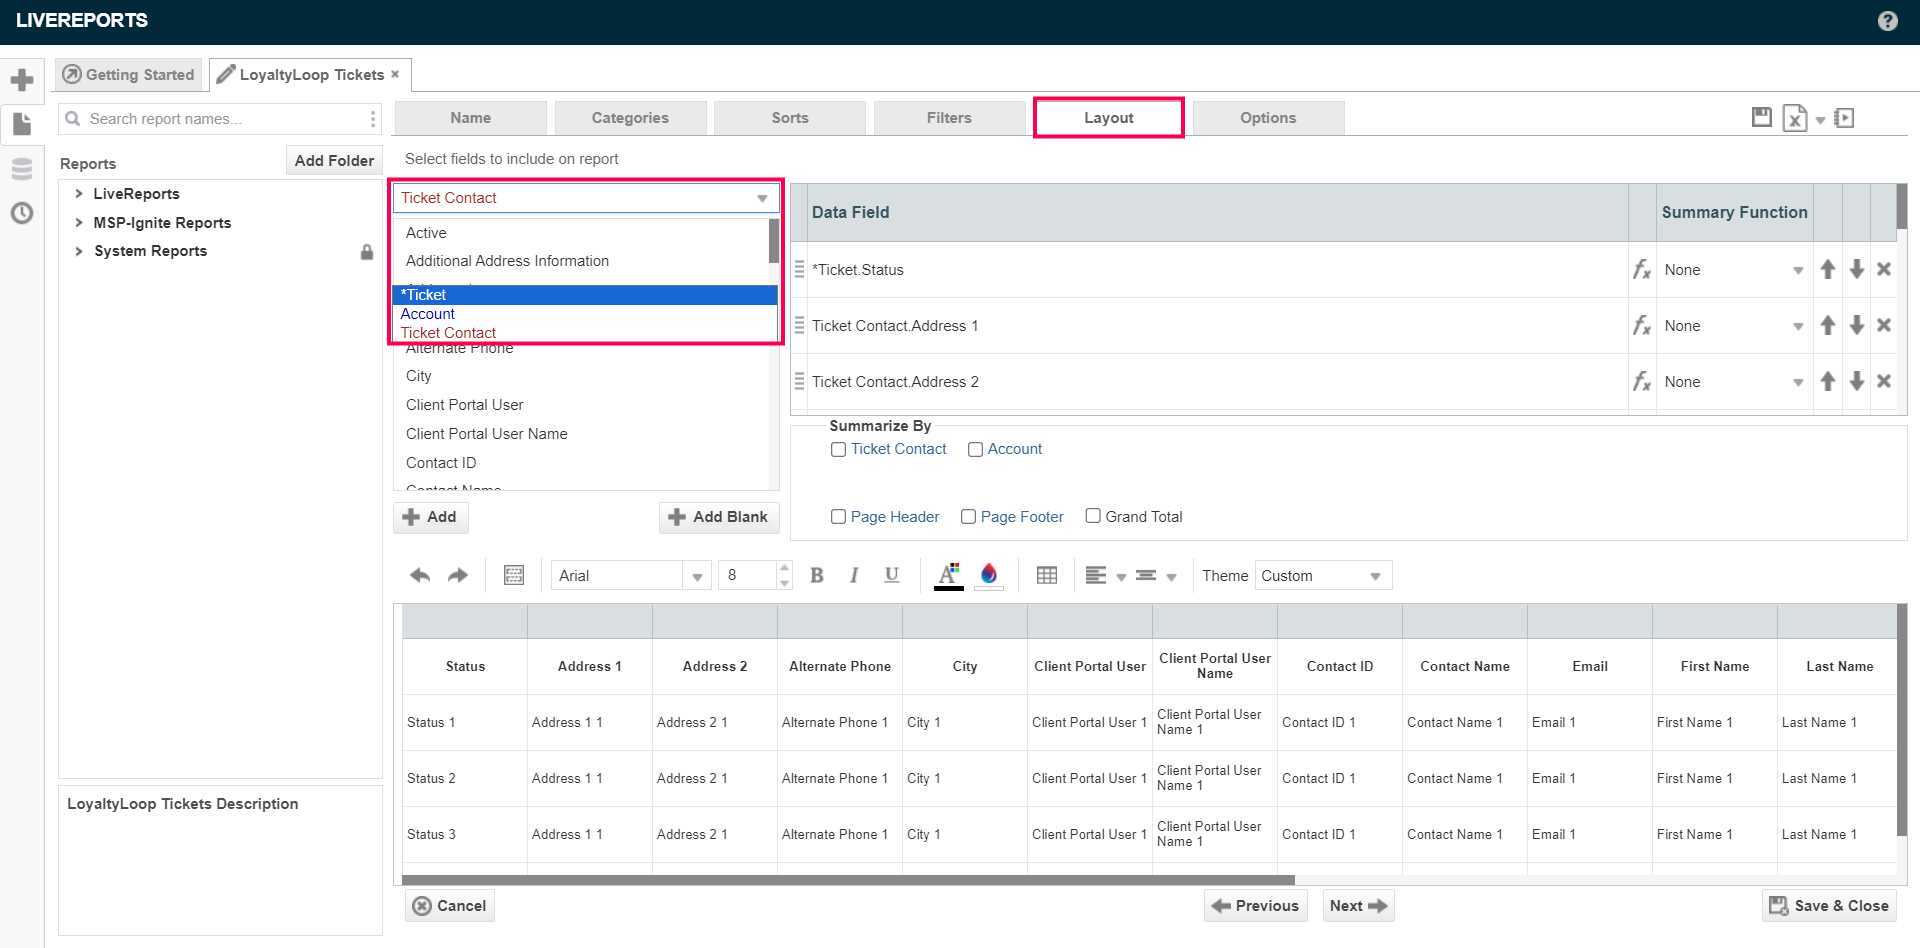
- Next, select Categories from the top menu. For this report from the Service Desk category select *Ticket, Account and Ticket Contact
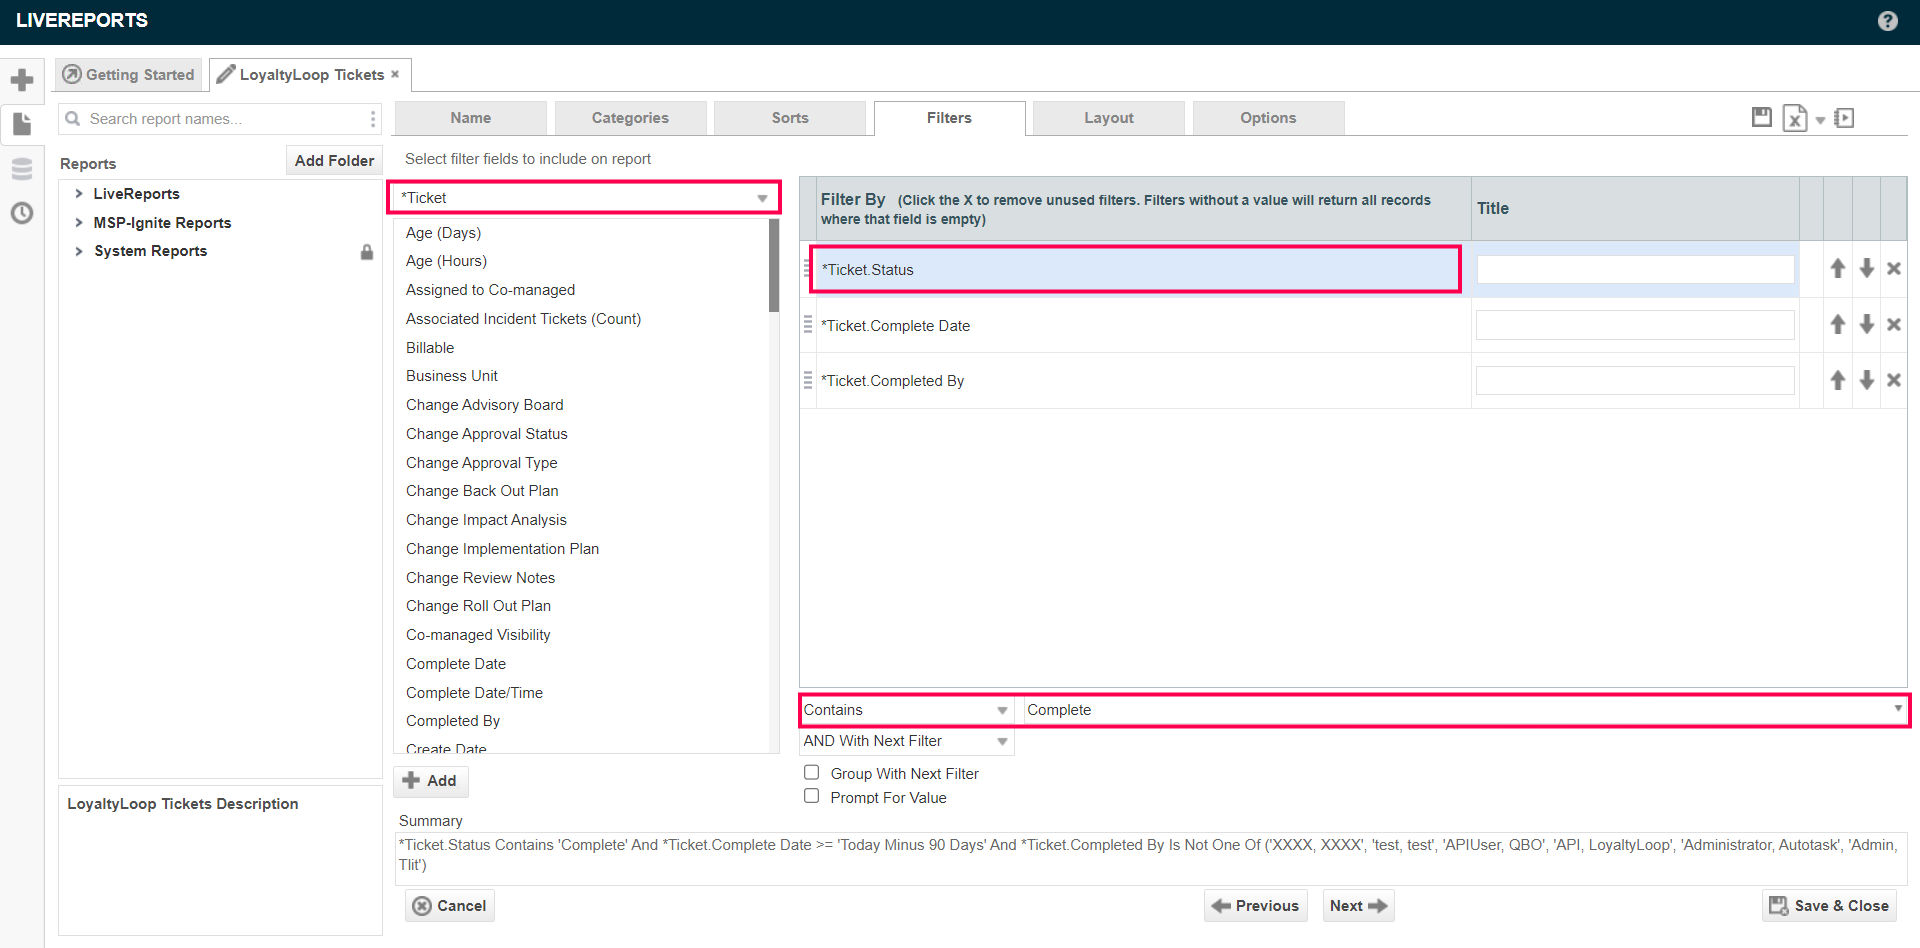
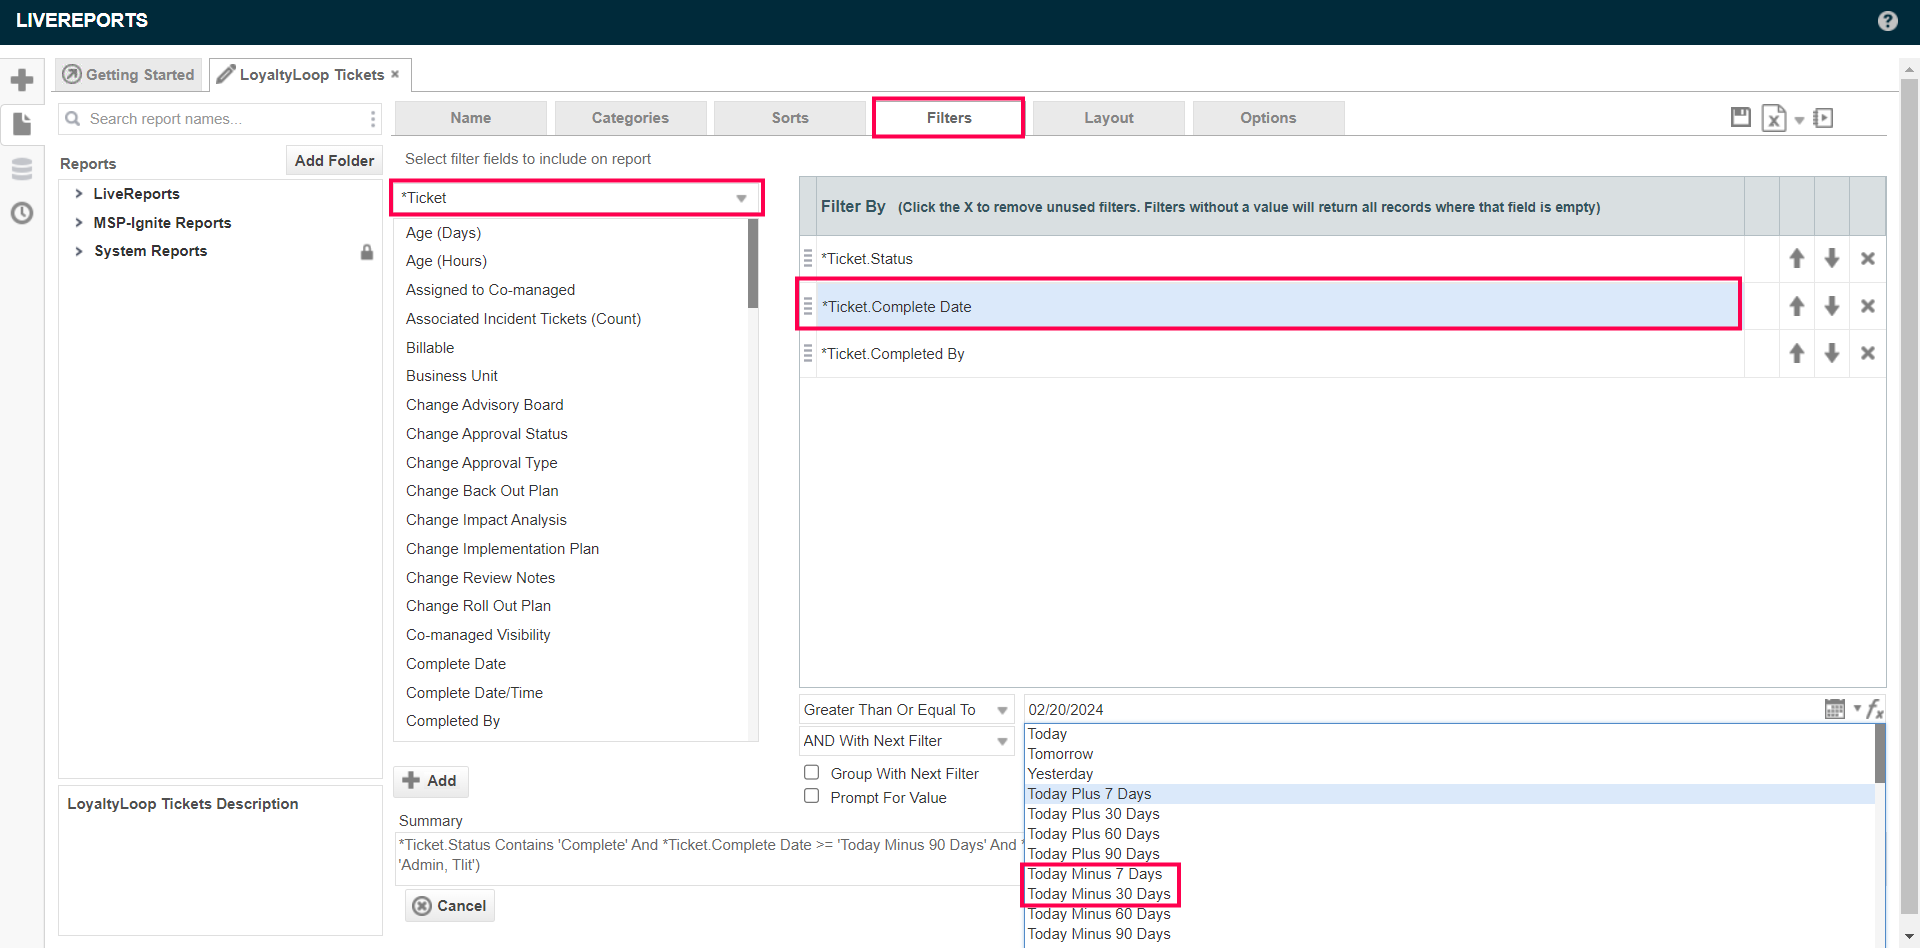
- Next, select Filters from the top menu. From the dropdown menu select *Ticket - Status and set Contains Complete
- Next, from the dropdown menu select Ticket - Complete Date and set Greater Than or Equal To Today Minus 7 Days
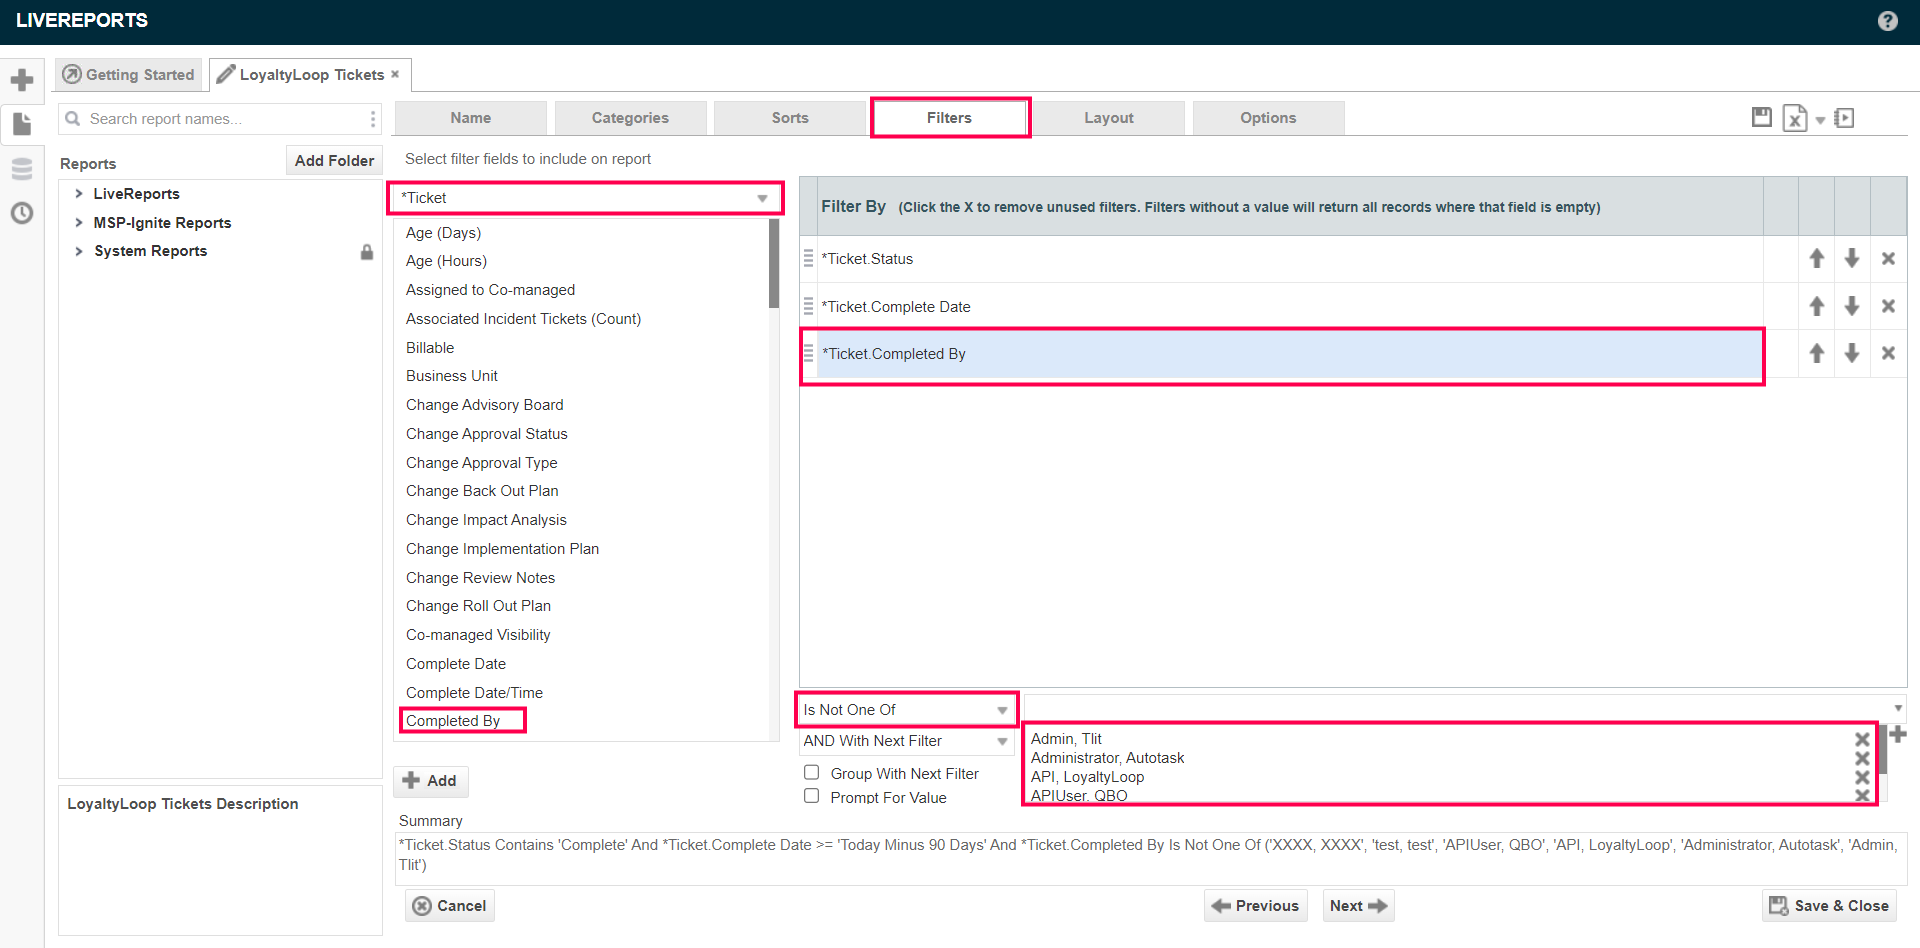
- Next from the dropdown menu select *Ticket - Complete and set Is Not One Of, then select all "Admin", "Automation" and "Test" options. NOTE: If you cannot scroll down in the dropdown menu, type the key word into the text field to the left of the dropdown menu button, and then click the dropdown button, and select all records with that key word. Repeat this for each key word.
- Next, from the top menu select Layout. Now configure the data fields that will be included in the report. Recommended fields include:


- Ticket Contact.Email (Required)
- Ticket.Status
- Ticket Contact.Address 1
- Ticket Contact.Address 2
- Ticket Contact.Phone
- Ticket.Contact City
- Ticket.Contact State
- Ticket.Contact Zip Code
- Ticket.Contact ID
- Ticket.Contact First Name
- Ticket.Ticket Number
- Account.Account Name
- Ticket.Complete By
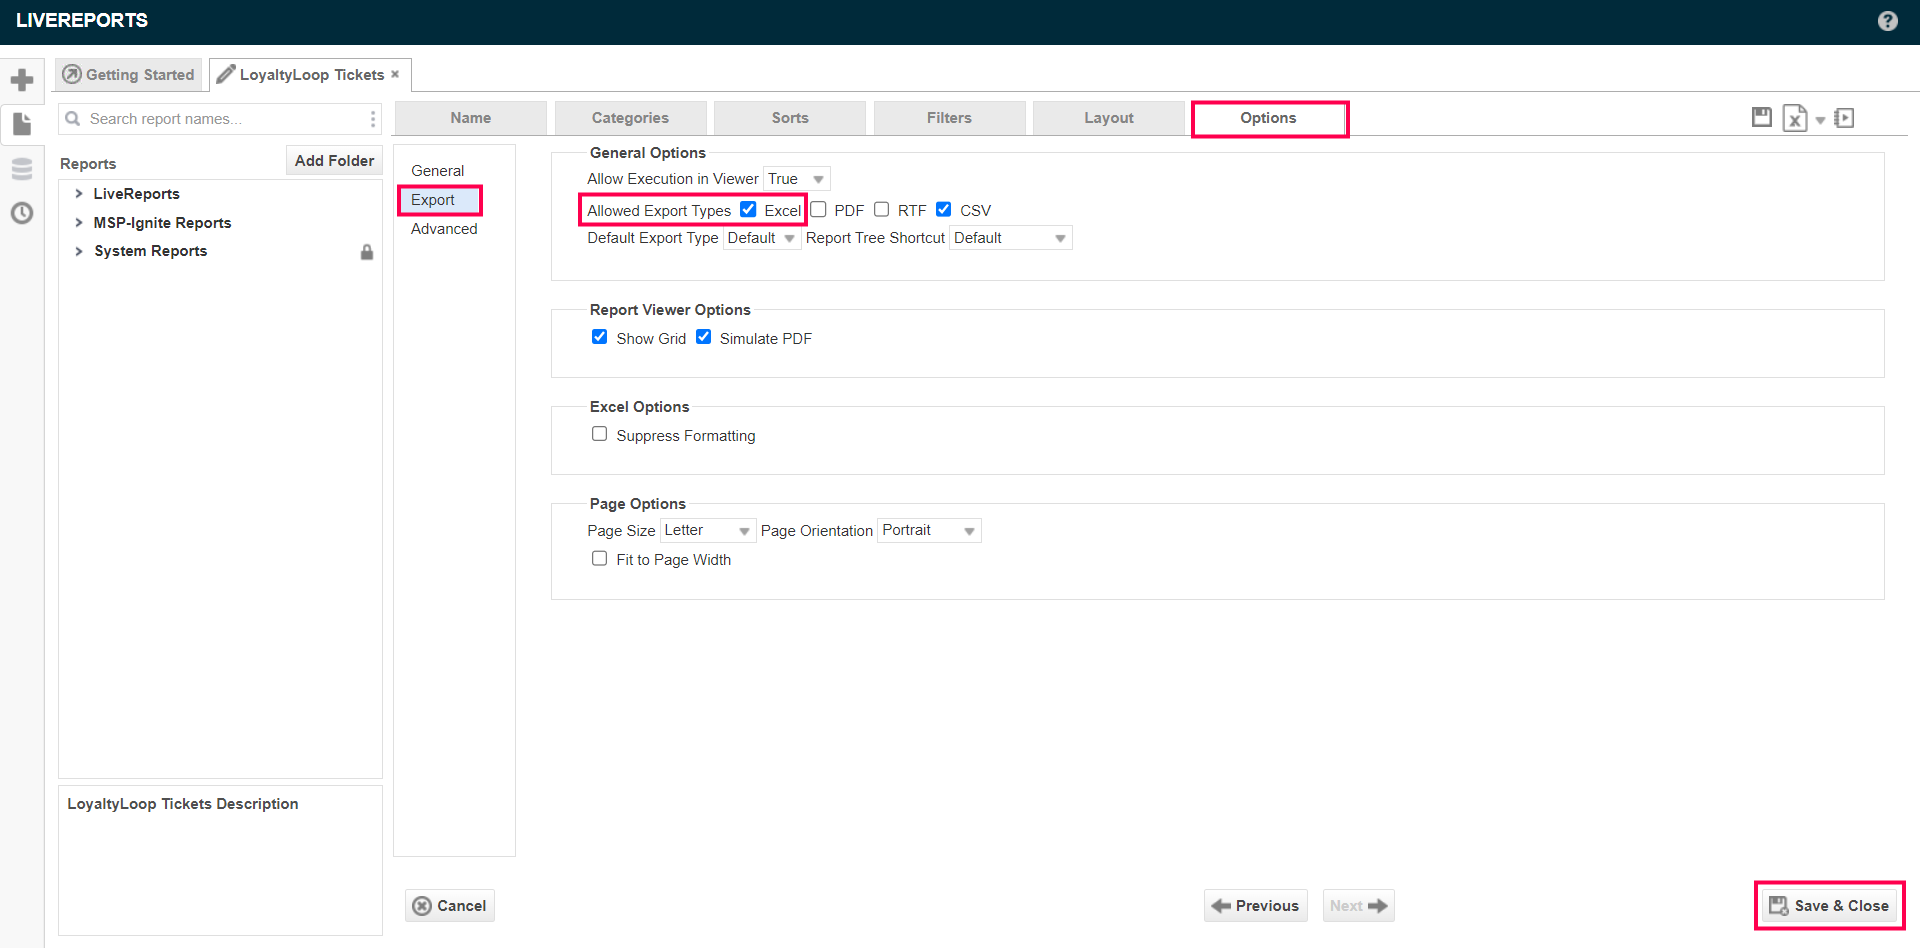
- Next, from the top menu select Options. Set the Allowed Export Types to Excel and select “Save & Close” button in the bottom right corner of the window.
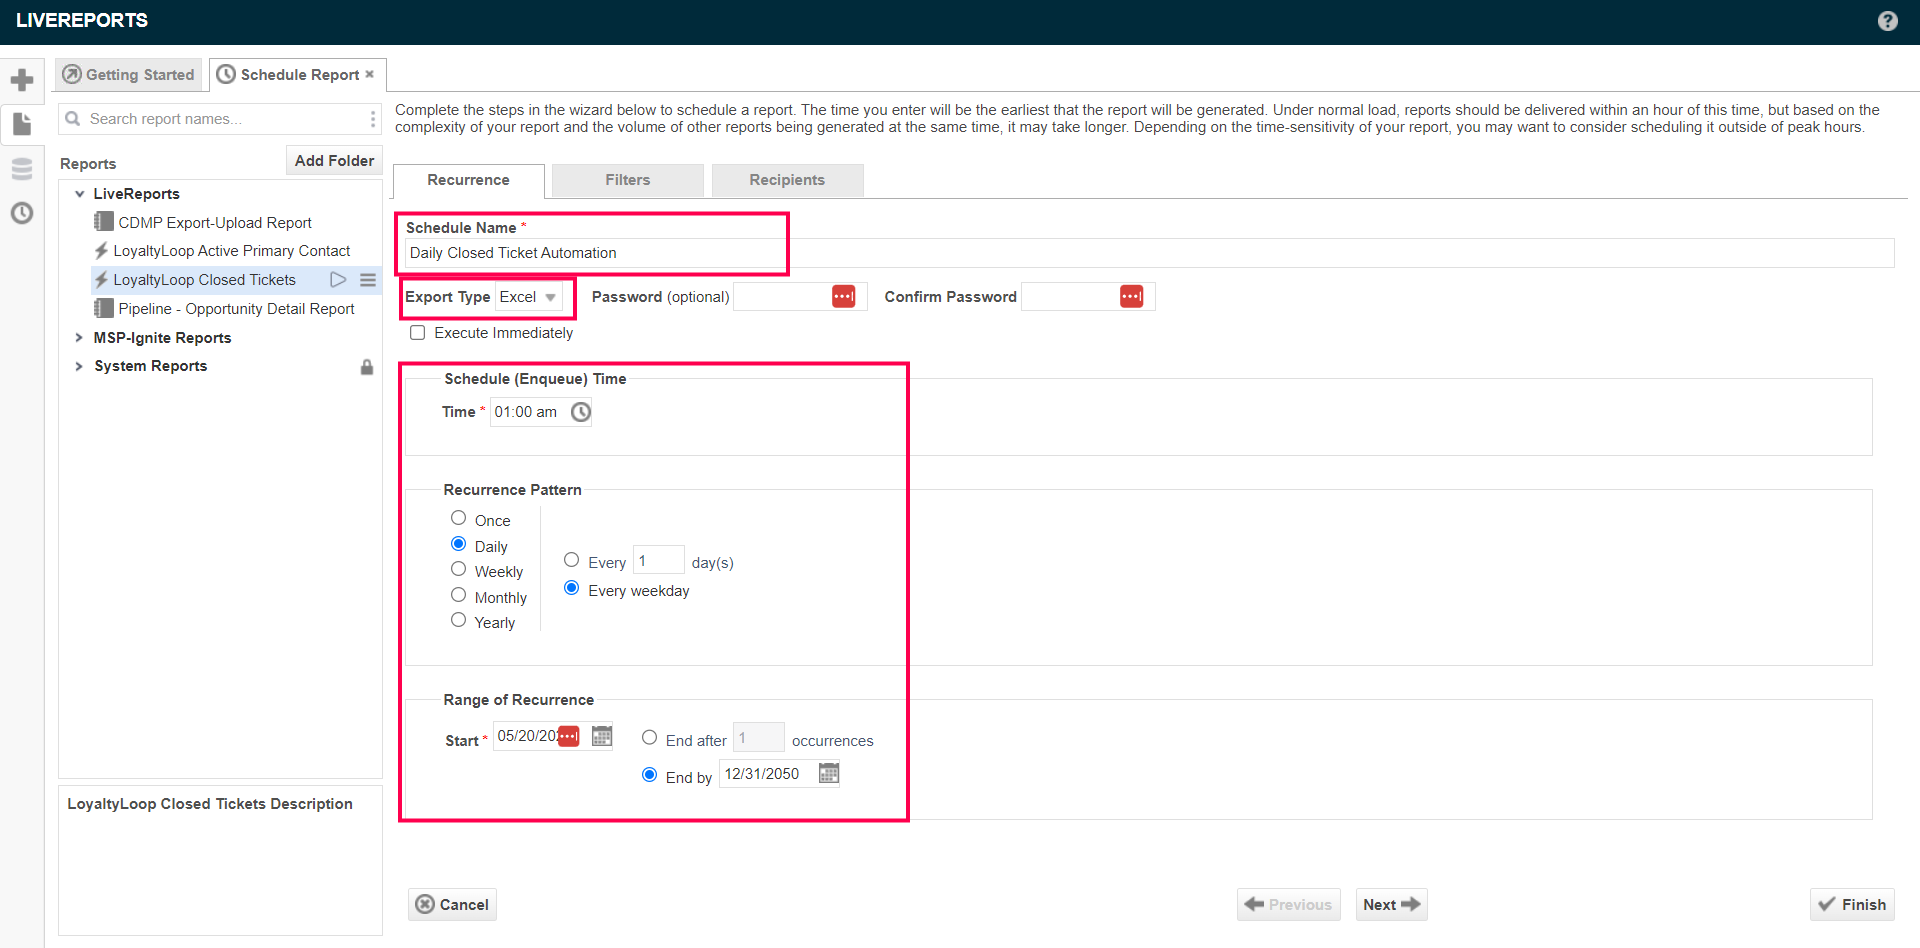
- Next, to schedule your report select the burger menu from the left window next to the report saved as LoyaltyLoop Active Primary Contact Report From there, select Schedule Report.
- Next, configure the Recurrence Name the Schedule and set Export Type Excel. Schedule Time (recommended 1:00 am) and the Recurrence Pattern (recommended daily/every weekday)
- Next, select Recipients and select To:
- Next, copy your Launch File Email Address from your LoyaltyLoop Primary Contact survey.
- Select Finish
