“You can't correct your problems without getting the bad with the good, and since our customers are given an outlet to voice concerns through LoyaltyLoop, we are now running at a much higher satisfaction rating than ever before. Thank you!”
Quickbooks Online
Integration Add-On
LOYALTYLOOP INTEGRATION
Automate your Feedback and Review Process!
If you use Quickbooks Online (QBO) to run your business and you keep track of customer details, LoyaltyLoop now offers a direct integration with Quickbooks to simplify and automate your customer feedback and review process, which also allowing you to engage customers sooner after they experience your business.
When using the LoyaltyLoop Quickbooks integration, your customer contact details for recent transactions (invoices and sales receipts) flow automatically into your LoyaltyLoop account.
Once configured, this enables you to have LoyaltyLoop engage customers as soon as the next day. Requesting feedback closer to when the customer experienced your business serves to increase both the quantity and quality of feedback, and the chances of received a Google review.
- Set it, and forget it!
- Engage customer soon after their experience
- Send requests as often as daily
- Save time (and money) not running manual reports
Below are the guides to setting up the Quickbooks integration.

Want to learn more?
Schedule a DemoHow much does it cost?
FREE. There is no additional cost.
How do I enable my Quickbooks Online Integration?
It takes only seconds to connect. You only need to connect from inside LoyaltyLoop. Here are the steps:
In LoyaltyLoop...
- Sign in as an Admin User in LoyaltyLoop
- Click your username in the upper right corner, then Settings
- Click Integrations under Data Management (Multi-location customers, first click the Location in question then Integrations)
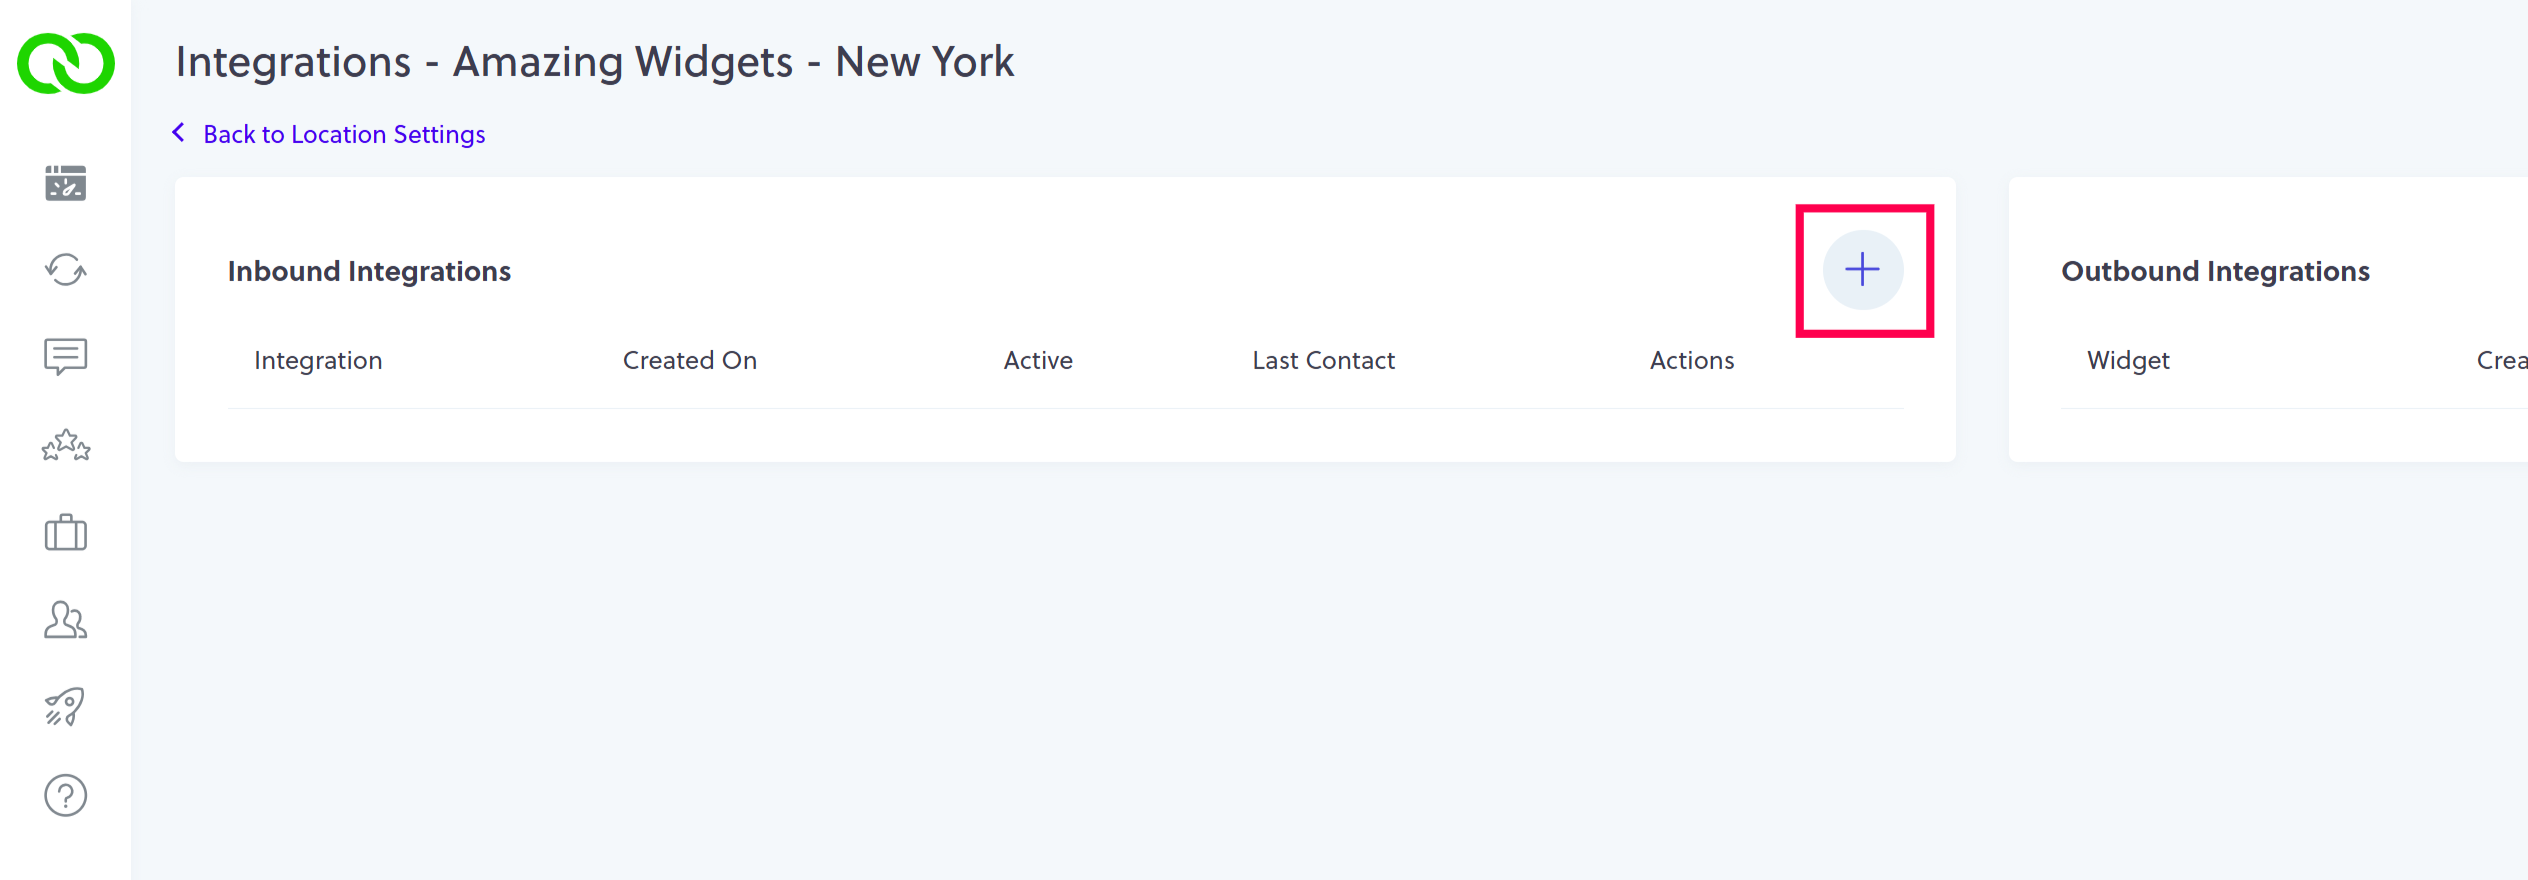
- On the left section "Inbound Integrations", click the plus (+) button
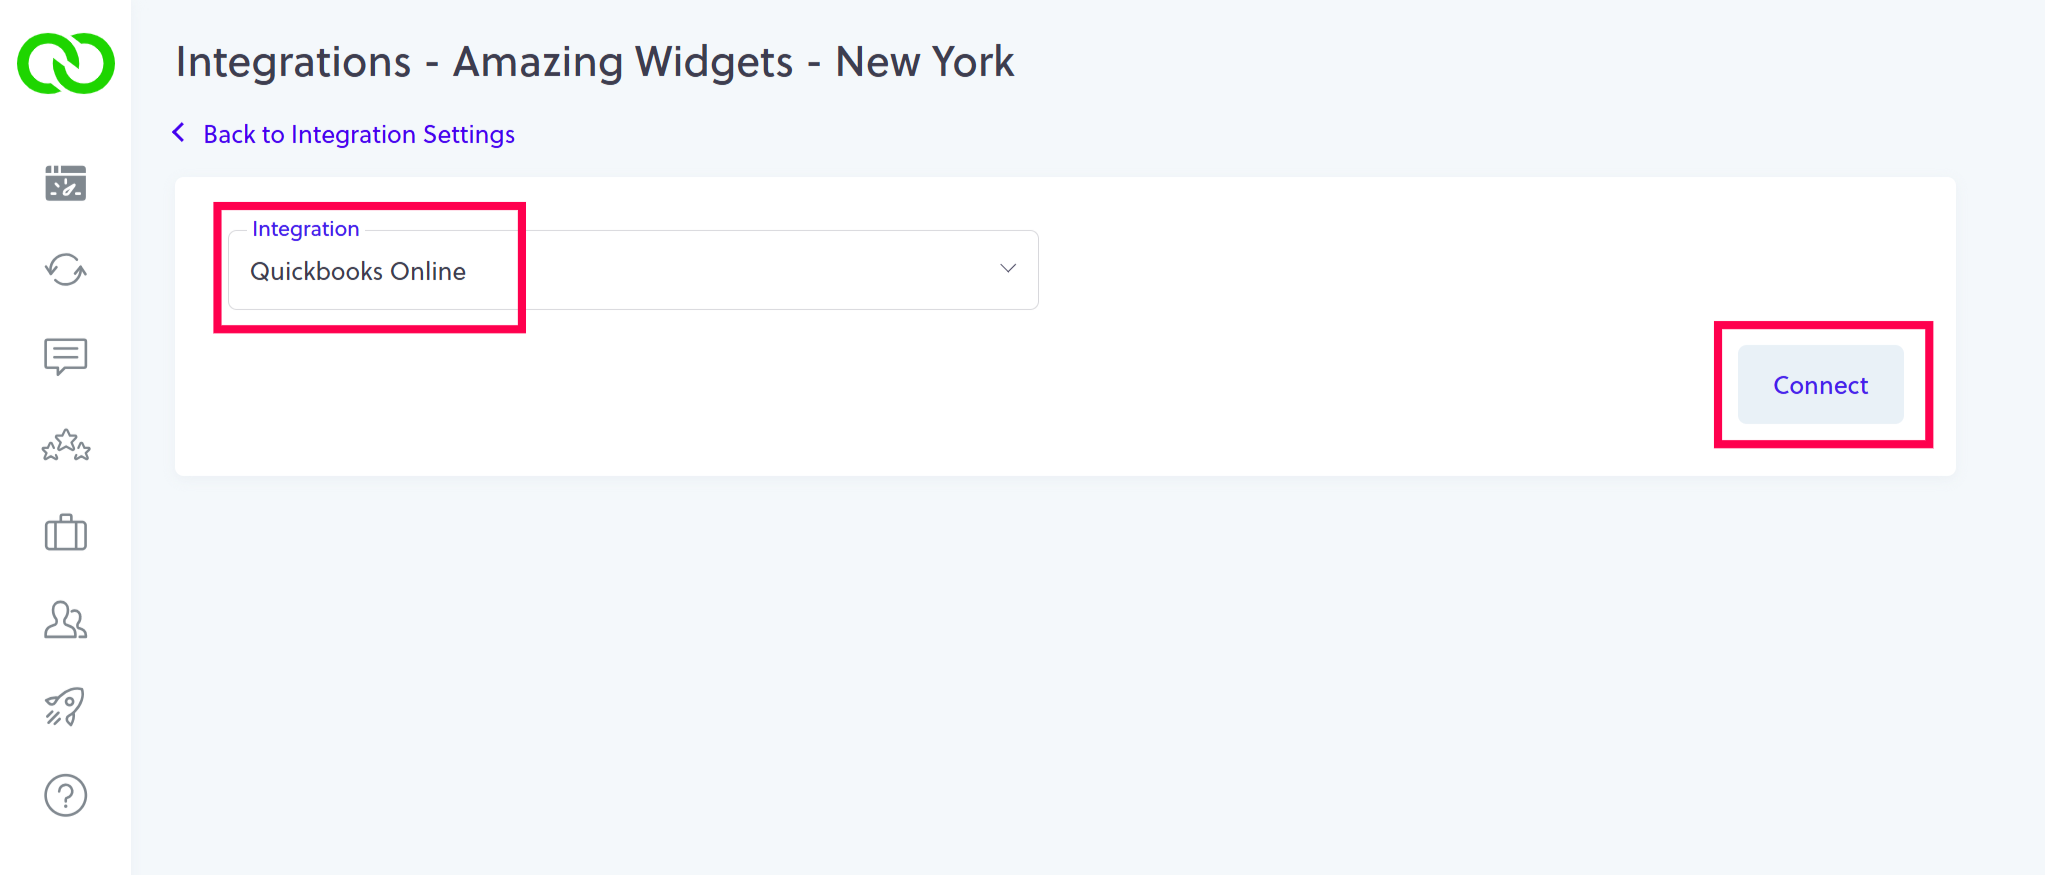
- Select Quickbooks Online from the drop-down menu
- Click the "Request Access" button
- QuickBooks will challenge you to enter your username and password you use to access Quickbooks Online. Follow any other instructions from QuickBooks on these screens. If you have multiple businesses, choose the business you wish to connect to LoyaltyLoop. On the QBO connection page, click the "Connect" button.
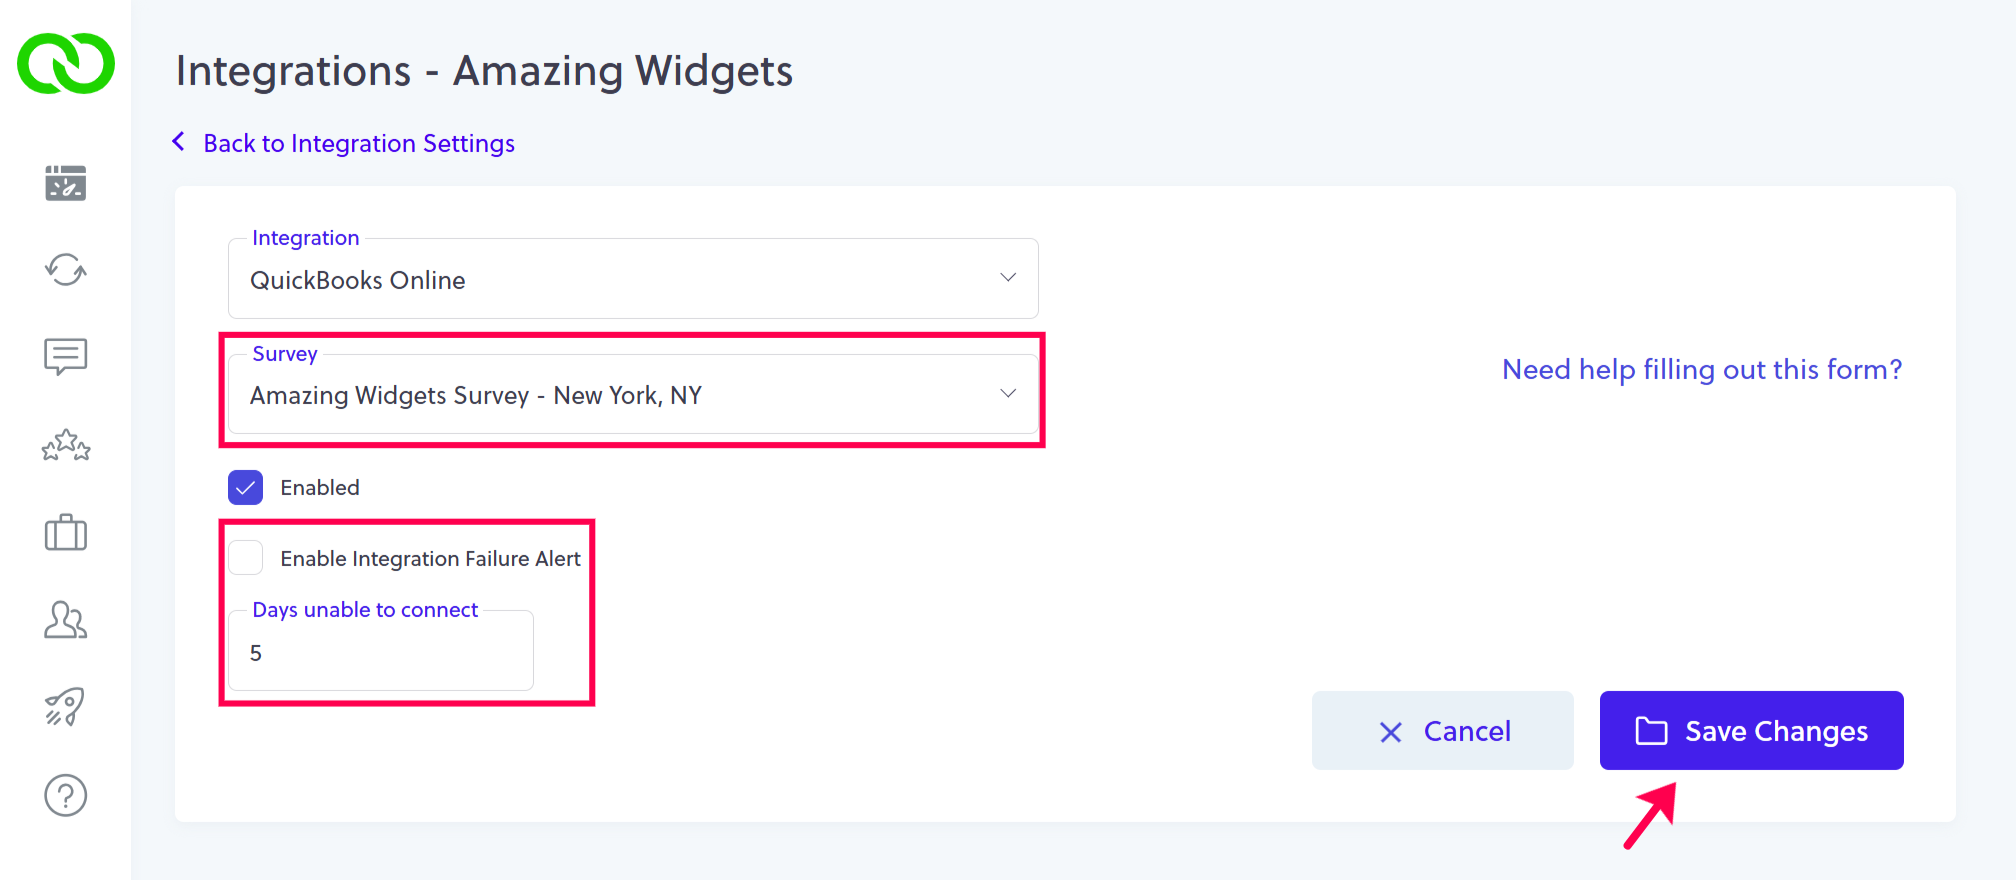
- When QuickBooks successfully connects with your LoyaltyLoop, you will land on the integration configuration page back inside your LoyaltyLoop account.
- Confirm When QuickBooks successfully connects with your LoyaltyLoop, you will land on the integration configuration form for QuickBooks Online back inside your LoyaltyLoop account. If you have more than one LoyaltyLoop survey, choose the survey that should use your QBO integration data, make sure it is "Enabled", and optionally, turn on the integration failure alert to notify you if the integration fails to run. Finally, click Save Changes, and you're done!

How does the integration behave?
When an invoice or sales receipt is created in Quickbooks Online, the primary customer contact associated with the transaction will flow into your LoyaltyLoop account the next day.
When the integration is first connected to your Quickbooks Online, LoyaltyLoop will fetch contacts for the last 30-days of transactions. Every day thereafter, LoyaltyLoop will only fetch the new transactions since the last time it connected to Quickbooks Online.
Which Quickbooks Online Invoice fields are included in the integration?
Legend: [i] Invoice record details, [r] Sales Receipt record details
- Email [i,r]
- First Name [i,r]
- Last Name [i,r]
- Company Name [i,r]
- Primary Phone [i,r]
- Mobile Phone [i,r]
- Shipping Street [i,r]
- Shipping City [i,r]
- Shipping State [i,r]
- Shipping Postal Code [i,r]
- Shipping Country [i,r]
- Transaction PO Number [i,r]
- Transaction Date [i,r]
- Transaction Total [i,r]
- Transaction Type [i,r]
- Transaction Description [i,r]
Can I impose a standard delay when sending my survey?
Yes. To ensure your customer has had the appropriate amount of time to experience your service, you can impose a delay on sending your survey. As stated below, we will set a 3-day delay on the default launch configuration. If you prefer something else, including no delay, please contact our support team at support@loyaltyloop.com, or 888-552-5667 option 3. Here's a blog post explaining imposed launch delays.
How do I change my survey send (launch) frequency?
With the integration enabled, your data flows to LoyaltyLoop as you close jobs. You are now in position to have your surveys sent soon after the customer experiences your business.
By default, and unless you specify otherwise, upon activation of the integration LoyaltyLoop will reconfigure your survey launch configuration as follows:
- Weekly Launch Frequency
- Default Launching Day on Tuesday
- Imposed 3-day delay
If you'd like a different launch configuration, please contact our support team at support@loyaltyloop.com or 888-552-5667 option 3.
Your existing Touch Frequency Filter (TFF) will be maintained. For example, our default TFF is 90-days, meaning customers (based on email address) who have been asked to give you feedback within the prior 90-days (or as per your specific setting), will be removed from your launch. This prevents "over-touching" the same person too often.