“You can't correct your problems without getting the bad with the good, and since our customers are given an outlet to voice concerns through LoyaltyLoop, we are now running at a much higher satisfaction rating than ever before. Thank you!”
Datto Autotask
Outbound Integration Add-In
LOYALTYLOOP INTEGRATION
View LoyaltyLoop Results in Autotask!
Attention Managed Service Providers (MSP)! Put the power of customer feedback at your fingertips inside Autotask.
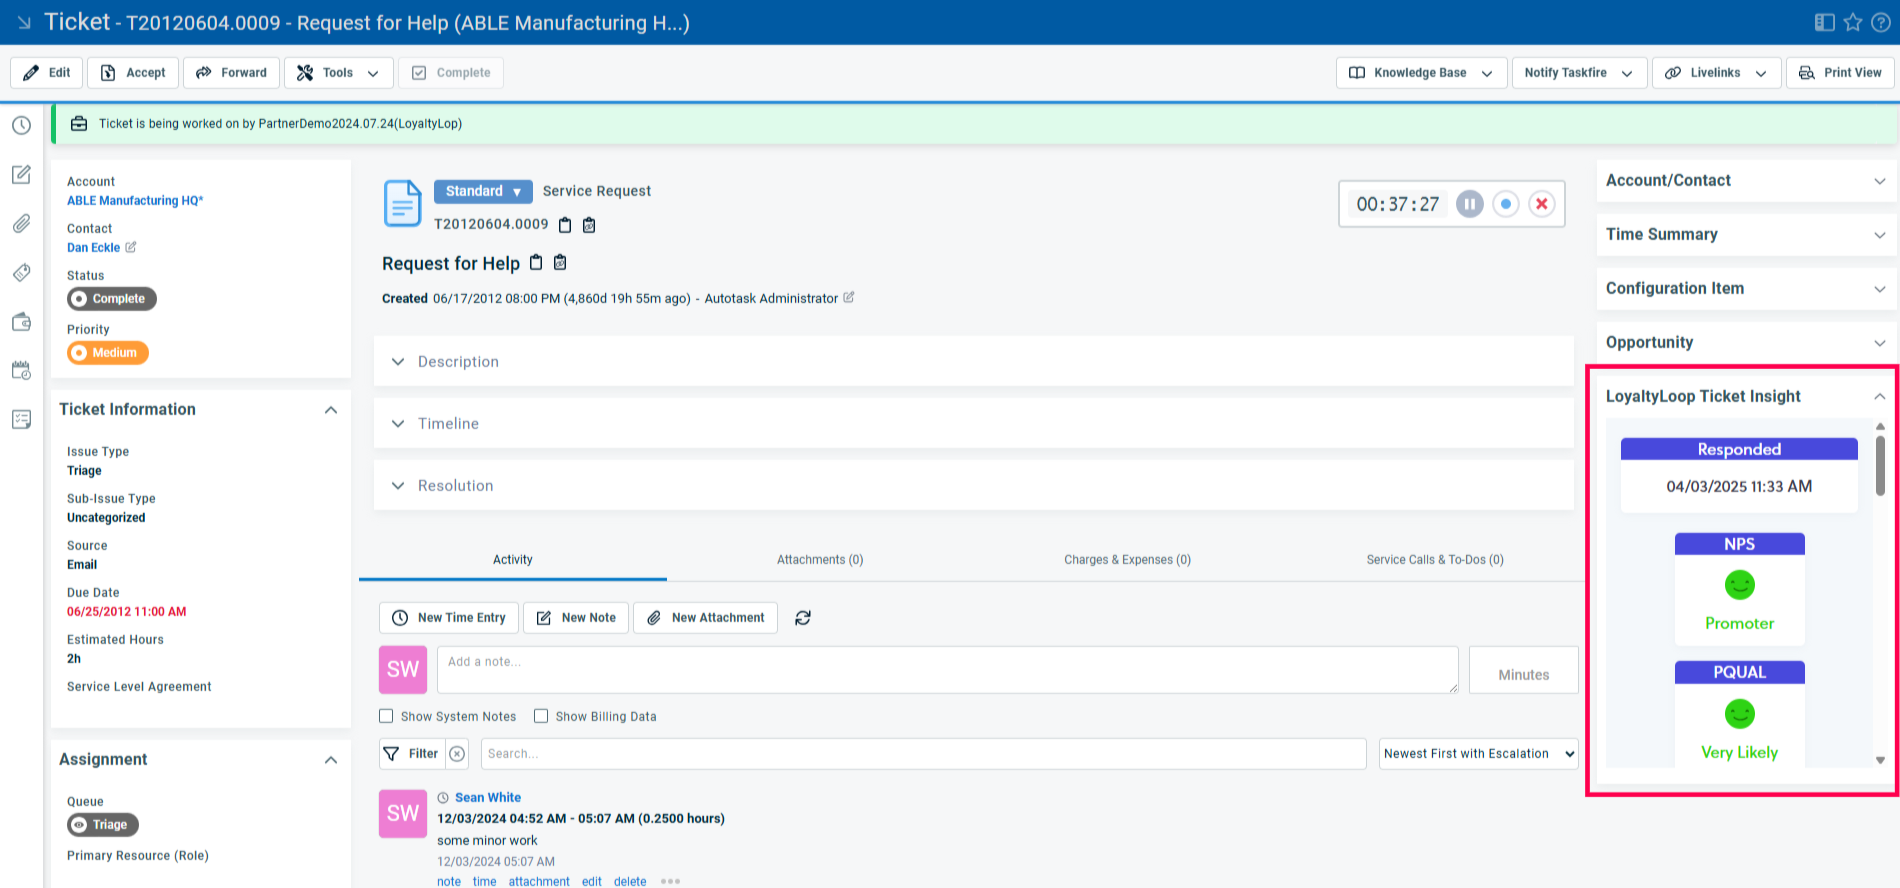
Embed your LoyaltyLoop dashboard as an Autotask tab, and use Autotask's Ticket Insights to see the disposition and most recent feedback for the contact of a ticket. Need, more details? No problem, from Autotask, click a LoyaltyLoop widget and you'll open your LoyaltyLoop account.
- Connect LoyaltyLoop to Autotask
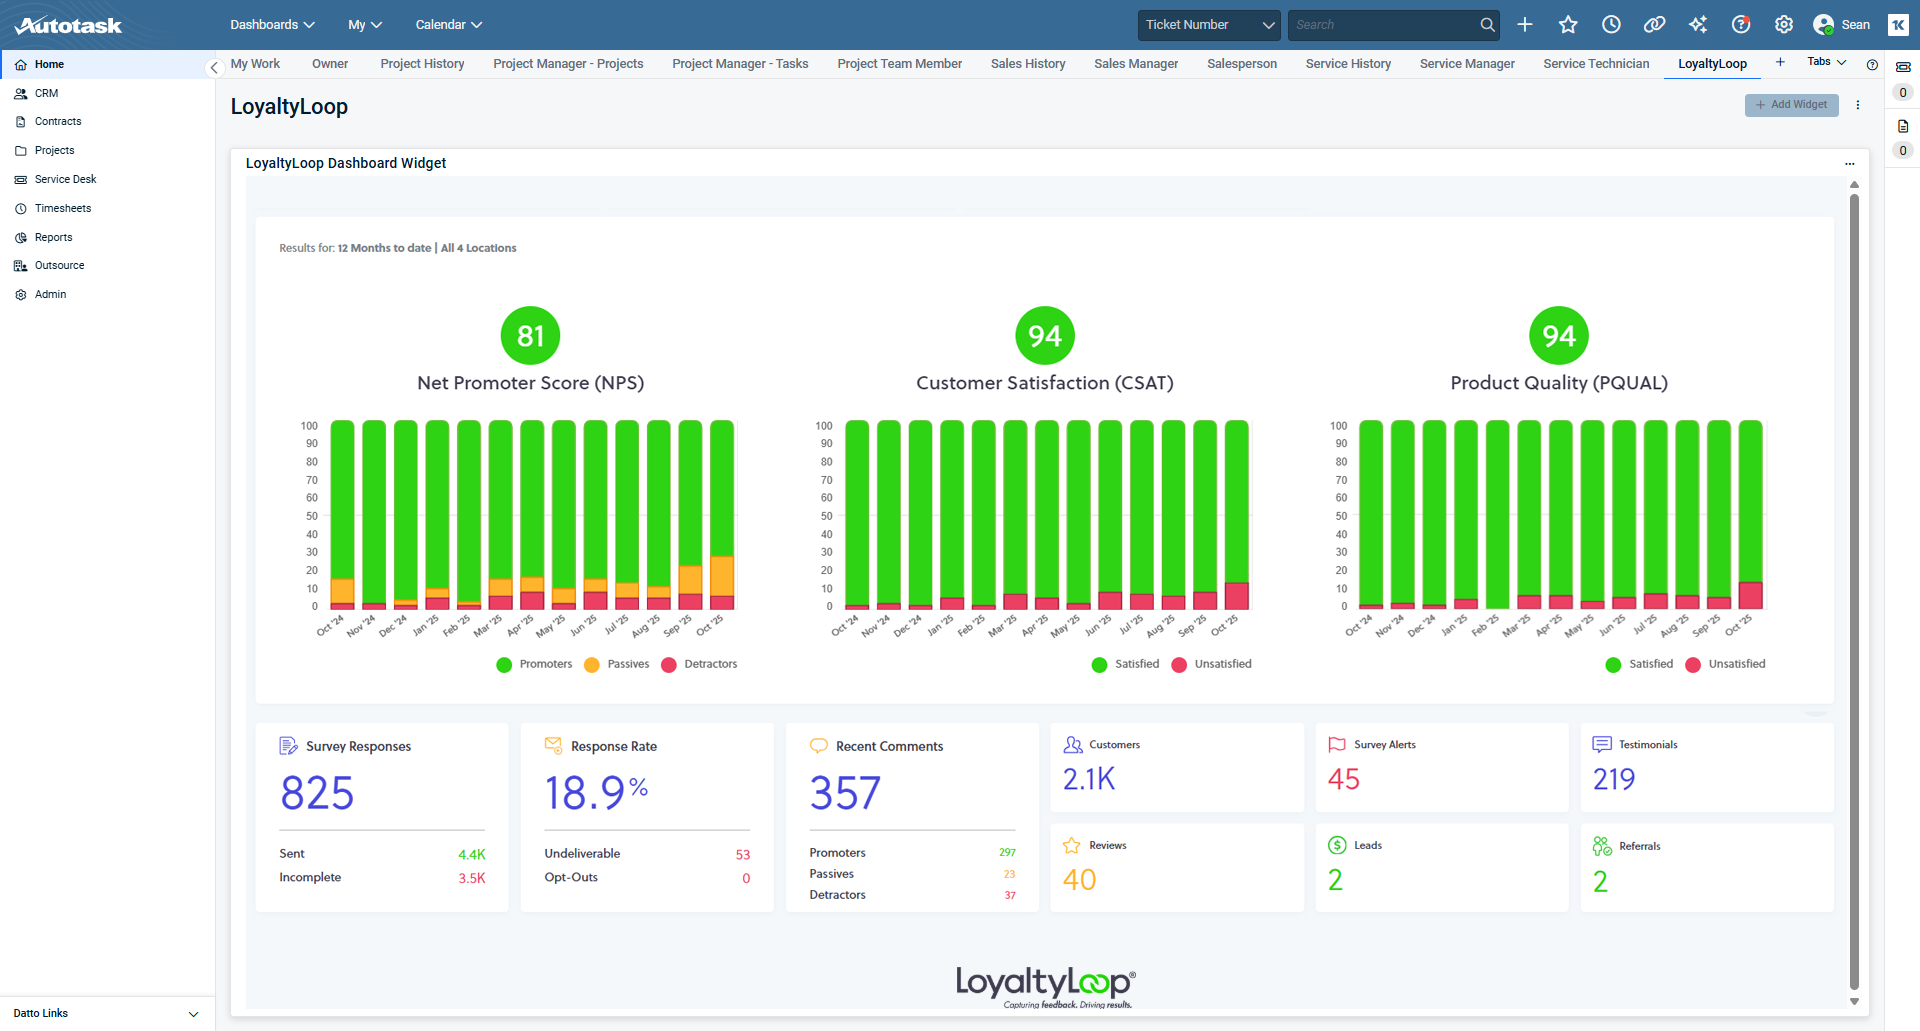
- View LoyaltyLoop dashboard in Autotask
- View feedback via Ticket Insights
- Access LoyaltyLoop from Autotask
On this page, you'll find the simple steps for adding your LoyaltyLoop widgets to your Autotask. It takes only a few minutes.
Want to learn more?
Schedule a Demo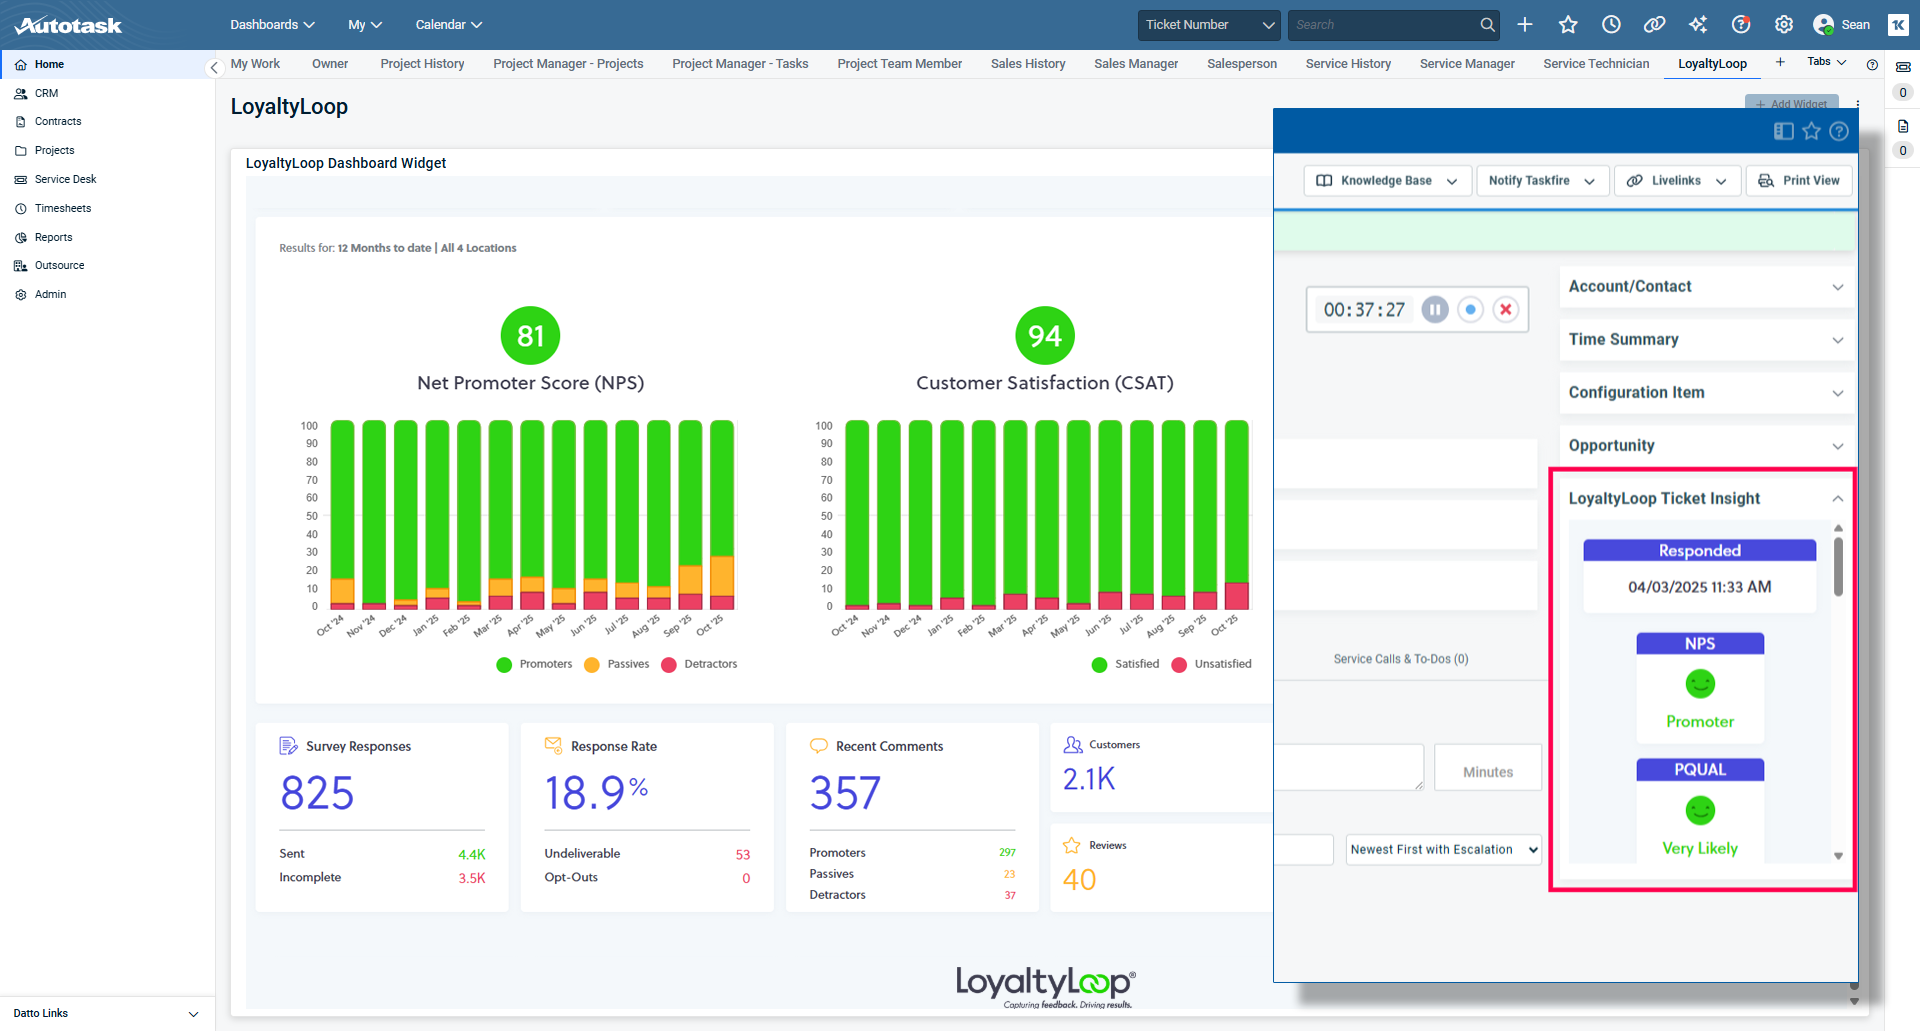
How much does this outbound integration cost?
Free. There is no additional cost to use the LoyaltyLoop outbound integrations with Autotask.
Can I access my LoyaltyLoop account from Autotask?
Yes. When viewing your dashboard widget or Ticket Insights in Autotask, you'll be able to click on those elements to take you to your LoyaltyLoop account.
How do I enable the widgets and Ticket Insights in Autotask?
Follow the below in order. If you have difficulty, please reach out to LoyaltyLoop support for help.
1. Connect LoyaltyLoop to Autotask
2. Enable Widgets and Insights In Autotask
1. Connect LoyaltyLoop to Autotask
NOTE: The credentials needed for this step are the same API user credentials that were used when setting up your Autotask inbound data integration. If you have not yet created API user credentials for the LoyaltyLoop-Autotask integrations, please follow these instructions before moving on.
Sign in to LoyaltyLoop as an Admin User. Click your username in the upper right corner, then Settings, then Integrations under the Data Management section for the Location in question. If you have more than one location in LoyaltyLoop, first click on the location, then Integrations.
TIP: You only need to set up the Dashboard widget and Ticket Insights for one of your LoyaltyLoop locations to have it display in Autotask.
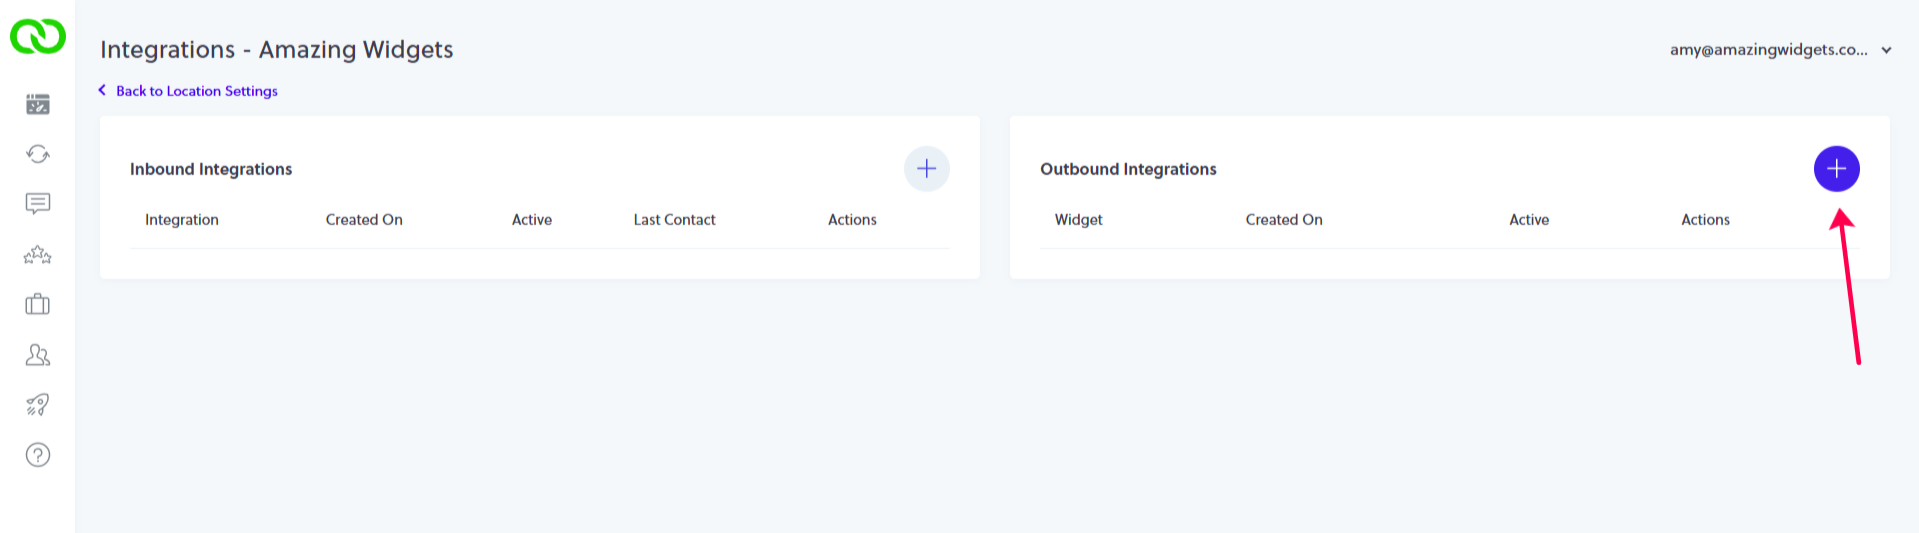
Find the section titled "Outbound Integrations", click the plus (+) icon to add an integration. Choose "Autotask Widget", enter your Autotask API username and password, then click Save Changes.
Click the plus (+) icon again, and choose "Autotask Insight". Enter your Autotask API username and password, then click Save Changes.
Proceed to steps 2, 3 and 4.
2. Enable Widgets and Insights In Autotask
NOTE: For additional information on this step, please refer to Autotask Help.
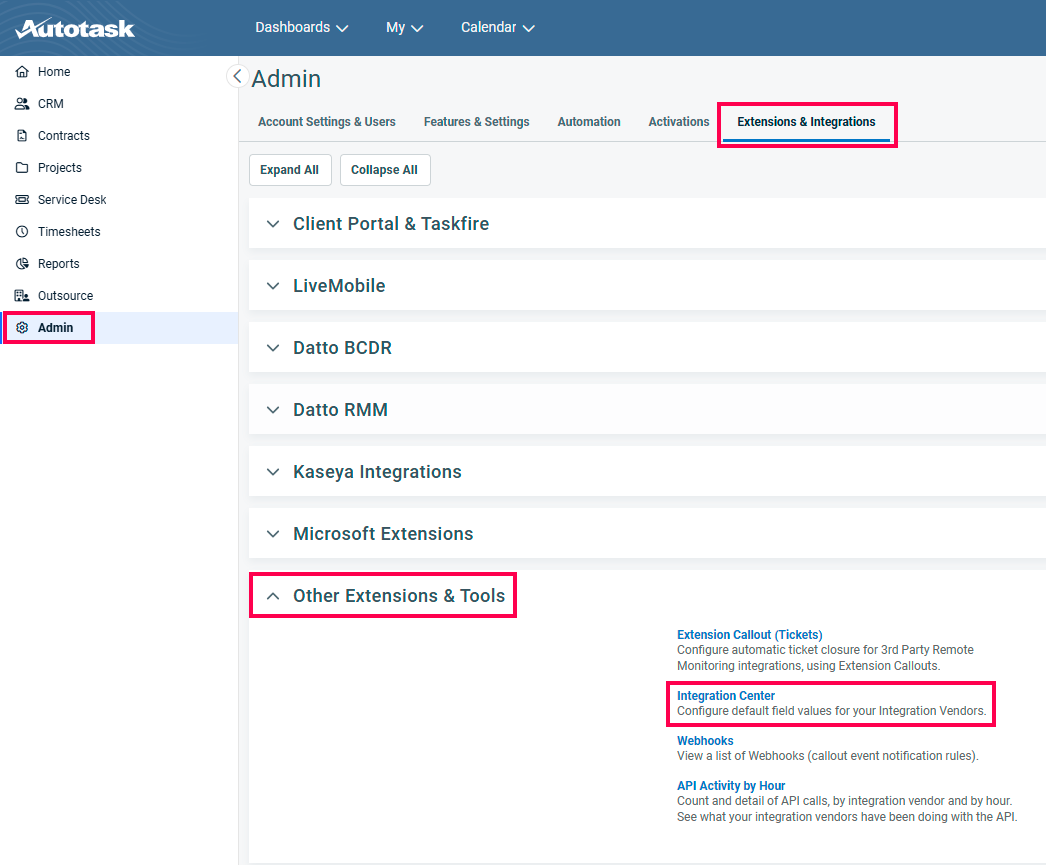
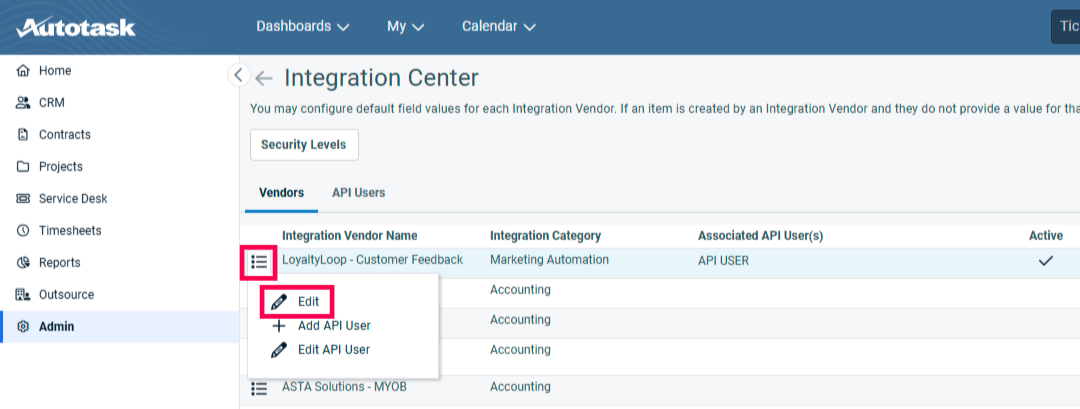
From the Admin Menu, select 'Extensions & Integrations'. Then, from the 'Other Extensions & Tools' tab select 'Integration Center'.
Click the burger menu next to LoyaltyLoop and select 'Edit'
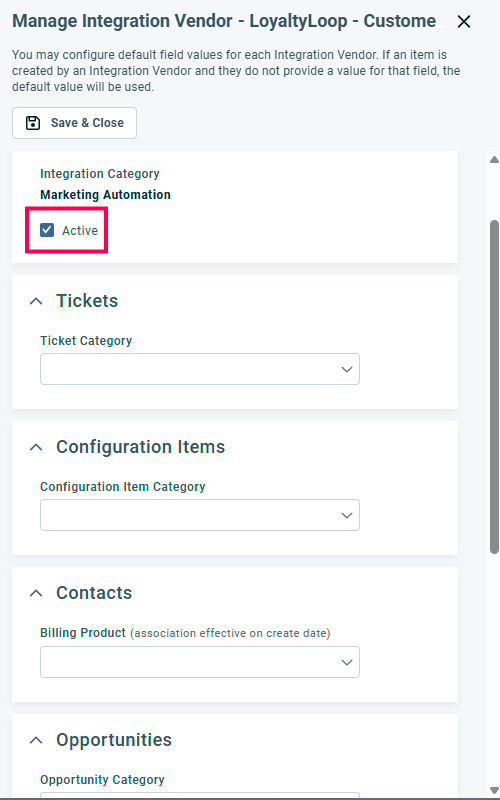
Now select 'Active' and continue to scroll to the bottom of the menu.
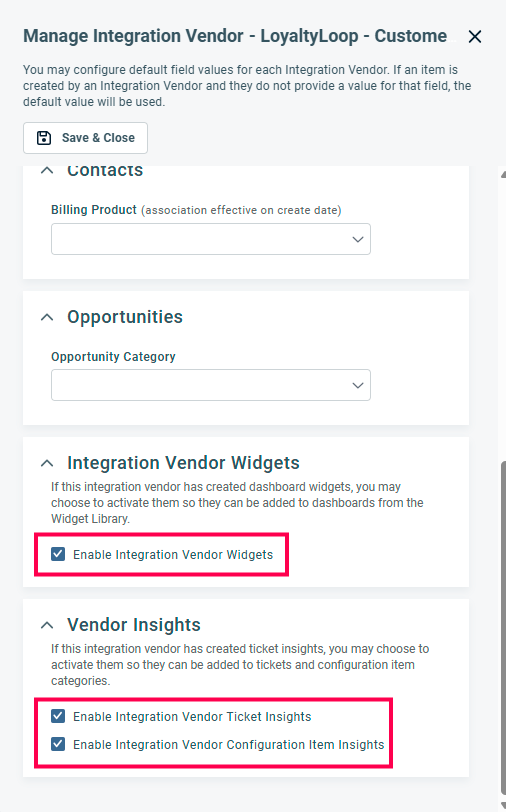
At the bottom of the menu, enable Integration Vendor Widgets and both Vendor Insights. Once complete, Save & Close.
3. Add the LoyaltyLoop Dashboard Widget to Autotask
NOTE: For additional information on this step, please refer to Autotask Help.
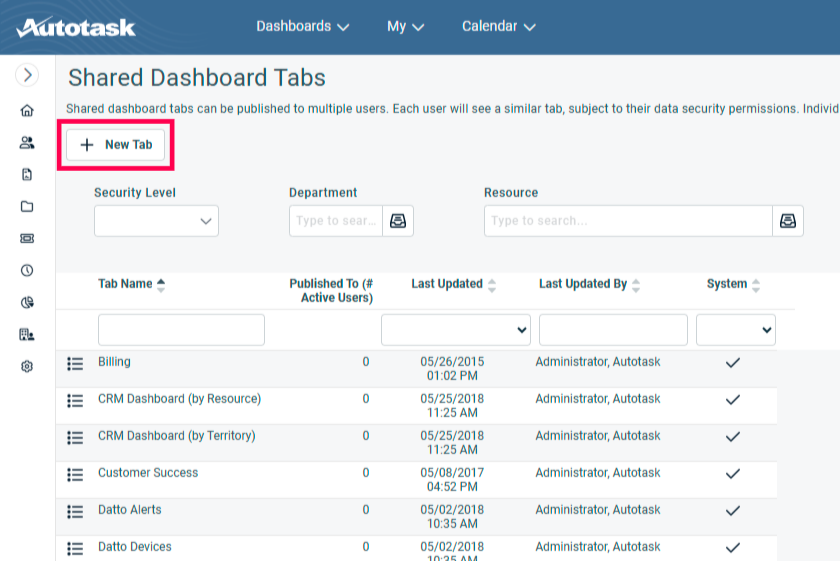
With the Widgets Enabled, from the Dashboards dropdown menu, select 'Manage Shared Tabs'

Select the '+ New Tab' button.
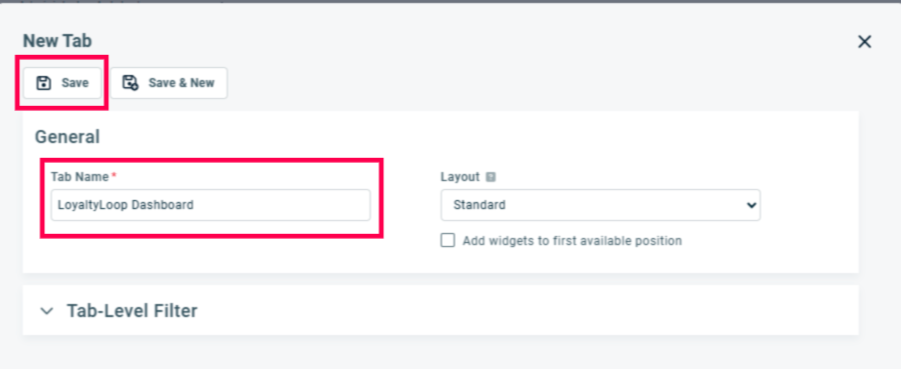
Name your Tab and then Save.
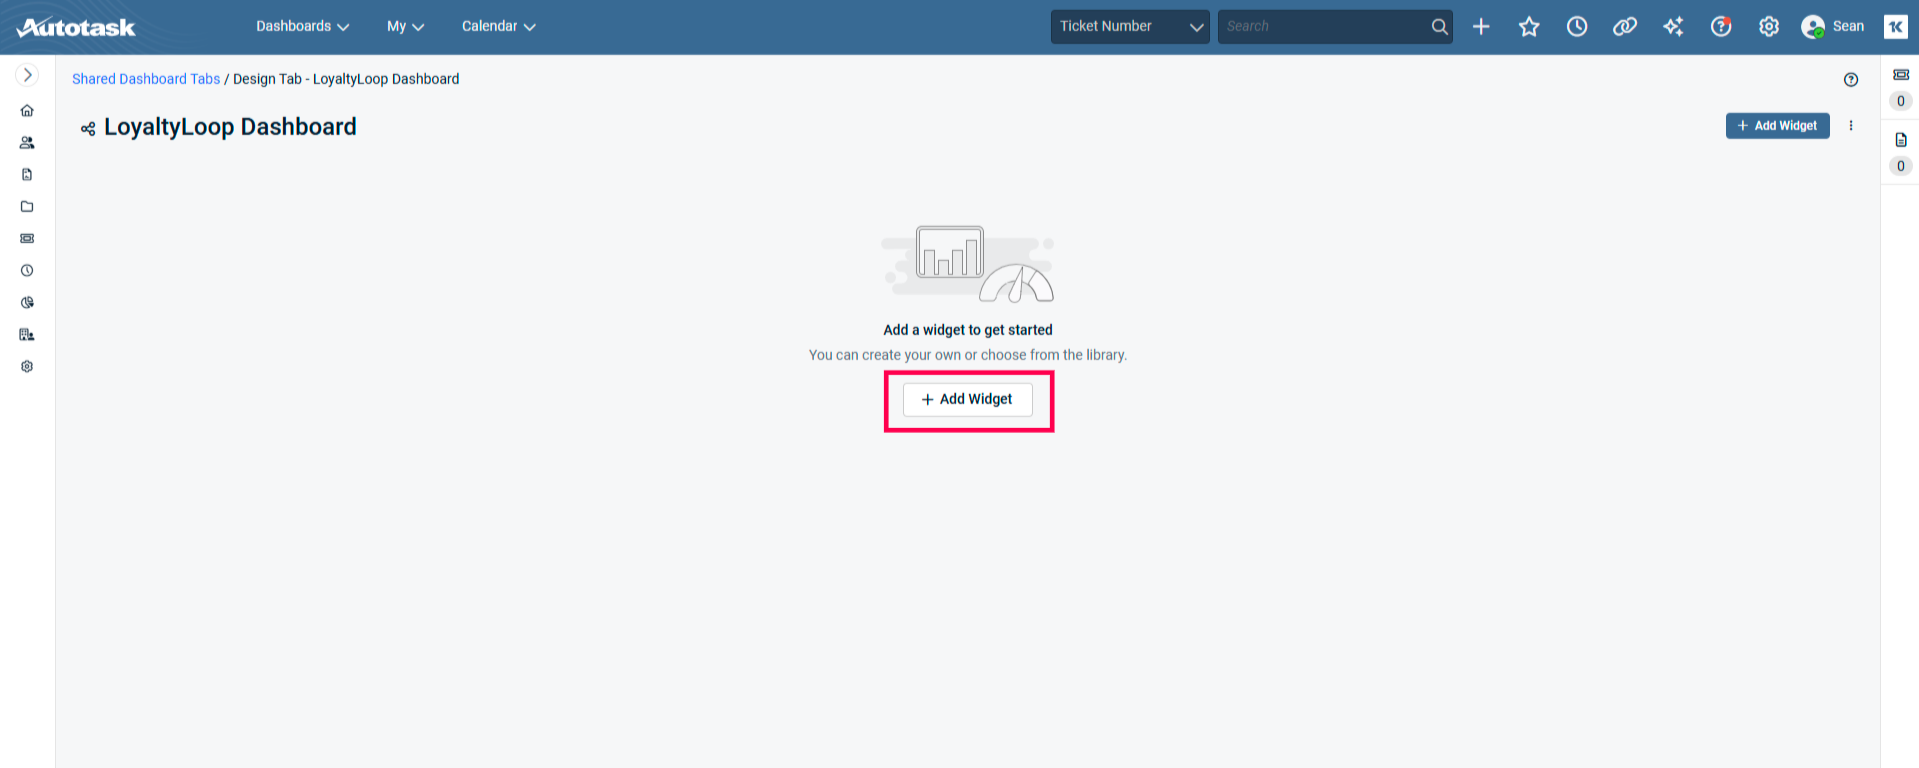
Select the '+ Add Widget' Button.
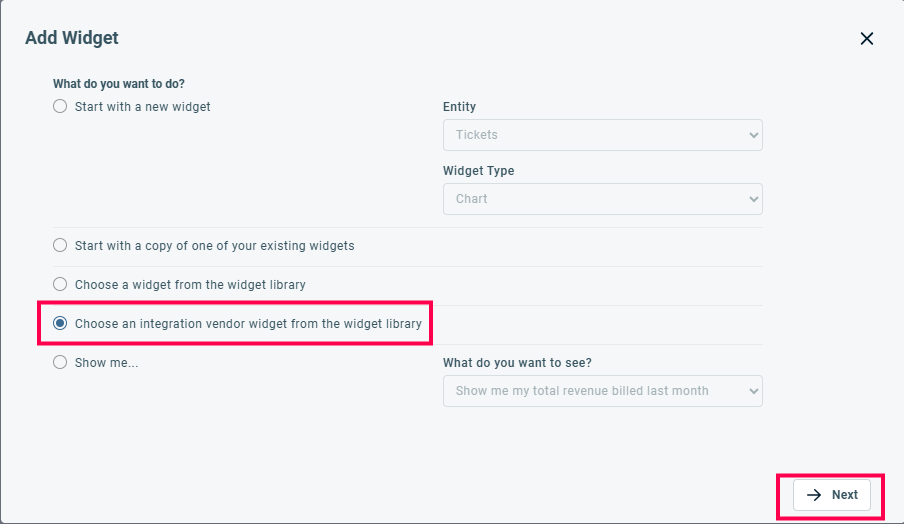
Select the 'Choose an integration vendor widget from the widget library' option and then click next.
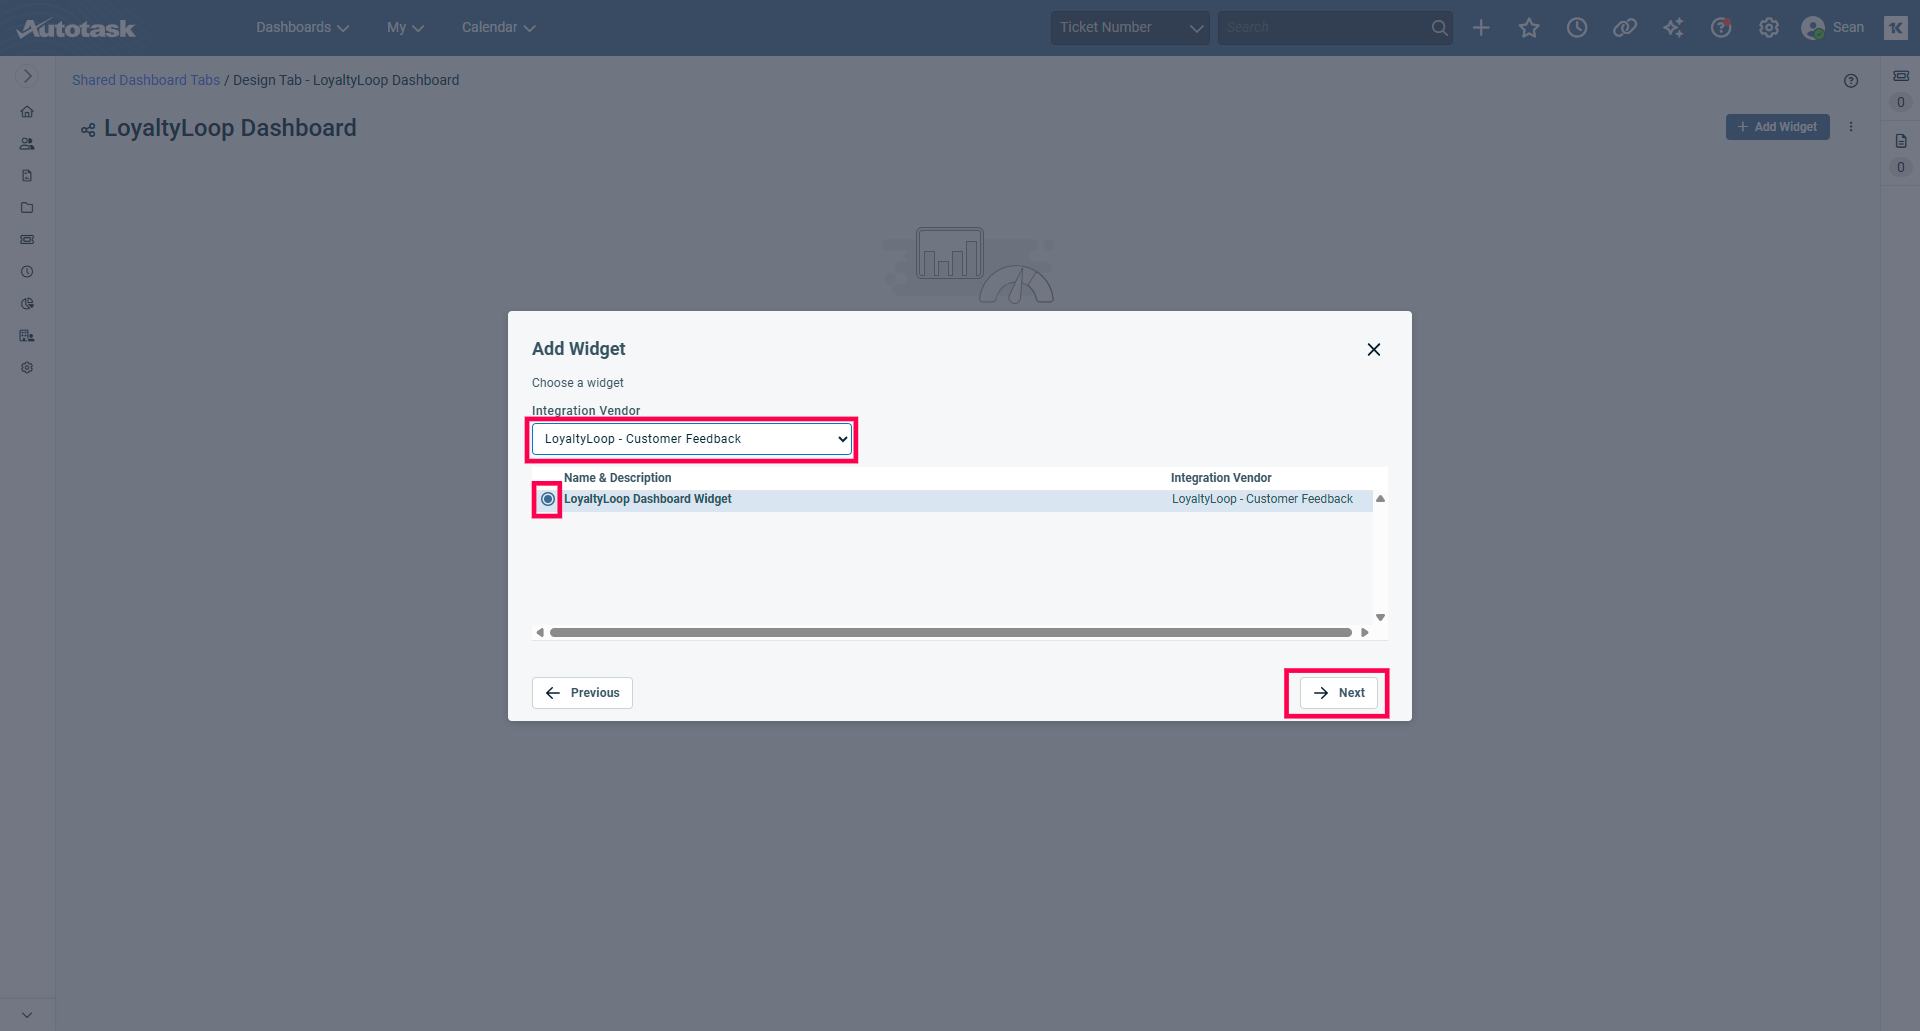
From the Integration Vendor drop down menu, select LoyaltyLoop. This will select the LoyaltyLoop Dashboard Widget. Click 'Next'.
Select the full screen option for the default Layout/Size.
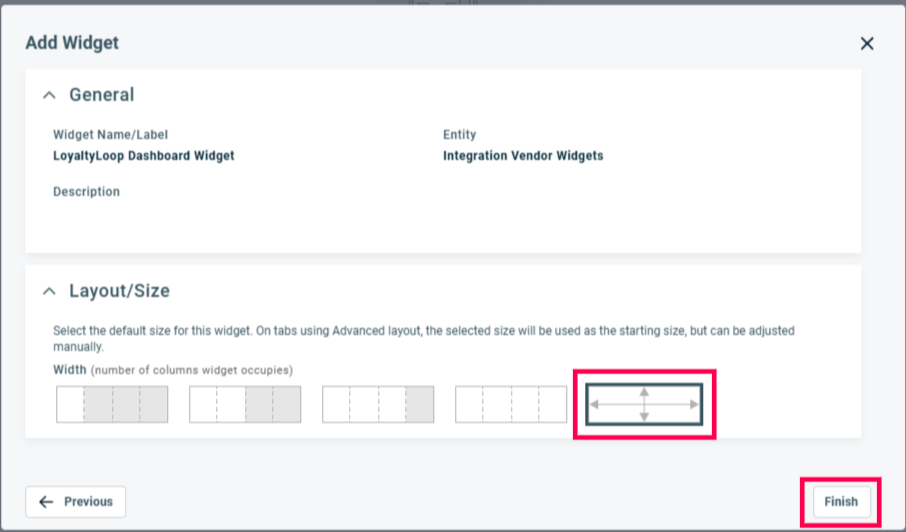
Your LoyaltyLoop Dashboard is now configured! Click the LoyaltyLoop tab from Autotask home to view it.
4. Enable LoyaltyLoop Ticket Insights for Autotask
NOTE: For additional information on this step, please refer to Autotask Help.
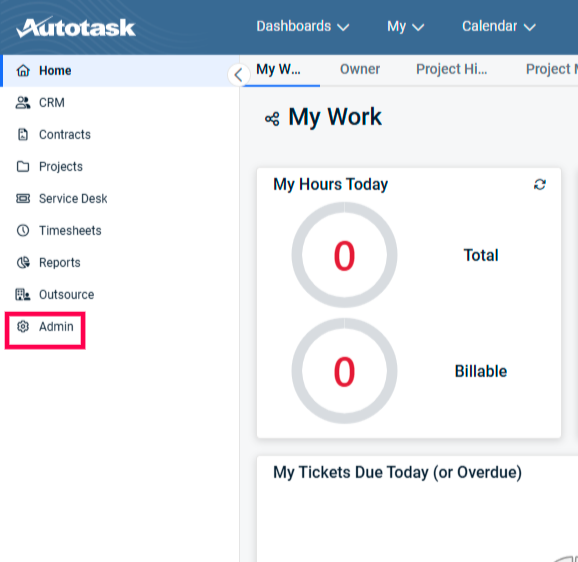
With the Vendor Insights enabled from the last item in Step 2 above, from the Home menu, select Admin.
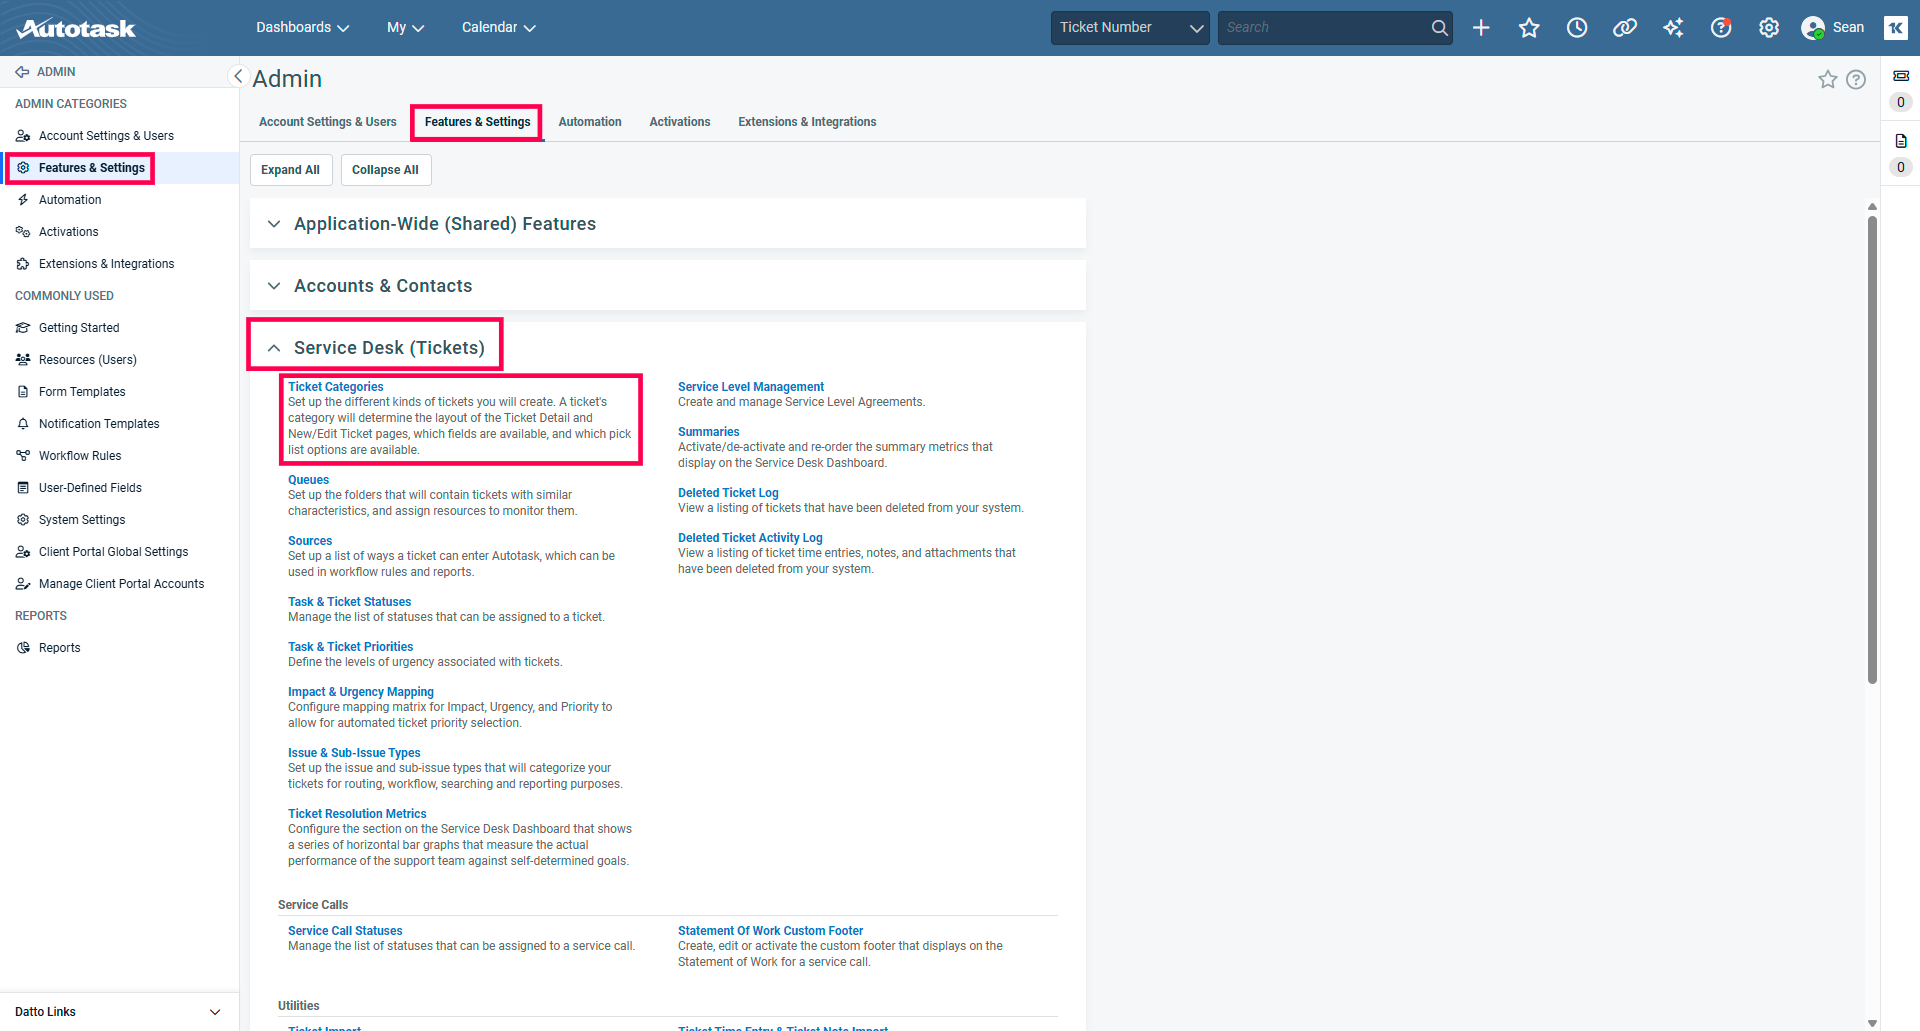
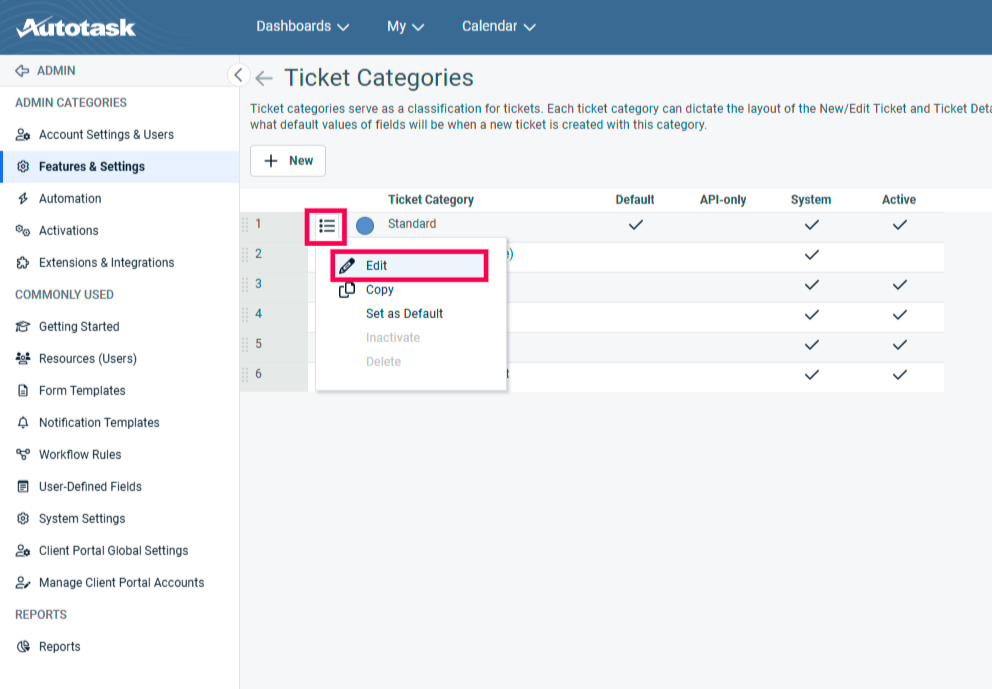
From the 'Features & Settings' menu, open the 'Service Desk (Tickets)' submenu and select 'Ticket Categories'.
Click the burger menu next to the appropriate Ticket Category. Then select 'Edit'.
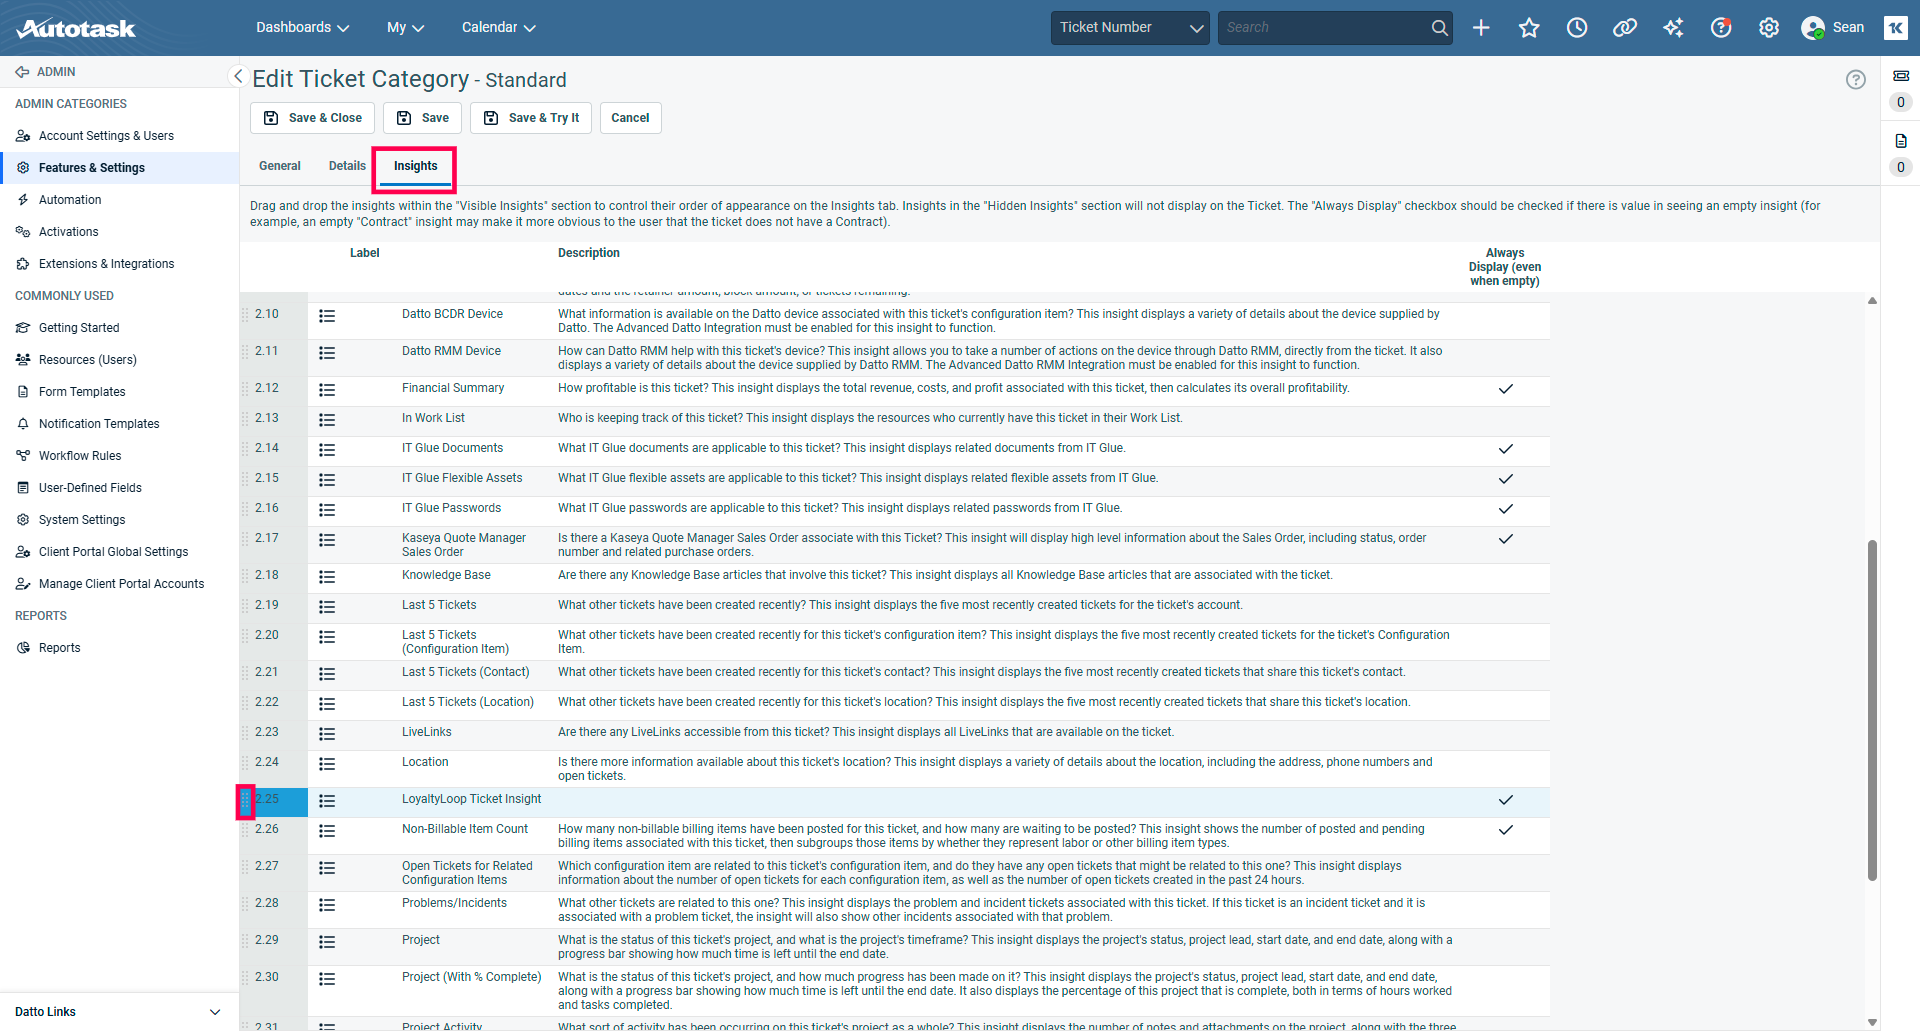
Click the Insights Menu and find the selection labeled LoyaltyLoop. If LoyaltyLoop is not a 'Visible Insight', drag and drop LoyaltyLoop into the Visible Insights by clicking and holding the drag and drop icons to the left of the table.
With LoyaltyLoop Ticket Insight listed as a Visible Insight, click 'Save & Close'. Repeat these steps as necessary for other relevant ticket categories.
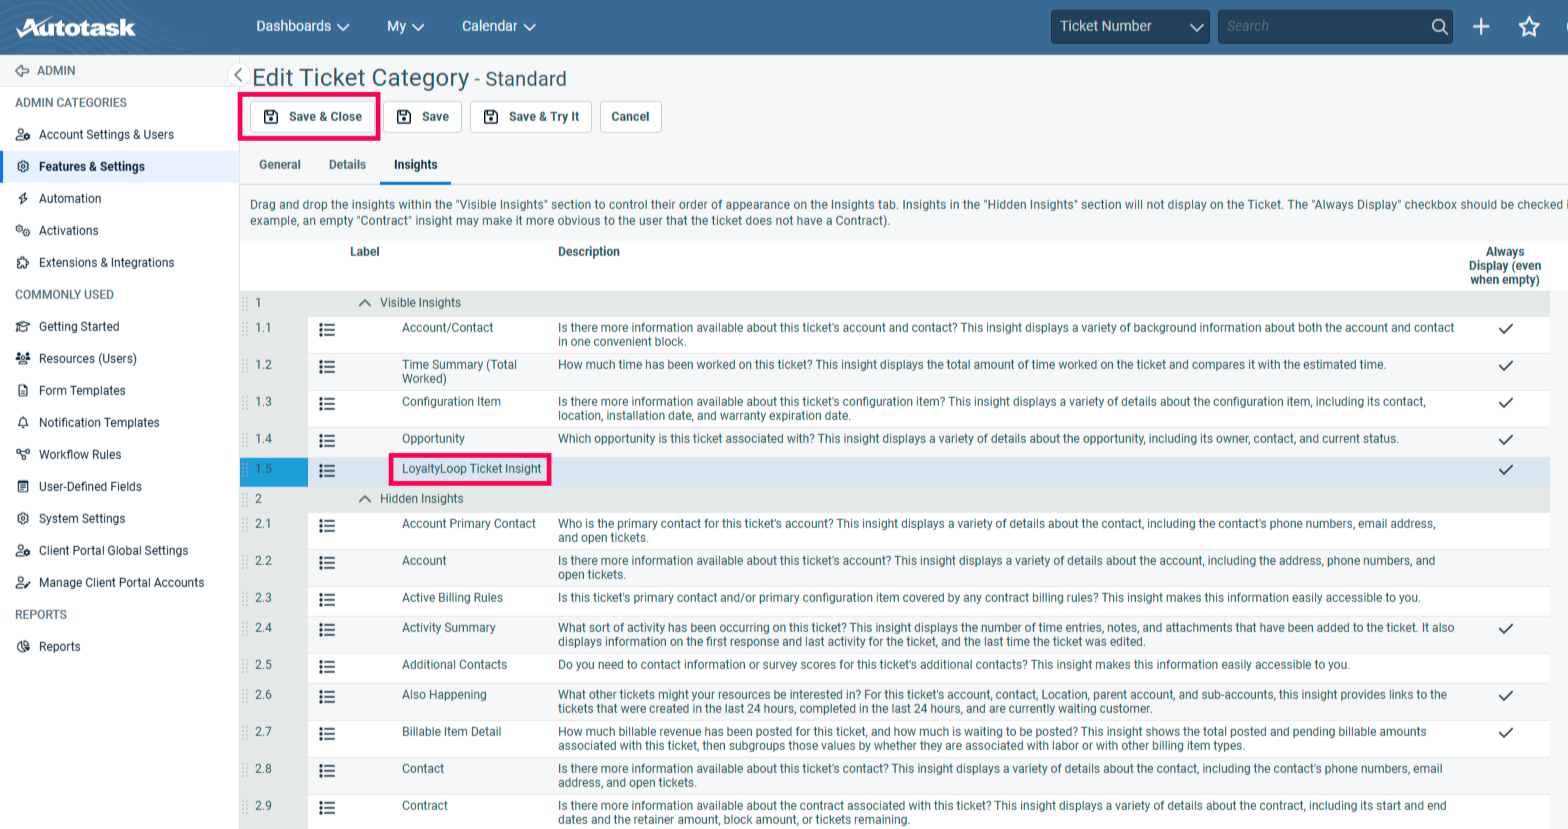
You have now set up your LoyaltyLoop Ticket Insights! Your LoyaltyLoop Ticket Insight will now show you the disposition of the contact relative to their most recent feedback.